ADVERTISEMENT
into the egg yolks while whisking continuously. This helps temper the eggs and prevents them from curdling. Gradually add the rest of the warm milk mixture into the egg yolks.
For Complete Cooking STEPS Please Head On Over To Next Page Or Open button (>) and don’t forget to SHARE with your Facebook friends
Return the mixture to the saucepan and cook over low heat, stirring constantly until it thickens to a custard-like consistency (about 5–7 minutes). You’ll know it’s ready when the mixture coats the back of a spoon and a finger swipe leaves a trail.
Once thickened, remove the saucepan from the heat, and stir in the **vanilla extract** and **almond extract** (if using).
### Step 3: Combine Cherry and Vanilla Mixtures
Let the custard base cool for a few minutes. Once cooled, mix in your prepared cherry puree. Stir until the cherries are fully incorporated into the creamy base. At this point, you can also fold in any extra chopped cherries if you’d like to add more texture.
### Step 4: Chill the Mixture
For the best results, place the mixture in the refrigerator for about 2–4 hours to chill thoroughly. If you’re short on time, you can place it in the freezer for a quicker chill, but make sure it’s not freezing solid.
### Step 5: Churn the Ice Cream
Once the mixture is chilled, it’s time to churn! Pour the mixture into an ice cream maker and churn according to the manufacturer’s instructions. This usually takes around 20-25 minutes, depending on your machine.
If you don’t have an ice cream maker, you can still make this recipe by placing the mixture in a shallow container and freezing it. Every 30 minutes, take it out of the freezer and stir it with a fork to break up the ice crystals. Repeat this for about 3-4 hours until it reaches the consistency of ice cream.
### Step 6: Freeze and Serve
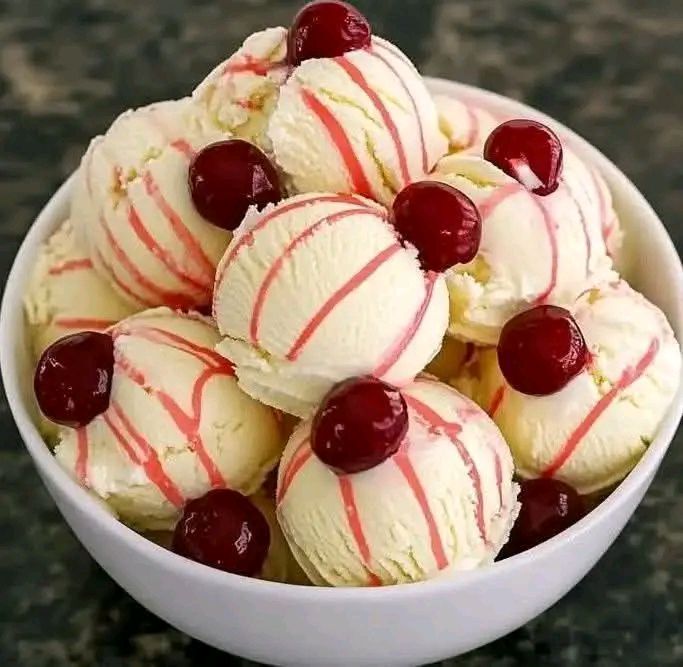
Once your ice cream is churned to the desired consistency, transfer it to an airtight container and freeze it for at least 4 hours or overnight to firm up. When ready to serve, scoop out creamy portions of your **Cherry Vanilla Ice Cream** and enjoy!
—
## 🌟 Why You’ll Love Cherry Vanilla Ice Cream:
– **Perfect Balance of Flavors:** The creamy vanilla base pairs beautifully with the tartness of the cherries, making every bite a perfect balance of sweetness and tang.
– **Made with Fresh Ingredients:** Using fresh, juicy cherries adds a natural sweetness and vibrant flavor to the ice cream.
– **Customizable:** You can adjust the sweetness or add in extra mix-ins like chocolate chips, crushed almonds, or more fruit for extra texture.
– **Homemade Goodness:** Making ice cream at home means you control the ingredients, ensuring a fresh and wholesome treat without any artificial additives.
—
## 🍒 Tips for the Perfect Cherry Vanilla Ice Cream:
– **Using Frozen Cherries:** If fresh cherries aren’t in season, frozen cherries are a great substitute. Just make sure to thaw and drain them before using them in the recipe to avoid excess liquid.
– **For a Smoother Texture:** If you prefer a smoother ice cream, you can puree the cherries completely and strain the mixture to remove any skins or pulp.
– **Add a Swirl:** For a fun twist, swirl some **cherry jam or cherry sauce** into the ice cream base before freezing it, creating a beautiful marbled effect.
—
## 🍦 Final Thoughts:
**Cherry Vanilla Ice Cream** is a classic, and for good reason—it’s absolutely delicious! Creamy, fruity, and utterly refreshing, this homemade ice cream is a treat that everyone will love. Whether you’re serving it as a dessert for a family gathering, enjoying it on a warm summer day, or indulging in a special treat, this recipe is sure to satisfy your sweet tooth.
Make it at home, and enjoy the sweet symphony of cherries and vanilla in every scoop!
—
Would you like to try adding other fruits or flavors to this recipe? Let me know, and we can come up with some exciting variations!
