ADVERTISEMENT
### **Step-by-Step Instructions for Grandma’s Rolls**
Now that you have all the ingredients gathered, it’s time to start baking. Follow these simple steps to create **Grandma’s Rolls** from scratch:
#### **Step 1: Activate the Yeast**
Start by activating the yeast. In a small bowl, combine the **warm water**, **granulated sugar**, and **active dry yeast**. Stir until the sugar dissolves, and let it sit for about 5-10 minutes, or until the mixture becomes foamy. This step ensures the yeast is alive and ready to do its job in the dough.
#### **Step 2: Combine the Wet Ingredients**
In a separate bowl, combine the **warm milk**, **unsalted butter**, and **vegetable oil**. Stir until the butter is mostly melted, and the mixture is well combined. Let it cool slightly if it’s too hot, as it could kill the yeast.
#### **Step 3: Mix the Dry Ingredients**
In a large mixing bowl, combine the **all-purpose flour** and **salt**. Stir to combine, creating a well in the center for the wet ingredients.
#### **Step 4: Add Wet Ingredients to Dry Ingredients**
Once the yeast mixture is foamy and the milk mixture is warm (but not hot), pour both into the flour mixture. Also add the **egg** at this point. Use a wooden spoon or your hands to combine everything until the dough starts to come together.
#### **Step 5: Knead the Dough**
Transfer the dough to a lightly floured surface and knead for about 8-10 minutes. The dough should become smooth and elastic, but still slightly sticky. If necessary, add a bit more flour, a tablespoon at a time, to help with kneading. The goal is a soft dough that’s just tacky to the touch but not too sticky.
#### **Step 6: Let the Dough Rise**
Place the kneaded dough in a lightly greased bowl and cover with a clean kitchen towel. Let the dough rise in a warm spot for 1-2 hours, or until it has doubled in size. This is the crucial resting period for the dough to rise and develop flavor.
#### **Step 7: Shape the Rolls**
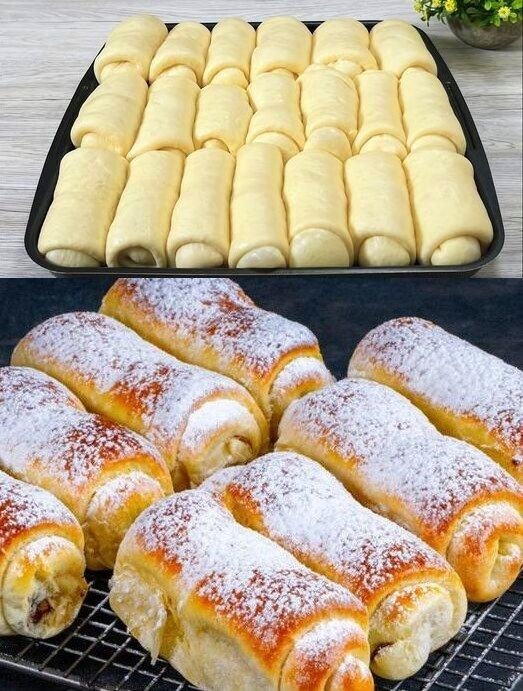
Once the dough has risen, punch it down gently to release the air. Divide the dough into small, even pieces (about 12-15 pieces depending on the size you prefer). Shape each piece into a smooth ball and place it on a greased or parchment-lined baking sheet. Make sure the rolls are close together but not touching, so they’ll rise upwards rather than outwards.
#### **Step 8: Second Rise**
Cover the shaped rolls with a kitchen towel and let them rise again for about 30 minutes, or until they have doubled in size. This second rise ensures the rolls are light and airy.
#### **Step 9: Bake the Rolls**
Preheat the oven to 375°F (190°C). Once the rolls have finished rising, bake them for 18-20 minutes, or until they are golden brown on top. The rolls should sound hollow when tapped on the bottom, and their internal temperature should reach around 190°F (88°C).
#### **Step 10: Brush with Butter**
As soon as the rolls come out of the oven, brush them generously with melted butter. This adds a beautiful sheen and enhances the flavor. Let the rolls cool slightly before serving.
—
### **Serving Grandma’s Rolls**
**Grandma’s Rolls** are perfect for any occasion, whether it’s a holiday meal, a family gathering, or simply a comforting addition to your dinner table. Serve them warm with butter, honey, or your favorite jam for a delightful snack. They can also be paired with soups, stews, or roasts to soak up the savory flavors of the dish.
These rolls are also excellent for making sandwiches. Slice them open and fill them with deli meats, cheeses, or vegetables for a delicious lunch or snack.
—
### **Tips for Perfect Rolls Every Time**
– **Use warm, not hot milk**: Hot milk can kill the yeast, so make sure the milk is warm to the touch, about 110°F (43°C).
– **Don’t skip the resting time**: Allowing the dough to rest and rise properly is essential for achieving that light, airy texture.
– **Knead thoroughly**: Kneading helps develop the gluten and ensures the rolls will rise properly.
– **Add flavor variations**: Feel free to experiment with adding garlic, herbs, or cheese to the dough for a savory twist.
—
### **Storing and Freezing Grandma’s Rolls**
If you have any leftover rolls, you can store them in an airtight container at room temperature for 2-3 days. For longer storage, freeze the rolls. Allow them to cool completely, then wrap them tightly in plastic wrap or foil and place them in a freezer-safe bag. They will stay fresh in the freezer for up to 3 months. To reheat, wrap the rolls in foil and bake at 350°F (175°C) for 10-
15 minutes, or until warm.
—
### **Conclusion**
There’s a reason **Grandma’s Rolls** have stood the test of time: they’re deliciously soft, tender, and a perfect companion to any meal. With their rich flavor and comforting texture, these rolls are a cherished tradition that has been passed down for over 100 years. Whether you’re making them for a special occasion or as an everyday treat, you can’t go wrong with this classic recipe. So, dust off that mixing bowl and start baking — your family will thank you!
