ADVERTISEMENT
A Comprehensive Guide to Polishing Marble Chips: Tips and Techniques
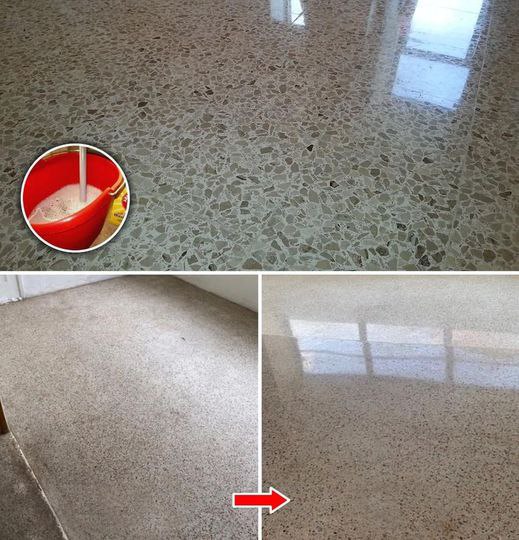
Marble chips are a timeless choice for enhancing everything from garden landscapes to countertops and decorative crafts. Known for their classic beauty and luxurious finish, marble chips bring elegance wherever they’re used. However, to maintain their glossy appearance and keep them looking their best, polishing is essential. Whether you’re working on a home improvement project, a DIY craft, or just looking to revive the sparkle of existing marble, this guide will walk you through the best methods to polish marble chips safely and effectively.
🪨 Why Polish Marble Chips?
Marble, though strong and stunning, is a porous and relatively soft stone. Over time, exposure to weather, foot traffic, or even dust and debris can dull its surface. Polishing helps to:
- Restore natural shine and color
- Smooth out scratches and minor imperfections
- Protect the stone from staining and wear
- Enhance overall appearance and longevity
Whether your marble chips are used indoors or outdoors, polishing them will revive their brilliance and elevate the aesthetic of any space.
🧰 What You’ll Need
Before diving in, gather your tools and supplies. You can opt for a manual method (good for small areas or crafts) or a mechanical method (ideal for larger surfaces).
Basic Supplies:
- Warm water
- Mild dish soap or stone-safe cleaner
- Soft cloth or sponge
- Microfiber cloths
- Soft-bristle brush or toothbrush
- Polishing powder or marble polish
- Sandpaper (various grits) or diamond polishing pads
- Buffing pad or polishing machine (optional)
- Protective gloves
- Sealer (optional, for long-term protection)
🧽 Step-by-Step Guide to Polishing Marble Chips
Step 1: Clean the Marble Chips
Start by cleaning the marble thoroughly to remove any dirt, oils, or grime.
- Mix warm water with a few drops of mild dish soap or use a pH-neutral stone cleaner.
- Use a soft cloth or sponge to gently scrub the surface of the marble chips.
- Rinse with clean water and dry completely with a microfiber cloth.
💡 Tip: Avoid acidic cleaners like vinegar or lemon juice—they can etch and damage marble!
Step 2: Sanding the Surface (If Needed)
If your marble chips have visible scratches, etching, or heavy dullness, light sanding may be necessary before polishing.
- Use fine-grit sandpaper (starting at 400 or 600 grit) to gently sand the surface in a circular motion.
- Gradually move to higher grits (800, 1000, 1500, and 2000) to smooth and prep the surface.
- Always sand wet, using a few drops of water to prevent dust and damage.
🎯 For delicate polishing or small chips, a nail buffer or fine diamond pad can be used instead.
Step 3: Apply Marble Polishing Powder or Paste
Once the surface is clean and smooth, it’s time to bring out that shine!
- Choose a marble-specific polishing compound or powder—these are designed to restore luster without harming the stone.
- Apply the product as directed, either directly to the chips or onto a damp cloth.
- Gently rub in small circular motions using a microfiber cloth or soft buffing pad.
- Continue polishing for a few minutes, applying light pressure.
🔄 Repeat as needed for deeper shine or more stubborn dullness.
Step 4: Buff to Shine
After applying polish, use a dry microfiber cloth or soft polishing pad to buff the marble chips.
- Wipe away any excess residue.
- For Complete Cooking STEPS Please Head On Over To Next Page Or Open button (>) and don’t forget to SHARE with your Facebook friends
- Buff in small sections to achieve an even, glossy finish.
If you’re working on a large surface or outdoor area, consider using a lo
