ADVERTISEMENT
a medium bowl, mix together the graham cracker crumbs, sugar, and cinnamon. Add the melted butter and stir until the mixture resembles wet sand. Press this mixture into the bottom of a 9-inch springform pan, ensuring it covers the entire bottom evenly. Place the pan in the refrigerator while you make the cheesecake filling.
Step 3: Prepare the Cheesecake Filling In a large mixing bowl, beat the softened cream cheese until smooth using an electric mixer. Add the sugar and continue to beat until fully combined. Add the eggs, one at a time, mixing well after each addition. Stir in the vanilla extract and sour cream, mixing until the filling is smooth and creamy.
Step 4: Assemble the Cheesecake Preheat your oven to 325°F (163°C). Remove the crust from the refrigerator and pour the cheesecake filling over the crust, spreading it out evenly with a spatula. Spoon the cooked apple filling on top of the cheesecake mixture, spreading it evenly over the surface.
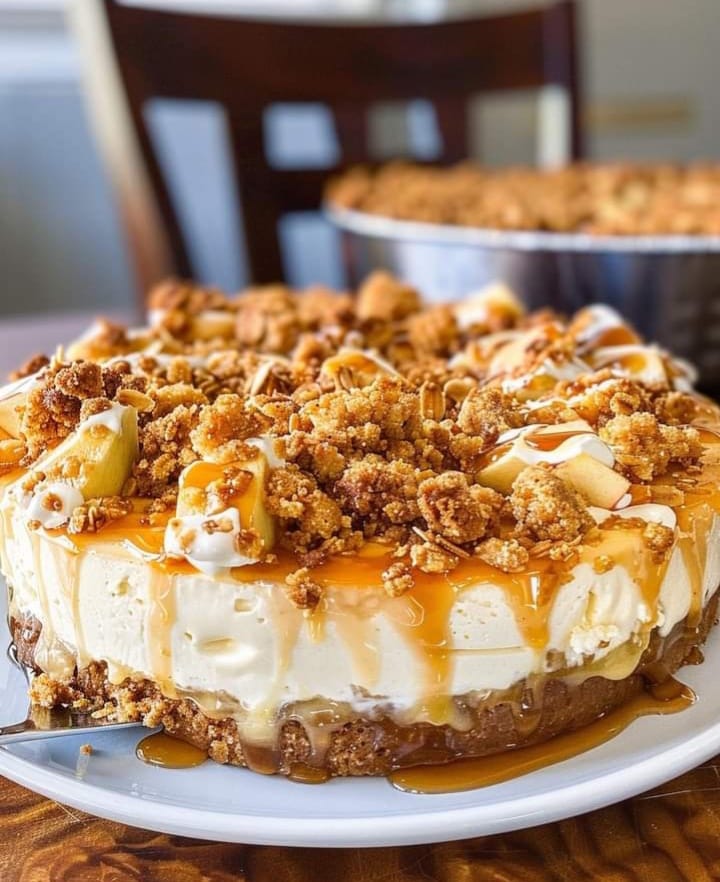
Step 5: Make the Crisp Topping In a small bowl, mix together the oats, flour, brown sugar, cinnamon, and salt. Add the cubed butter and use a fork or your fingers to work the butter into the dry ingredients until a crumbly texture forms. Sprinkle the crisp topping evenly over the apple filling.
Step 6: Bake the Cheesecake Place the springform pan on a baking sheet and bake the cheesecake in the preheated oven for 60-70 minutes, or until the edges are set and the center is slightly jiggly. You can also check for doneness by inserting a toothpick into the center of the cheesecake—it should come out clean, but the center should still have a little wobble.
Once baked, turn off the oven and let the cheesecake cool in the oven with the door slightly ajar for about 1 hour. Afterward, remove the cheesecake from the oven and let it cool completely at room temperature. Refrigerate for at least 4 hours, or preferably overnight, to allow the flavors to fully meld together.
Step 7: Serve and Enjoy Once the cheesecake has chilled, carefully remove the sides of the springform pan. Slice the cheesecake and serve! You can drizzle with caramel sauce, dust with powdered sugar, or top with a dollop of whipped cream for an extra special touch.
Tips and Variations
- Apple Varieties: The type of apple you use can affect the flavor and texture of your filling. Granny Smith apples are tart and hold their shape well during baking, while Honeycrisp apples offer a sweet and slightly tangy flavor.
- Cinnamon Roll Twist: For an extra burst of cinnamon flavor, consider adding a sprinkle of cinnamon or cinnamon sugar to the cheesecake batter before baking.
- Make It in Advance: This cheesecake keeps well for up to 3 days in the refrigerator, making it an excellent dessert to prepare ahead of time for gatherings or parties.
- Gluten-Free Option: Swap the graham cracker crumbs with gluten-free graham cracker crumbs or crushed gluten-free cookies to make this recipe suitable for those with gluten sensitivities.
Why You’ll Love This Apple Crisp Cheesecake
Apple Crisp Cheesecake is the perfect dessert for anyone who loves the warm, spiced flavor of apple crisp but also craves the creamy indulgence of cheesecake. The crust is buttery and crunchy, the filling is rich and velvety, and the apple topping with its crisp, oat-based crumble adds a delightful contrast in texture. It’s a comforting yet indulgent dessert that’s perfect for fall but can be enjoyed year-round. Whether you’re serving it at Thanksgiving, a birthday party, or simply as a special treat, this cheesecake is sure to be a hit.
Enjoy the best of both worlds with Apple Crisp Cheesecake, and let this delightful dessert elevate your baking repertoire!
