ADVERTISEMENT
### The Basic Ingredients for Artisan No-Knead Bread
To make **Artisan No-Knead Bread**, you only need a handful of simple ingredients. Here’s what you’ll need:
#### 1. **Flour**
The type of flour you use will influence the texture and flavor of your bread. Most recipes call for **all-purpose flour**, which works perfectly well for this type of bread. However, you can experiment with other types of flour, such as **bread flour**, which has a higher protein content and helps develop a chewier texture, or **whole wheat flour**, which adds a more rustic, earthy flavor to the bread.
#### 2. **Water**
The water in the recipe is what activates the yeast and helps form the dough. It’s important to use **room-temperature water**, as water that is too hot or too cold can prevent the yeast from working properly.
#### 3. **Yeast**
Yeast is the leavening agent in bread, and for this no-knead recipe, you’ll typically use **active dry yeast** or **instant yeast**. Both types work well, but instant yeast is often preferred because it doesn’t need to be activated in water before use. You can use a smaller amount of instant yeast and mix it directly into the dry ingredients.
#### 4. **Salt**
Salt is essential for flavor and controlling yeast activity. It also helps strengthen the dough’s gluten structure. Be sure to use regular **table salt** or **kosher salt**, but avoid using **iodized salt**, as it can interfere with the fermentation process.
#### 5. **Olive Oil (Optional)**
While olive oil is optional in this recipe, it can add a little extra richness to the dough and a nice flavor. Some bakers add a couple of tablespoons of olive oil to their no-knead bread for a slightly softer texture and more complex flavor.
—
### Step-by-Step Instructions for Artisan No-Knead Bread
Making Artisan No-Knead Bread is incredibly simple, and the results are worth the wait. Here’s a step-by-step guide to help you create the perfect loaf.
#### Step 1: Mix the Ingredients
Start by combining the dry ingredients. In a large mixing bowl, whisk together **3 cups of all-purpose flour**, **1 1/2 teaspoons of salt**, and **1/4 teaspoon of yeast**. Once the dry ingredients are mixed, slowly pour in **1 1/2 cups of water**. Stir everything together with a wooden spoon or your hands until it forms a rough, shaggy dough. The dough will be quite sticky, which is perfectly normal. Avoid adding more flour, as this will affect the texture of the bread.
#### Step 2: Let the Dough Rise
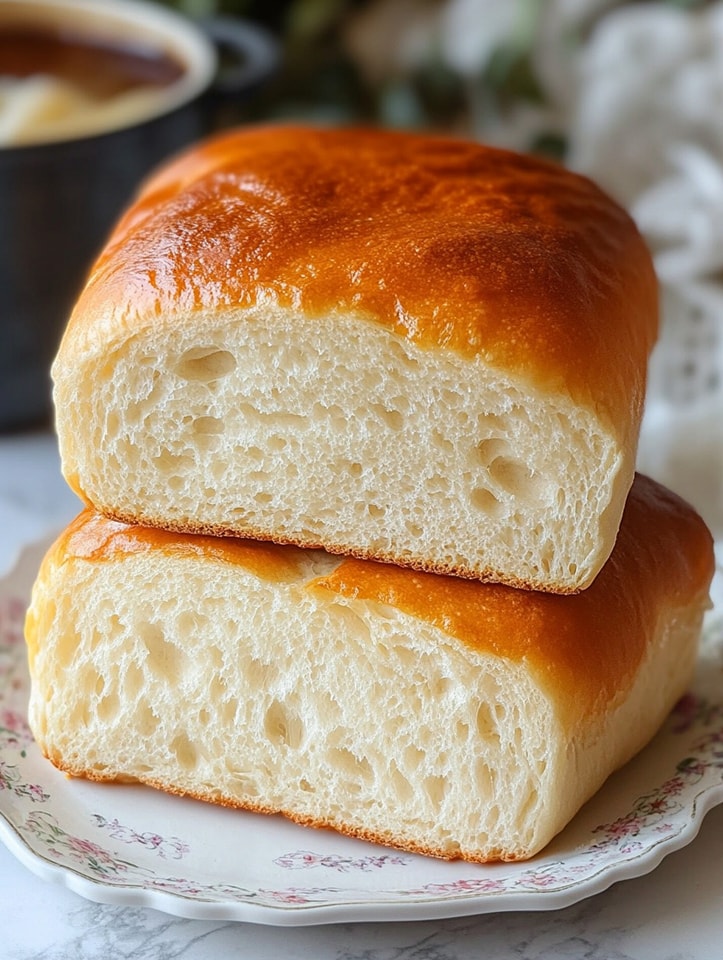
Cover the bowl tightly with plastic wrap or a clean kitchen towel and let it rest in a warm place for **12 to 18 hours**. The dough needs time to ferment and rise. During this time, the yeast will work its magic, and the dough will become bubbly and airy. The longer the dough sits, the more developed the flavor will be, so feel free to let it rise for up to 18 hours for the best results. A typical resting period is around 16 hours.
You’ll know the dough is ready when it’s visibly puffed up and dotted with bubbles on the surface. It should have a slightly sticky consistency and a soft, elastic feel when you touch it.
#### Step 3: Shape the Dough
After the dough has risen, it’s time to shape it. Sprinkle a clean surface with flour and gently turn the dough out onto it. Fold the edges of the dough in toward the center to create a round shape. You can gently use your hands to stretch and shape the dough into a tight ball. Be careful not to deflate the dough too much; you want to keep the air bubbles inside for a light, airy texture.
At this point, you can allow the dough to rest for another 30 minutes to an hour to let it rise slightly more. This additional rest will help it hold its shape during baking.
#### Step 4: Preheat the Oven and Dutch Oven
While the dough is resting, preheat your **oven to 450°F (230°C)**. If you’re using a **Dutch oven** (which is highly recommended for this recipe to create a crispy crust), place it in the oven while it’s preheating to ensure it’s hot when the dough goes in. The Dutch oven acts like a mini steam oven, trapping moisture and creating a beautifully crusty exterior on the bread.
#### Step 5: Bake the Bread
Once the oven has reached temperature, carefully remove the Dutch oven from the oven (using oven mitts, as it will be very hot). Gently transfer your dough into the preheated Dutch oven, being careful not to deflate the dough too much. You can use a bench scraper or your hands to lift the dough, or simply turn the bowl over and let it slide out.
Cover the Dutch oven with the lid and return it to the oven. Bake the bread for **30 minutes** with the lid on, then remove the lid and bake for an additional **15-20 minutes** to allow the crust to become golden brown and crispy.
#### Step 6: Cool and Enjoy
Once the bread is baked, remove it from the oven and carefully take it out of the Dutch oven. Let it cool on a wire rack for at least **30 minutes** before slicing. This resting time allows the bread to set and develop its full flavor and texture.
For Complete Cooking STEPS Please Head On Over To Next Page Or Open button (>) and don’t forget to SHARE with your Facebook friends
