ADVERTISEMENT
## Step-by-Step Instructions: How to Make a Banana Split Trifle
Making a Banana Split Trifle is a fairly straightforward process. Since it’s a no-bake dessert, it’s simple to assemble, and you won’t need to spend a lot of time in the kitchen. Below are the detailed steps for creating this decadent dessert:
### **Step 1: Prepare the Cake**
Start by preparing your base layer—whether you’re using store-bought vanilla cake or baking a homemade cake. If you’re using a homemade cake, follow your recipe instructions, but make sure to bake it in a 9×9-inch pan or something similar.
– Once the cake is baked and cooled, cut it into small cubes or chunks. You want them to be bite-sized, so make sure the pieces are not too large.
### **Step 2: Prepare the Pudding**
Next, make the **vanilla pudding** layer. If you’re using store-bought pudding, simply prepare it according to the instructions on the package. If you’re making homemade pudding, you can use a recipe that includes heavy cream, sugar, eggs, cornstarch, and vanilla extract.
– Once the pudding is prepared, let it cool for a few minutes so it’s not too hot when layering it in the trifle.
### **Step 3: Assemble the Trifle**
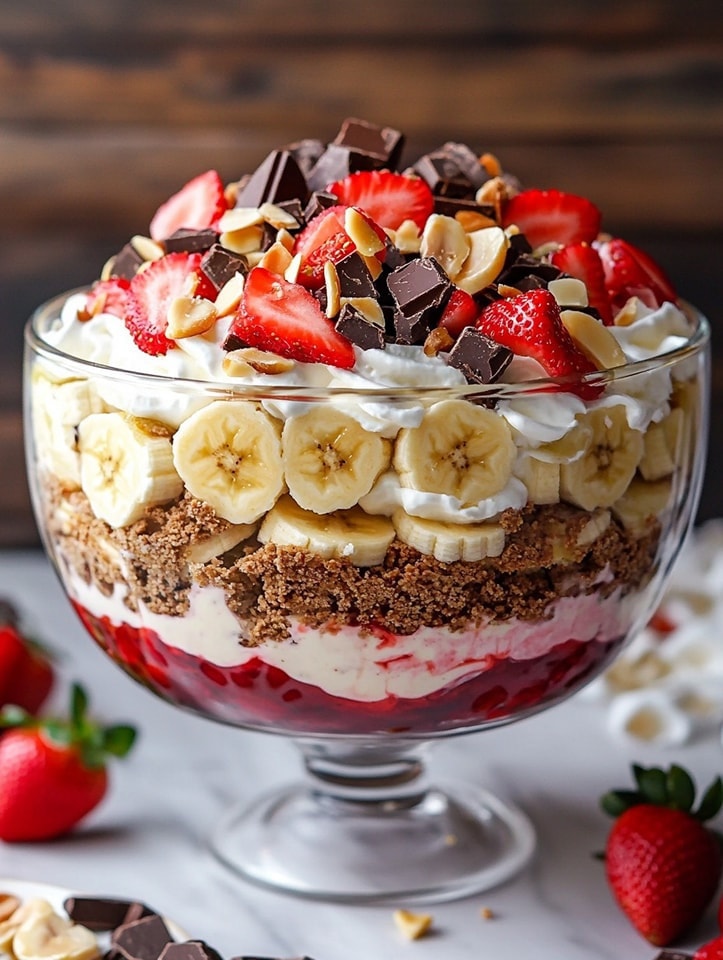
1. **Layer the Cake**: Begin by placing the cubed vanilla cake at the bottom of a large trifle dish (or any glass bowl you prefer). This forms the first layer of the trifle.
2. **Add the Bananas**: Slice the bananas and arrange them evenly on top of the cake layer. You can place banana slices in a ring pattern around the edges or layer them in any fashion you prefer.
3. **Drizzle Chocolate Syrup**: Drizzle a generous amount of chocolate syrup over the bananas to add some richness and flavor.
4. **Spread the Pudding**: Pour a layer of vanilla pudding over the bananas, spreading it evenly to cover the bananas and cake beneath it.
5. **Whipped Cream**: Next, layer a thick layer of whipped cream on top of the pudding. This layer should be light and fluffy, giving the trifle a beautiful contrast in texture.
6. **Repeat the Layers**: Repeat the layering process—cake, bananas, chocolate syrup, pudding, and whipped cream—until you run out of ingredients. Finish the final layer with a generous dollop of whipped cream on top.
### **Step 4: Add the Toppings**
Once the layers are assembled, it’s time to finish off your Banana Split Trifle with the signature toppings.
1. **Chopped Nuts**: Sprinkle the top with chopped peanuts, walnuts, or pecans to add a crunchy texture.
2. **Mini Chocolate Chips**: If you like, sprinkle some mini chocolate chips or shaved chocolate over the whipped cream.
3. **Maraschino Cherries**: Finally, top the trifle with maraschino cherries for that classic banana split look.
### **Step 5: Refrigerate and Serve**
After assembling your trifle, cover the dish with plastic wrap or a lid and refrigerate it for at least 2-3 hours. This allows the layers to set and the flavors to meld together, making the trifle even more delicious. If you have the time, you can even prepare it the night before.
When you’re ready to serve, simply scoop the trifle into individual servings or use a large spoon to serve from the dish. The Banana Split Trifle is best enjoyed cold, and it’s perfect for sharing with family and friends.
## Tips for Making the Perfect Banana Split Trifle
1. **Use Ripe Bananas**: The bananas should be ripe but not overly mushy. Slightly firm bananas work best for layering, as they won’t turn mushy in the trifle.
2. **Make Ahead**: This is a great dessert to prepare ahead of time, as the flavors improve with time. Make it the night before your event for an easy, stress-free dessert the next day.
3. **Chill Well**: Be sure to let your trifle chill in the fridge for a few hours before serving to allow all the layers to set.
4. **Adjust Layers**: Feel free to adjust the layers to suit your preferences. For example, you can make the pudding layer thicker or thinner, depending on your taste.
5. **Serve in Individual Portions**: If you prefer, you can assemble the trifle in individual serving glasses for a more elegant presentation.
## Variations of the Banana Split Trifle
While the classic Banana Split Trifle is amazing on its own, you can switch things up to make it even more unique.
1. **Chocolate Banana Split Trifle**: Add a layer of chocolate cake or brownies instead of vanilla cake for a chocolatey twist on the traditional dessert.
2. **Caramel Banana Split Trifle**: Use caramel sauce instead of chocolate syrup for a different flavor profile. You can also add a layer of caramel pudding or dulce de leche.
3. **Vegan Banana Split Trifle**: Replace the vanilla cake with a vegan version, use dairy-free whipped cream and pudding, and make sure your chocolate syrup and other ingredients are dairy-free.
4. **Banana Split Parfaits**: Instead of assembling a large trifle, serve individual banana split parfaits in glasses. This is great for parties or as a single-serving treat.
## Conclusion
The **Banana Split Trifle** is the ultimate indulgent dessert, combining all the delicious components of a banana split into a layered, no-bake masterpiece. It’s perfect for parties, family gatherings, and celebrations, offering a crowd-pleasing treat that everyone will love. With its creamy pudding, fresh bananas, fluffy whipped cream, and crunchy nuts, this dessert delivers the same satisfying flavors and textures as the classic banana split—only better.
So next time you’re in the mood for a dessert that’s as fun to make as it is to eat, give this Banana Split Trifle a try. With just a few simple ingredients and some creative assembly, you can create a stunning dessert that will be the talk of your gathering and leave everyone asking for the recipe.
