ADVERTISEMENT
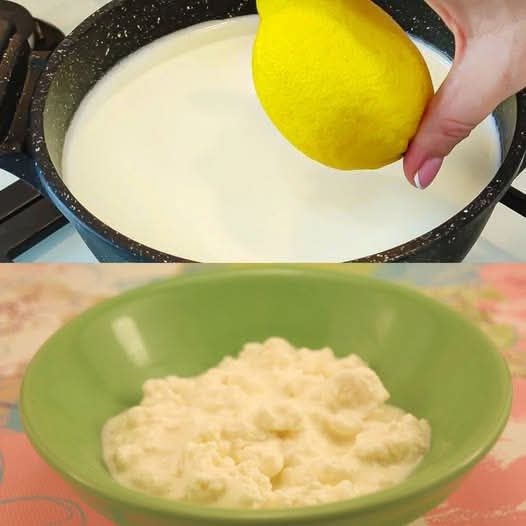
Let the milk sit on low heat for 2-3 minutes after adding the lemon juice. You’ll see the curds (the solid part) and whey (the liquid part) completely separate. If the milk hasn’t fully curdled, you can add a little more lemon juice, but usually, 2 tablespoons should be sufficient.
#### Step 4: Strain the Curds
Once the curds have formed, turn off the heat. Take a **cheesecloth** or a clean kitchen towel, place it over a fine-mesh sieve, and carefully strain the curdled milk over a bowl to separate the solid paneer from the whey.
You can reserve the whey to use in soups, gravies, or smoothies since it’s packed with nutrients.
#### Step 5: Rinse and Press the Paneer
After straining the curds, rinse the paneer under **cold water** to remove any lemony taste and cool it down. Gather the edges of the cloth or towel and twist to form a pouch.
To form a block of paneer, gently press the cloth-wrapped curds to remove excess water. For a firmer texture, press the paneer under a heavy object (like a pot or a can) for 15-30 minutes.
#### Step 6: Unwrap and Use
Once the paneer has been pressed to your desired consistency, unwrap it from the cloth and cut it into cubes or slices. Your **fresh homemade paneer** is now ready to be used in your favorite recipes!
### Tips for Perfect Homemade Paneer
1. **Use Whole Milk**: Whole milk gives the paneer a rich, creamy texture. Avoid using skim milk as it may yield drier, less flavorful curds.
2. **Don’t Overcook the Milk**: Always keep an eye on the milk to prevent it from boiling over. Once it boils, turn the heat down before adding the lemon juice.
3. **Press for the Right Texture**: The longer you press the paneer, the firmer it will be. If you like soft, crumbly paneer for dishes like **paneer bhurji**, press it for less time. For firmer paneer, such as for **paneer tikka**, press it for longer.
4. **Use Fresh Lemon Juice**: Fresh lemon juice works best for curdling the milk and making soft, fresh paneer. Avoid bottled lemon juice if possible, as it may not work as effectively.
5. **Store Properly**: Store your homemade paneer in a container filled with water in the refrigerator. This will help it stay moist and fresh for a few days. You can also freeze it for longer storage—just remember to drain it well before using.
### Delicious Recipes with Homemade Paneer
Now that you’ve made your own fresh paneer, the possibilities are endless! Here are some delicious ideas for how to incorporate your homemade paneer into your meals:
– **Paneer Butter Masala**: A rich, creamy tomato-based curry with soft cubes of paneer.
– **Palak Paneer**: A classic dish where paneer is cooked with pureed spinach, garlic, and spices.
– **Paneer Tikka**: Marinated paneer grilled to perfection, served with naan or a side of salad.
– **Paneer Bhurji**: Scrambled paneer cooked with onions, tomatoes, and spices for a quick breakfast or dinner.
– **Shahi Paneer**: A royal dish made with paneer in a rich and creamy gravy of cashews, almonds, and cream.
### Final Thoughts
Making **fresh paneer at home** is a rewarding and surprisingly easy task. With just a few basic ingredients—milk, lemon juice, and a little patience—you can create your own homemade cheese in as little as **5 minutes**. Whether you’re looking for a healthier option or just want to try something new in the kitchen, this **boiling milk with lemon** method gives you fresh, delicious paneer that you can use in a variety of dishes.
Homemade paneer brings out the authentic flavors of your recipes, and there’s something truly satisfying about creating it from scratch. So, the next time you’re craving a rich and creamy Indian dish, skip the store-bought options and make your own paneer at home—you’ll never go back!
