ADVERTISEMENT
Chocolate Braid: A Simple Dessert to Prepare but Really Tasty!
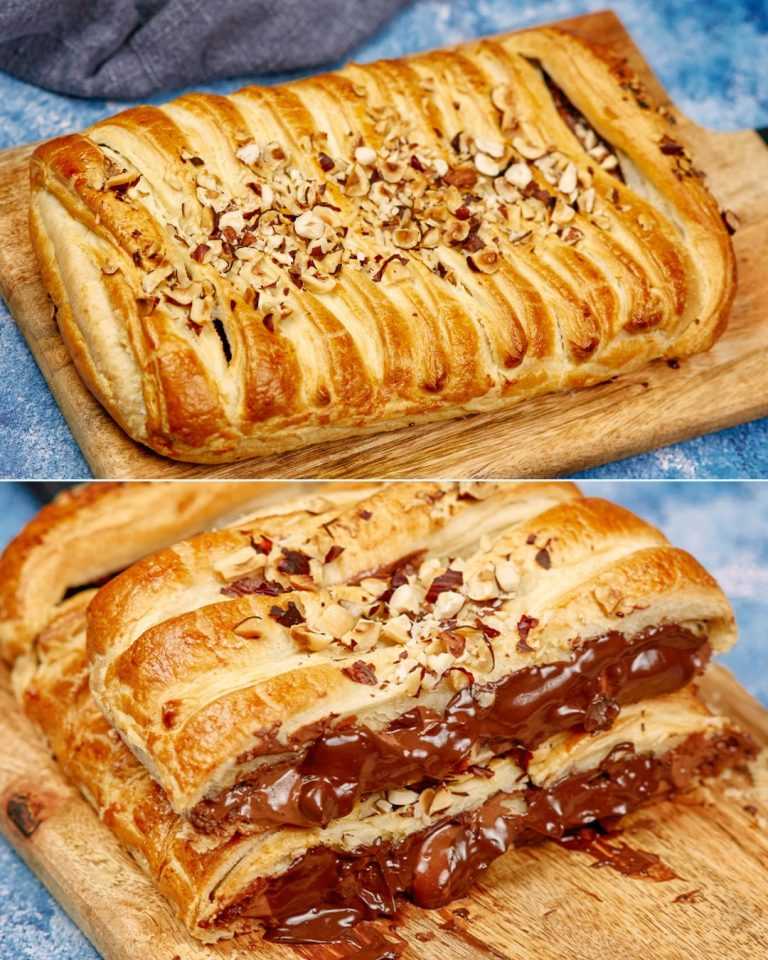
If you’re looking for a show-stopping dessert that’s simple to make yet absolutely delicious, then look no further than the irresistible Chocolate Braid! This sweet and decadent treat combines the richness of chocolate with a soft, buttery dough, creating a perfect balance of flavor and texture. Whether you’re hosting a gathering, celebrating a special occasion, or just craving something sweet, this dessert is sure to impress.
In this recipe, we’ll walk you through the easy steps to create a chocolate braid that looks like it came from a professional bakery—without all the hassle. So let’s dive in and get baking!
Why You’ll Love This Chocolate Braid
- Simple to Make: With just a few basic ingredients, you can create this mouthwatering dessert in no time.
- Buttery, Flaky Dough: The dough is soft, light, and buttery, perfectly complementing the rich chocolate filling.
- Impressive Appearance: The braided design looks elegant, making it perfect for a special occasion or when you want to impress your guests.
- Customizable: You can easily adjust the filling with different chocolate varieties or add a sprinkle of nuts, dried fruit, or even a bit of cinnamon for a twist.
Ingredients:
For the dough:
- 2 1/4 teaspoons active dry yeast (1 packet)
- 3/4 cup warm milk (110°F/43°C)
- 1/4 cup sugar
- 1/2 cup unsalted butter, melted
- 1/2 teaspoon vanilla extract
- 2 1/2 cups all-purpose flour
- 1/2 teaspoon salt
- 1 large egg
For the filling:
- 1 cup chocolate chips or chopped chocolate (dark or milk, depending on your preference)
- 2 tablespoons unsalted butter, melted
For the egg wash:
- 1 egg, beaten (to brush over the dough for a golden finish)
Instructions:
Step 1: Prepare the Dough
In a small bowl, sprinkle the yeast over the warm milk and let it sit for about 5 minutes until it becomes frothy. This step activates the yeast and ensures your dough rises beautifully.
In a large mixing bowl, combine the flour, sugar, and salt. Create a well in the center and pour in the yeast mixture, melted butter, vanilla extract, and egg. Stir everything together until the dough begins to form.
Knead the dough on a floured surface for about 5-7 minutes, or until it becomes smooth and elastic. If you have a stand mixer, you can use the dough hook to do the work for you!
Step 2: Let the Dough Rise
Place the kneaded dough in a lightly greased bowl and cover it with a clean kitchen towel. Let it rise in a warm place for about 1-1.5 hours, or until it has doubled in size. This is the perfect time to prepare your filling and set up your workspace.
Step 3: Make the Chocolate Filling
While your dough is rising, prepare the filling. In a microwave-safe bowl, melt the chocolate chips and butter together in 20-second intervals, stirring between each interval until smooth and fully melted. Set aside to cool slightly.
Step 4: Shape the Dough
Once the dough has risen, punch it down gently to release any air bubbles. Roll the dough out on a floured surface into a rectangle, about 12 inches by 18 inches (30 cm by 45 cm).
Spread the melted chocolate filling evenly over the surface of the dough, leaving a small border around the edges.
Step 5: Braiding the Dough
To create the braid, make evenly spaced vertical slits along the sides of the dough, about 1 inch apart (2.5 cm). Carefully fold one side of the dough over the chocolate filling, then alternate folding the left and right sides over each other in a crisscross pattern. This will create the classic braided effect.
For Complete Cooking STEPS Please Head On Over To Next Page Or Open button (>) and don’t forget to SHARE with your Facebook friends
