ADVERTISEMENT
Instructions
Step 1: Prepare the Dough
- Activate the Yeast: In a small bowl, combine the warm milk and granulated sugar. Sprinkle the yeast on top and let it sit for about 5-10 minutes, until it becomes frothy. This step ensures the yeast is active and ready to work its magic in the dough.
- Make the Dough: In a large mixing bowl, combine the flour and salt. Add the yeast mixture, melted butter, and egg, then stir until a dough forms. You may need to add a little extra flour if the dough is too sticky.
- Knead the Dough: Turn the dough out onto a lightly floured surface and knead for about 5-7 minutes, until the dough is smooth and elastic. Alternatively, you can use a stand mixer with a dough hook attachment for this step.
- Let the Dough Rise: Place the kneaded dough in a lightly oiled bowl, cover it with a clean towel, and let it rise in a warm place for about 1 to 1 ½ hours, or until it has doubled in size.
Step 2: Prepare the Filling
While the dough is rising, make the filling. In a small bowl, combine the softened butter, brown sugar, and cinnamon. Stir until well combined into a thick paste. Set aside.
Step 3: Roll Out the Dough
Once the dough has risen, punch it down to release any air bubbles. Turn it out onto a floured surface and roll it into a large rectangle, about 16 inches by 12 inches in size.
Step 4: Add the Filling
Spread the cinnamon-sugar butter mixture evenly over the dough, leaving about 1 inch of space on the edges. Then, sprinkle the chocolate chips generously over the top.
Step 5: Roll and Slice
Carefully roll up the dough tightly, starting from the long side, to form a log. Once rolled, use a sharp knife or dental floss to cut the dough into 12 even slices.
Step 6: Arrange in the Pan
Place the sliced rolls in a greased 9×13-inch baking dish, arranging them close together. This helps them bake together and creates that soft, pull-apart texture. Cover the rolls with a towel and let them rise for another 30 minutes while the oven preheats to 350°F (175°C).
Step 7: Bake the Rolls
Once the rolls have risen, bake them in the preheated oven for 20-25 minutes, or until golden brown on top and cooked through. The chocolate chips will be melted, and the sweet aroma will fill your kitchen!
Step 8: Make the Glaze
While the rolls are baking, make the glaze. In a small bowl, whisk together the powdered sugar, milk, and vanilla extract until smooth. Adjust the consistency by adding more milk if necessary.
Step 9: Glaze the Rolls
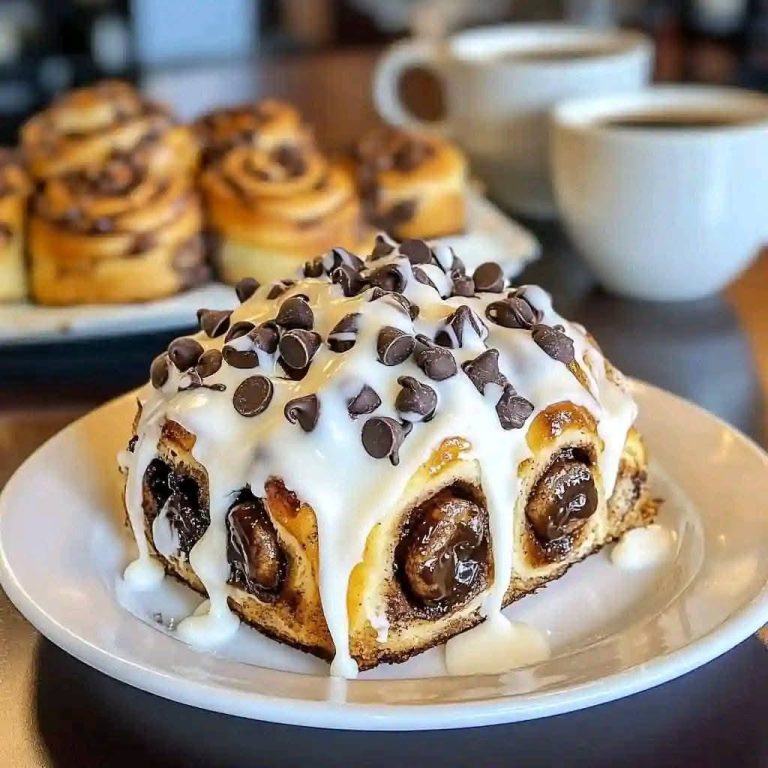
As soon as the cinnamon rolls come out of the oven, drizzle the glaze over them while they’re still warm. The glaze will melt slightly into the rolls, creating a shiny, sweet finish.
For Complete Cooking STEPS Please Head On Over To Next Page Or Open button (>) and don’t forget to SHARE with your Facebook friends
Serving Suggestions
These chocolate chip cinnamon rolls are delicious on their own, but you can make them extra special with a few variations:
- Serve with whipped cream or vanilla ice cream for a truly indulgent dessert.
- Add nuts like chopped pecans or walnuts to the filling for a little crunch.
- Top with extra chocolate chips if you’re a serious chocolate lover.
Tips for Success
- Dough Consistency: If the dough is too sticky, add a bit more flour, but don’t add too much. A slightly sticky dough will yield fluffier rolls.
- Make Ahead: You can prepare the rolls the night before. After slicing, cover and refrigerate them overnight. The next morning, let them come to room temperature before baking.
- Freeze for Later: If you have extra rolls, freeze them after baking. Just reheat in the microwave or oven for a few minutes for that fresh-out-of-the-oven taste.
Final Thoughts
There’s no denying that the combination of cinnamon and chocolate is a match made in heaven, and these Chocolate Chip Cinnamon Rolls take that classic duo to the next level. Soft, gooey, and bursting with flavor, they’re perfect for a lazy Sunday morning or a special occasion. Whether you’re baking for your family or just treating yourself, this recipe is sure to become a favorite in your baking rotation. So, roll up your sleeves, and enjoy the sweet reward of these delightful treats!
