ADVERTISEMENT
Cooker Hood Full of Grease? With This Remedy, It Shines Again!
The cooker hood in your kitchen works tirelessly to keep the air fresh, removing steam, smoke, and grease as you cook. However, over time, all that grease and grime can accumulate on the surface of the hood, making it look dull, sticky, and—let’s face it—pretty unattractive. If you’ve noticed your cooker hood turning into a greasy mess, don’t panic! With the right technique, you can restore its shine and functionality in no time.
In this article, we’ll share a simple, effective remedy to clean your cooker hood, removing grease and grime, and leaving it sparkling once again.
Why Does the Cooker Hood Get So Greasy?
Before we dive into the cleaning remedy, let’s understand why cooker hoods get covered in grease in the first place. When you cook, especially when frying or sautéing, tiny droplets of grease and oil from your food get carried into the air. The cooker hood has a fan that pulls this greasy air into the filter and exhaust system. While the filter does its best to trap the grease, some particles inevitably settle on the exterior of the hood, creating that unsightly greasy buildup over time.
What You’ll Need to Clean Your Greasy Cooker Hood
Before you start, gather the following items to effectively clean your cooker hood:
- Dish Soap: The grease-cutting power of dish soap is perfect for cleaning oily surfaces.
- Baking Soda: This will help break down stubborn grease.
- White Vinegar: Acts as a natural degreaser and disinfectant.
- Warm Water: To mix with your cleaning agents.
- Microfiber Cloths: Soft and absorbent, these will help wipe down your cooker hood without leaving scratches.
- Soft Brush: A non-abrasive brush will help scrub away tough grease.
- Spray Bottle: For applying your homemade cleaning solution.
Step-by-Step Guide to Cleaning Your Greasy Cooker Hood
Follow these simple steps to get your cooker hood back to its shining, grease-free glory!
1. Turn Off the Power
Before you start cleaning, ensure the cooker hood is turned off and unplugged, if possible. This will prevent any electrical accidents or issues with the appliance during the cleaning process.
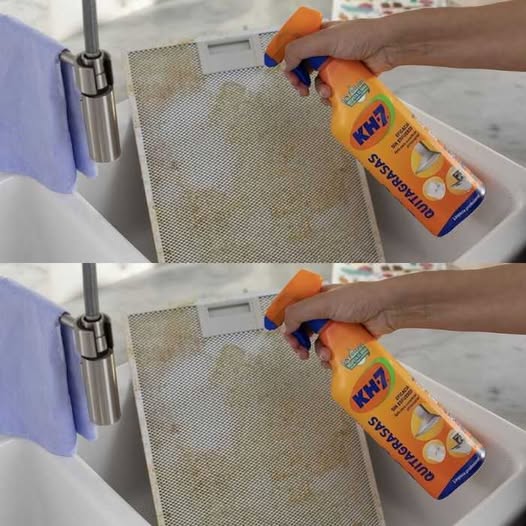
2. Remove the Grease Filters
The grease filters on your cooker hood are designed to trap grease and dirt. These filters can accumulate a lot of grease, so it’s important to clean them separately.
- Metal Mesh Filters: If your cooker hood uses metal mesh filters (usually aluminum or steel), you can remove them easily by sliding or unclipping them. Check your manufacturer’s instructions for removal.
- Charcoal Filters: If your hood uses charcoal filters (typically used in ductless hoods), these cannot be cleaned and should be replaced every few months.
Once removed, set the filters aside to be cleaned later.
3. Make Your Grease-Busting Cleaning Solution
Now it’s time to create your effective cleaning solution. You’ll need a mix of warm water, dish soap, baking soda, and white vinegar to break down the greasy buildup.
- Option 1: Simple Grease-Cutting Solution
- Mix 2 tablespoons of dish soap with 1 cup of warm water in a spray bottle.
- Shake well until it forms a soapy solution.
- Option 2: Extra Powerful Degreaser
- Mix 1 cup of warm water with 1/2 cup of white vinegar.
- Add 2 tablespoons of baking soda and stir until the baking soda dissolves.
- Pour the mixture into a spray bottle and shake well.
4. Spray the Cleaning Solution onto the Hood
Spray your cleaning solution generously over the greasy surface of the cooker hood. Make sure to cover all areas that have visible grease buildup. Let the solution sit for 10-15 minutes. This will allow the cleaning agents to break down the grease, making it easier to wipe away.
5. Scrub Away the Grease
After the solution has had time to work, use a soft brush or sponge to gently scrub the cooker hood. Pay extra attention to areas with thicker grease buildup. The baking soda in the solution will provide a mild abrasive action, helping to lift off stubborn grease without scratching the surface.
For especially tough spots, apply a bit more cleaning solution and let it sit for another 5–10 minutes before scrubbing again.
