ADVERTISEMENT
For Complete Cooking STEPS Please Head On Over To Next Page Or Open button (>) and don’t forget to SHARE with your Facebook friends
3. Add the Eggs
Allow the dough to cool for about 5 minutes so it’s not too hot when you add the eggs. Then, add the eggs one at a time, mixing each egg in fully before adding the next one. You can use a wooden spoon or a stand mixer with a paddle attachment to mix the dough. After adding all four eggs, the dough should be smooth, glossy, and slightly sticky.
4. Pipe the Dough
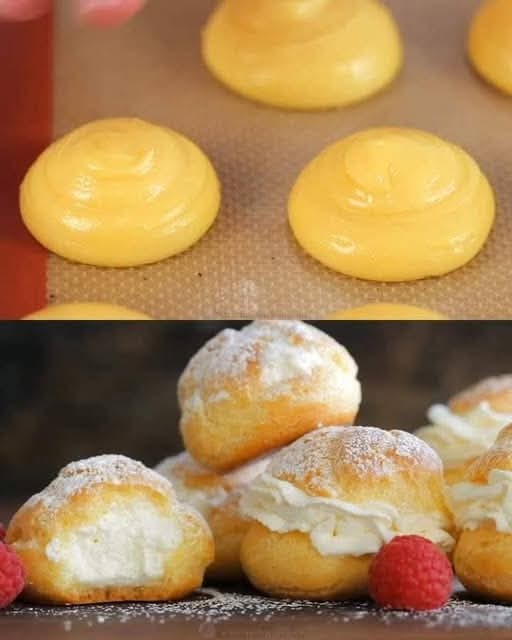
Transfer the dough to a piping bag fitted with a large round tip (or you can simply use a Ziploc bag with the tip cut off). Pipe small mounds of dough, about 1.5 inches in diameter, onto the prepared baking sheet, leaving enough space between each puff for them to expand as they bake. If you don’t have a piping bag, you can use two spoons to drop the dough onto the baking sheet.
5. Bake the Cream Puff Shells
Place the baking sheet in the preheated oven and bake for about 25-30 minutes or until the cream puffs are golden brown and puffed up. Try not to open the oven door during the first 20 minutes of baking, as this can cause the puffs to deflate.
Once they’re done, remove the cream puffs from the oven and allow them to cool completely on a wire rack. Letting them cool is essential because it prevents the pastry from becoming soggy when you fill them.
How to Make the Filling:
1. Whip the Cream
While the cream puff shells are cooling, it’s time to make the filling. In a chilled mixing bowl, beat 1 cup of heavy cream and 2 tablespoons of powdered sugar using a hand mixer or stand mixer on medium-high speed until stiff peaks form. This should take about 2-3 minutes.
2. Add the Vanilla
Once the cream has reached stiff peaks, add 1 teaspoon of vanilla extract and mix for a few more seconds to incorporate the flavor.
Now, you’ve got a rich and fluffy whipped cream filling ready to go!
Assemble the Cream Puffs:
Once your cream puff shells have cooled and your filling is ready, it’s time to assemble these delicious treats.
1. Cut a Small Hole in the Cream Puff Shells
Carefully use a small serrated knife to cut a small slit or hole in the side or bottom of each cream puff. This is where you’ll insert the filling.
2. Pipe the Whipped Cream Filling
Fill a piping bag with the whipped cream filling (or use a spoon if you don’t have a piping bag). Insert the tip into the hole you made in each cream puff and gently squeeze the bag to fill each puff with the luscious cream. Be generous — you want each puff to be filled with creamy goodness.
3. Serve and Enjoy
Once your cream puffs are filled, dust them lightly with powdered sugar for a beautiful finishing touch. Serve them immediately, or refrigerate them until ready to serve. These delicate treats are best enjoyed the same day they are made, but they can be stored in the fridge for a day or two.
Tips for Perfect Cream Puffs:
- Don’t Open the Oven Early: The first 20 minutes of baking are crucial for helping the cream puffs puff up. Opening the oven door too early can cause them to deflate.
- Cool the Puffs Completely: Before filling them, let the cream puffs cool completely. This ensures the pastry stays crisp and doesn’t get soggy from the filling.
- Fill Just Before Serving: If you’re making cream puffs ahead of time, consider filling them just before serving to keep the shells from becoming soggy.
- Experiment with the Filling: While whipped cream is the classic filling for cream puffs, you can experiment with other fillings like chocolate ganache, pastry cream, or even ice cream for a fun twist.
Why You’ll Love This Cream Puffs Recipe
Cream puffs are the perfect balance of textures — crispy on the outside, soft and airy on the inside, and filled with a luscious, creamy filling. Whether you’re making them for a special occasion, a holiday dessert, or just a sweet treat for yourself, these cream puffs will be a hit.
With just a few simple ingredients and a little patience, you can create these elegant, crowd-pleasing treats that everyone will love. So, grab your ingredients and get ready to make the best cream puffs ever — they’re sure to become a family favorite!
Happy baking, and enjoy every delicious bite of your homemade cream puffs!
