ADVERTISEMENT
## **Step-by-Step Instructions for Making Easter Bunny Poke Cake**
Now that you’ve gathered all your ingredients, let’s walk through the process of making your Easter Bunny Poke Cake, from start to finish.
### **Step 1: Bake the Cake**
1. Preheat your oven according to the instructions on your cake mix box (usually around 350°F or 175°C).
2. Prepare the cake mix by following the instructions on the box (typically this involves adding eggs, oil, and water). If you’re making a homemade white cake, you can follow your preferred recipe for white cake batter.
3. Pour the batter into a greased 9×13-inch baking pan and bake according to the cake mix instructions (usually about 25-30 minutes). Be sure to check for doneness by inserting a toothpick into the center of the cake – it should come out clean.
4. Once the cake is done, remove it from the oven and allow it to cool for about 10-15 minutes before moving on to the next step.
### **Step 2: Poke the Cake**
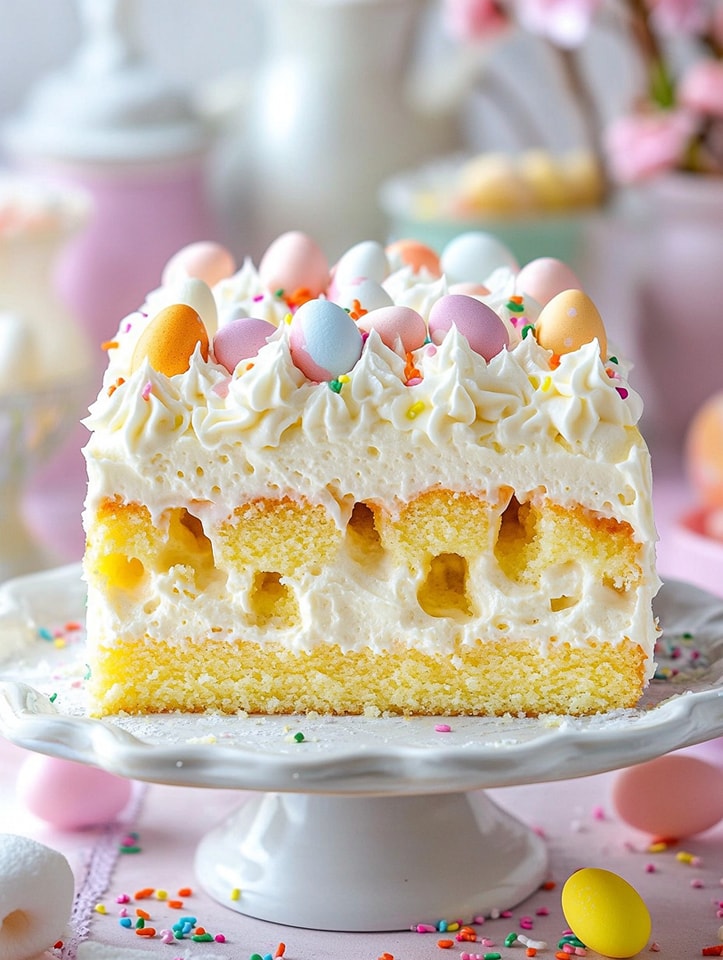
1. Once the cake has cooled slightly, use the handle of a wooden spoon or a similar tool to poke holes all over the surface of the cake. The holes should be about 1 inch apart, and they should go about halfway down into the cake. The more holes you make, the better the liquid will soak in, resulting in a moister cake.
2. After the holes are made, set the cake aside while you prepare the gelatin mixture.
### **Step 3: Prepare the Jell-O Gelatin**
1. In a separate bowl, dissolve the Jell-O gelatin in 1 ½ cups of boiling water. Stir well until the gelatin is fully dissolved.
2. Add 1 ½ cups of cold water to the gelatin mixture and stir to combine.
3. Carefully pour the gelatin mixture over the cake, ensuring it goes into the holes. You’ll want to pour the gelatin slowly and evenly across the surface so that it soaks into every hole.
4. Once the cake is covered with gelatin, refrigerate it for at least 2 hours to allow the gelatin to set and soak into the cake.
### **Step 4: Make the Frosting**
1. In a mixing bowl, beat the cream cheese and butter together until smooth and creamy.
2. Add the powdered sugar, vanilla extract, and heavy whipping cream. Beat on medium-high speed until the frosting is light and fluffy.
3. Divide the frosting into several bowls, depending on how many colors you want to use. Add a few drops of food coloring to each bowl to create pastel shades. Mix until the colors are evenly incorporated.
### **Step 5: Frost the Cake**
1. Once the gelatin has fully set and the cake is cool, spread a thin layer of frosting over the top of the cake. Use a spatula to smooth it out evenly.
2. Now it’s time to decorate! Spread the pastel-colored frosting over the top of the cake to create the bunny’s face. You can use a white layer for the bunny’s face and then decorate with other pastel colors for the ears, nose, and cheeks.
### **Step 6: Create the Bunny Face Decoration**
1. To make the bunny’s face, start by using mini marshmallows for the cheeks. You can place them on either side of the cake, just below where you’ve frosted the bunny’s eyes.
2. Use candy eyes (or chocolate chips) to form the bunny’s eyes.
3. Use pink decorating gel to create the bunny’s nose.
4. For the ears, use frosting in pastel colors to form two long ovals at the top of the cake.
5. Optionally, you can use shredded coconut to add a fluffy texture to the bunny’s fur, or sprinkle candy decorations around the edges of the cake for a festive touch.
### **Step 7: Final Touches**
Once you’ve decorated the cake, add some additional Easter-themed candy around the cake, such as jelly beans, chocolate eggs, or Peeps. This will give your cake even more of a festive and playful appearance, perfect for Easter.
—
## **Tips for Making the Perfect Easter Bunny Poke Cake**
– **Customize the Colors:** Feel free to get creative with the colors you use for the frosting and gelatin. You can mix and match pastel shades or even create a tie-dye effect for a fun, vibrant look.
– **Use Homemade Cake:** If you prefer to make your own cake from scratch, feel free to substitute the boxed cake mix with your favorite white cake recipe.
– **Gelatin Flavor Combinations:** You can experiment with different flavors of Jell-O for the cake, such as lemon, lime, strawberry, or even blueberry. The key is to choose flavors that will pair well with the frosting and create a fun, colorful effect.
– **Interactive Decoration:** If you’re making this cake for kids, let them help with decorating the bunny’s face. Kids will love placing the marshmallows and candy eyes on the cake, and it makes the dessert even more fun and personalized.
– **Make it Ahead:** If you’re short on time, you can prepare the cake a day or two ahead of Easter. Just make sure to store it in the fridge to keep it fresh.
—
## **Conclusion**
The Easter Bunny Poke Cake is the perfect way to bring some fun and flavor to your Easter celebration. With its whimsical design, colorful layers, and deliciously moist texture, it’s a dessert that will delight both kids and adults alike. Whether you’re serving it as a centerpiece for your Easter dinner or bringing it to a family gathering, this cake is sure to make a lasting impression. So, gather your ingredients, put on your apron, and enjoy creating this sweet and festive treat for your holiday celebrations!
