ADVERTISEMENT
### **Instructions**
Now that we have our ingredients ready, let’s get started on making this delicious, no-bake 2-layer dessert!
#### **Step 1: Prepare the Crust**
1. **Crush the cookies**: Start by crushing your choice of cookies. If you’re using graham crackers, you can place them in a plastic bag and use a rolling pin to crush them into fine crumbs. Alternatively, you can use a food processor for faster results. The crumbs should be small and uniform.
2. **Mix the crust ingredients**: In a mixing bowl, combine the crushed cookies, melted butter, and sugar (if using). Stir the mixture until it forms a slightly moist, crumbly texture. You want the crumbs to stick together when pressed.
3. **Press the crust into a pan**: Grease an 8×8-inch square pan or a similar-sized baking dish with a little butter or cooking spray. Press the crust mixture evenly into the bottom of the pan. Use the back of a spoon or a glass to press it firmly to ensure a tight and compact crust.
4. **Chill the crust**: Place the crust in the refrigerator for at least 15 minutes to set before adding the creamy filling.
#### **Step 2: Make the Creamy Filling**
1. **Beat the cream cheese**: In a large mixing bowl, beat the softened cream cheese until smooth and creamy. Use a hand mixer or stand mixer to make this process easier. This step is essential for creating a smooth texture in the filling.
2. **Add the sweetened condensed milk**: Slowly add the sweetened condensed milk to the cream cheese, beating continuously to incorporate. This will give the filling its rich, creamy texture and sweetness.
3. **Whip the cream**: In a separate bowl, whip the heavy cream until stiff peaks form. This can take a few minutes with a hand mixer, so be patient. Once the cream is whipped, gently fold it into the cream cheese and condensed milk mixture. Be careful not to deflate the whipped cream too much—this will ensure that the filling remains light and airy.
4. **Add the vanilla extract**: Stir in the vanilla extract for flavor, and if you’d like the filling to be sweeter, you can also add powdered sugar to taste.
#### **Step 3: Assemble the Dessert**
1. **Layer the filling**: Once the crust has set, pour the creamy filling on top of the crust. Use a spatula to spread it out evenly and smooth the top.
2. **Chill to set**: Cover the pan with plastic wrap and refrigerate for at least 2-4 hours, or until the filling has fully set. If you’re short on time, you can also freeze it for 1-2 hours for a quicker chill.
#### **Step 4: Add Toppings (Optional)**
1. **Garnish with toppings**: Before serving, add any toppings you like. Fresh fruit, chocolate chips, or a drizzle of caramel sauce will all complement the creamy layers beautifully. The toppings add texture and extra flavor to your dessert, making it even more indulgent.
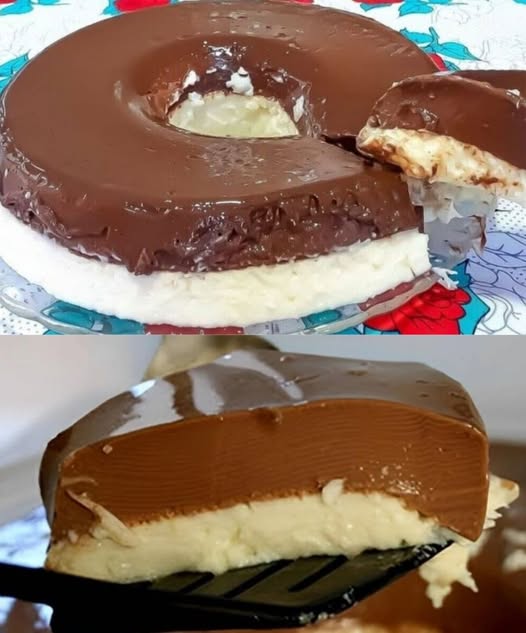
2. **Serve and enjoy**: Cut the dessert into squares or slices and serve chilled. The dessert is creamy, refreshing, and bursting with flavor.
## **Customization Ideas**
One of the best things about this 2-layer, no-bake dessert is its versatility. Here are some ideas to customize the dessert to your liking:
### **Flavor Variations for the Filling**
– **Lemon or Lime**: Add lemon or lime zest to the filling for a citrusy kick. You can also replace the vanilla extract with lemon or lime juice for a tart flavor.
– **Chocolate**: Incorporate melted chocolate or cocoa powder into the filling for a rich, chocolatey twist. Top with chocolate shavings or a drizzle of melted chocolate.
– **Peanut Butter**: Add a spoonful of peanut butter to the filling mixture for a nutty, creamy texture. You can also top it with chopped peanuts for an added crunch.
### **Crust Alternatives**
– **Oreos**: Use Oreo cookies (or a gluten-free version) for the crust for a chocolatey base.
– **Nuts**: If you’re looking for a gluten-free option, try using finely chopped almonds, walnuts, or pecans for a nutty crust.
– **Graham Crackers with Cinnamon**: For a spicy twist, try using graham crackers mixed with a pinch of cinnamon for extra flavor.
### **Topping Variations**
– **Caramel Sauce**: Drizzle caramel sauce over the top for a rich and sweet addition.
– **Berries**: Use a mixture of fresh berries such as strawberries, blueberries, or raspberries for a fresh, fruity topping that’s perfect for summer.
– **Coconut Flakes**: For a tropical flair, top the dessert with shredded coconut or toasted coconut flakes.
## **Storage Tips**
– **Refrigeration**: This 2-layer no-bake dessert should be stored in an airtight container in the refrigerator. It will last for up to 3-4 days, but it’s best enjoyed within 2 days for the freshest taste and texture.
– **Freezing**: If you have leftovers, you can also freeze the dessert for later. Simply cut it into individual squares and wrap each one in plastic wrap before placing them in an airtight container or freezer bag. Thaw in the refrigerator for a few hours before serving.
## **Conclusion**
This easy 2-layer, no-bake dessert is a showstopper that requires minimal effort but delivers big on flavor and satisfaction. Whether you’re looking to impress guests at a party or just treat yourself to something sweet, this dessert checks all the boxes: it’s creamy, customizable, and incredibly easy to make. The combination of a buttery cookie crust and a rich, smooth filling creates the perfect balance of textures and flavors.
So the next time you’re in the mood for a quick and delicious dessert, try making this 2-layer no-bake treat—it’s bound to become a favorite in your recipe rotation. Enjoy!
