ADVERTISEMENT
Here are the main culprits responsible for dirty grout:
1. **Moisture and Mold**: Bathrooms, kitchens, and entryways are particularly prone to moisture, which can seep into grout lines. If left unchecked, this moisture can lead to mold and mildew growth.
2. **Oil and Grease**: Kitchens, especially around cooking areas, often see oil and grease splattering on floors. This sticky residue easily collects in grout lines and is tough to remove.
3. **Dirt and Dust**: Everyday foot traffic brings in dirt and dust, which can collect in the grout lines and leave behind a grimy residue.
4. **Spills and Stains**: Food and drink spills can seep into the grout, leaving stains that are difficult to clean. This is especially true for dark liquids like coffee, wine, and sauces.
### The Professional Tiler’s Secret
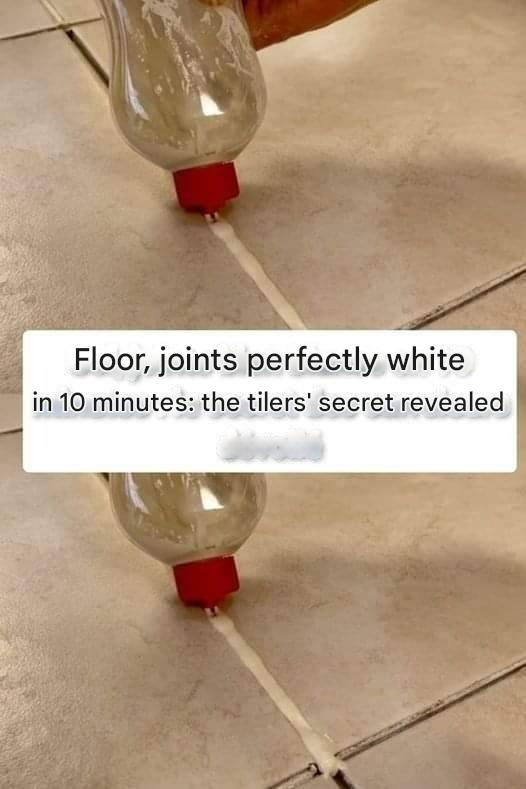
Now, here’s the secret that tilers and professional cleaners use to get those grout joints looking brand-new in no time: **a simple paste made from a combination of baking soda and hydrogen peroxide**. This powerful duo works wonders in removing dirt, grime, and stains from grout without damaging your tiles or the grout itself.
When used together, baking soda acts as a gentle abrasive that helps lift dirt and debris from the surface, while hydrogen peroxide acts as a bleaching agent that whitens and disinfects. This method is not only fast but also non-toxic, making it a safe and eco-friendly solution for cleaning your floors.
### Materials You’ll Need
To get started, you don’t need a ton of fancy equipment or products. In fact, the following items are all you need to achieve perfectly white grout joints:
1. **Baking Soda** – A natural abrasive that gently scrubs away dirt and stains without scratching the tiles.
2. **Hydrogen Peroxide (3%)** – A mild bleaching agent that helps lift stains and disinfect surfaces.
3. **An Old Toothbrush or Grout Brush** – For scrubbing and applying the paste to the grout lines.
4. **A Spray Bottle (Optional)** – If you want to make the process even quicker, a spray bottle can help you apply the hydrogen peroxide more evenly.
These common household items work wonders when combined, allowing you to restore your grout and tiles to their original, flawless condition.
### Step-by-Step Guide to Achieving White Floors and Joints in 10 Minutes
Now, let’s dive into the process itself. In just a few simple steps, you’ll have your floors and grout joints looking as good as new. You don’t need to be a professional tiler to achieve these results, and you certainly don’t need hours of hard labor.
#### Step 1: Gather Your Materials
Make sure you have all the materials ready and within reach. You won’t need anything beyond the basics mentioned above. If you want to save time, consider filling your spray bottle with hydrogen peroxide, so you can apply it directly to the grout.
#### Step 2: Prepare the Grout Cleaning Paste
To make the cleaning paste, mix the following ingredients:
– **1/4 cup of baking soda**
– **1/4 cup of hydrogen peroxide**
In a small bowl, combine the baking soda and hydrogen peroxide, stirring until a thick paste forms. You want the paste to be spreadable but not runny, so adjust the consistency by adding a bit more hydrogen peroxide if necessary.
#### Step 3: Apply the Paste to the Grout Joints
Using an old toothbrush or grout brush, scoop a small amount of the paste onto the bristles. Gently apply the paste to the grout lines, covering the entire length of each joint. Don’t worry about being too precise—just make sure the paste gets into the grout lines and covers all the stained or dirty areas.
If you have larger areas to clean, you can work in sections. For stubborn spots, apply a slightly thicker layer of paste to ensure maximum effectiveness.
#### Step 4: Let It Sit for 5–10 Minutes
Once you’ve applied the paste to the grout, allow it to sit for about 5 to 10 minutes. During this time, the hydrogen peroxide will begin to work its magic, lifting dirt, grime, and stains from the grout. The baking soda will also begin to gently scrub away any debris stuck to the surface.
For Complete Cooking STEPS Please Head On Over To Next Page Or Open button (>) and don’t forget to SHARE with your Facebook friends
ADVERTISEMENT
ADVERTISEMENT
