ADVERTISEMENT
### How to Make Funfetti Oreo Icebox Cake
Now that we have all the ingredients ready, let’s dive into the step-by-step process of making this incredible dessert.
#### Step 1: Prepare the Whipped Cream Mixture
In a large mixing bowl, begin by combining the whipped topping, softened cream cheese, sugar, and vanilla extract. Use an electric mixer or stand mixer to beat the mixture until it becomes smooth and fluffy. This should only take about 2-3 minutes.
Once the mixture is smooth, add in the Funfetti cake mix. No need to bake the cake mix – you’ll simply be incorporating it into the whipped cream mixture. Mix until fully combined, ensuring the cake mix is well-blended and no lumps remain.
#### Step 2: Prepare the Oreo Cookies
The next step is to prepare the Oreo cookies for layering. You can either break the cookies into smaller pieces or crush them into crumbs. For a more dramatic visual effect, consider breaking the cookies into halves or quarters, so you get big chunks of Oreo throughout the cake. Alternatively, if you prefer a smoother texture, crush the cookies into crumbs using a food processor or by placing them in a plastic bag and pounding them with a rolling pin.
#### Step 3: Layer the Cake
Now that the whipped cream mixture and Oreo cookies are ready, it’s time to start layering your Funfetti Oreo Icebox Cake.
1. **First Layer – Whipped Cream Mixture:** Start by spreading a layer of the whipped cream mixture at the bottom of your chosen baking dish (a 9×13-inch baking dish works well). This will be the base layer, and it helps ensure that the cake stays together.
2. **Second Layer – Oreos:** Add a layer of Oreo pieces over the whipped cream mixture. Try to cover the entire surface of the cake with the cookies.
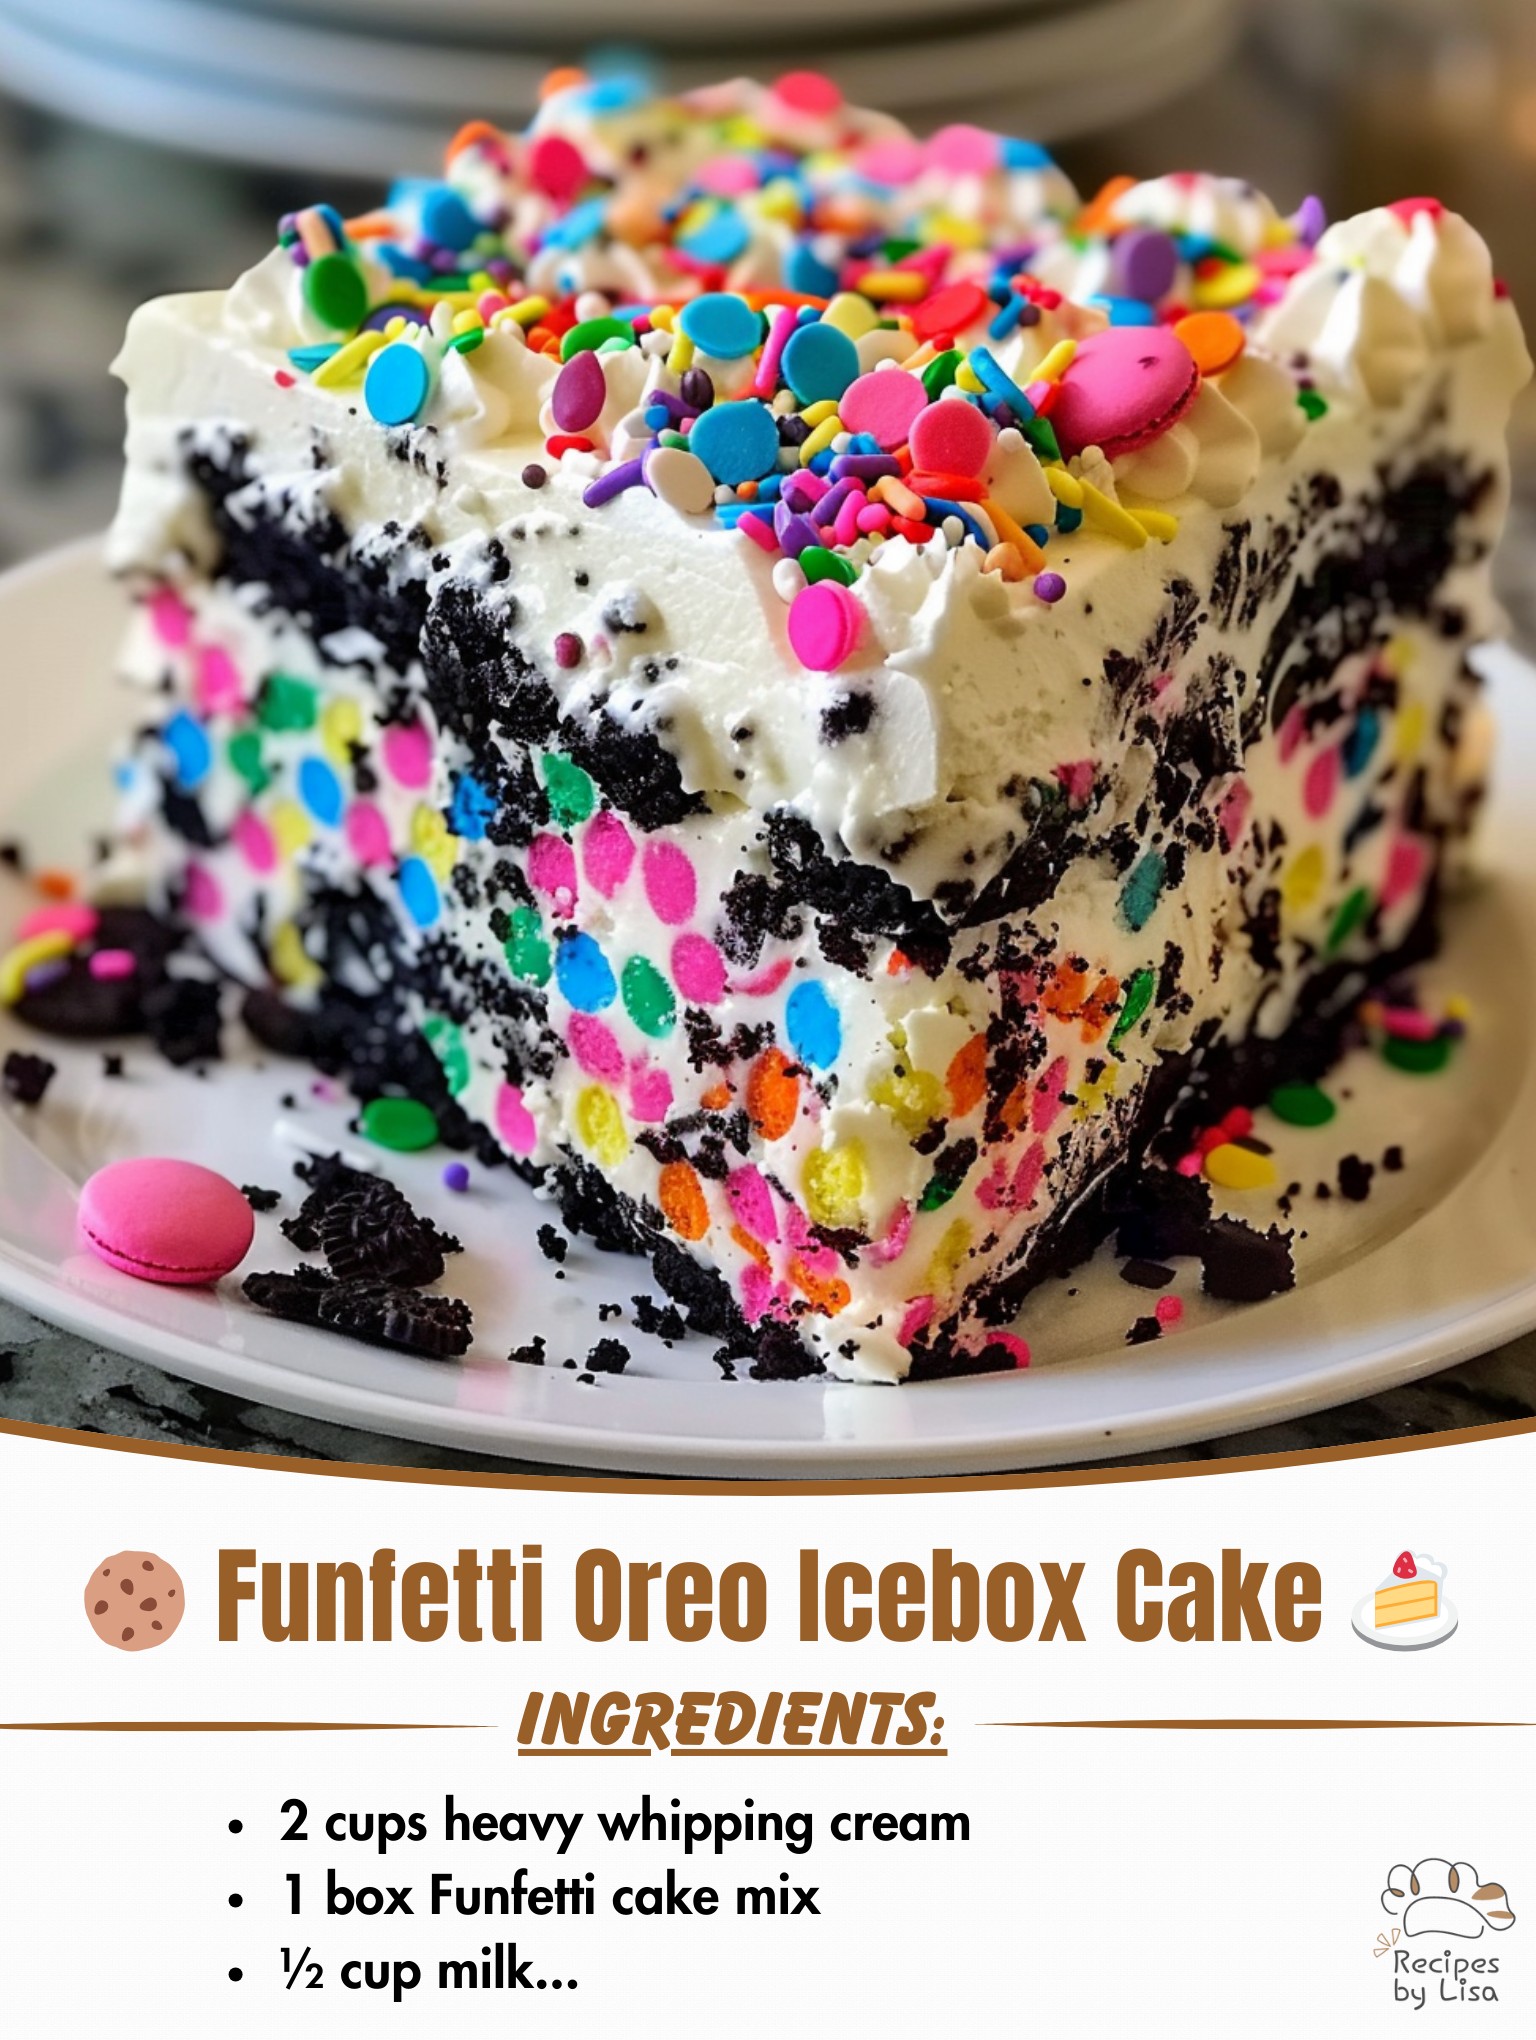
3. **Repeat:** Continue layering until you run out of ingredients, but make sure the final layer is a generous layer of the whipped cream mixture on top. The top layer of whipped cream will help hold the cake together and give it a smooth, creamy finish.
4. **Optional – Sprinkles:** Once the cake is assembled, sprinkle a handful of additional Funfetti sprinkles on top for extra color and texture. These sprinkles will add a cheerful, party-ready look to your icebox cake.
#### Step 4: Chill the Cake
Once the cake is fully assembled, cover the dish with plastic wrap or aluminum foil, and refrigerate it for at least 4 hours, preferably overnight. The chilling process allows the flavors to meld together and gives the cake time to set. As it chills, the Oreo cookies will soften, creating a cake-like texture that’s both creamy and slightly crunchy.
#### Step 5: Serve and Enjoy
After the cake has chilled, remove it from the fridge, slice it into squares, and serve! You can garnish it with additional sprinkles or even a dollop of whipped cream if you want to make it extra fancy. The cake is ready to serve, and it’s perfect for parties, family gatherings, or simply as a delightful sweet treat after dinner.
### Tips for Success
While this recipe is straightforward, there are a few tips to ensure your Funfetti Oreo Icebox Cake turns out perfectly every time:
1. **Use Room Temperature Ingredients:** For the smoothest whipped cream mixture, make sure your cream cheese is softened to room temperature before mixing it with the whipped topping. This will prevent any lumps from forming in the mixture.
2. **Let It Chill Long Enough:** Don’t rush the chilling process! The longer the cake sits in the fridge, the better the flavors will combine, and the Oreos will soften into a delicious, cake-like texture. Aim for at least 4 hours, but overnight is best for a truly set cake.
3. **Experiment with Oreo Flavors:** While classic Oreos are delicious, feel free to experiment with different Oreo flavors to customize the cake to your liking. For example, mint Oreos, peanut butter Oreos, or even birthday cake Oreos could add a fun twist to this dessert.
4. **Add a Layer of Chocolate:** For an extra indulgent version, you can drizzle some melted chocolate over the top of the whipped cream mixture or sprinkle chocolate chips over the final layer. This adds richness and an additional layer of flavor.
5. **Use a Store-Bought Cake Mix:** If you’re in a time crunch, using a store-bought Funfetti cake mix is a huge time-saver. However, you can also make your own homemade Funfetti cake mix if you’re feeling adventurous.
### Why You’ll Love This Recipe
The Funfetti Oreo Icebox Cake is a dessert that ticks all the boxes: it’s easy, it’s no-bake, and it’s absolutely delicious. Whether you’re new to baking or an experienced home chef, this recipe is approachable and forgiving. The combination of creamy whipped topping, crunchy Oreos, and colorful Funfetti cake mix creates a dessert that’s a feast for the eyes and the taste buds.
But the best part? The cake requires no baking, making it an ideal choice for hot summer days or when you want a dessert that’s quick to assemble but feels like a special occasion treat. Plus, the fact that it can be prepared ahead of time makes it perfect for gatherings and parties, allowing you to enjoy the event without worrying about last-minute preparation.
### Conclusion
Whether you’re preparing for a birthday bash, a family celebration, or simply craving a decadent dessert, the Funfetti Oreo Icebox Cake is an ideal choice. Its no-bake nature and simple ingredients make it incredibly easy to whip up, and the result is a creamy, colorful dessert that will impress everyone who tastes it.
From the first bite of crunchy Oreos and creamy whipped topping to the fun of the colorful Funfetti cake mix, this dessert delivers on every level. So, go ahead and try making your own Funfetti Oreo Icebox Cake — it’s an easy way to bring joy and magic to any occasion!
