ADVERTISEMENT
### **Instructions:**
#### **Step 1: Prepare the Pickles**
1. **Drain and Pat Dry the Pickles**: First, drain the pickles from their jar and pat them dry using paper towels. This step is important to remove excess moisture from the pickles, which will help the bacon crisp up during baking. You want to ensure that your pickles are as dry as possible to prevent sogginess in your finished dish.
2. **Slice the Pickles (Optional)**: Depending on the size of your pickles, you can choose to leave them whole or slice them into smaller, more manageable pieces. If you’re making smaller cups, cut the pickles into halves or thirds. Alternatively, you can leave them whole and wrap the entire pickle in bacon for a larger snack.
#### **Step 2: Wrap the Pickles with Bacon**
1. **Cut the Bacon**: Take your slices of bacon and cut them in half or thirds, depending on the size of the pickle pieces. You want the bacon to wrap around the pickle fully but still be able to hold its shape while baking.
2. **Wrap Each Pickle Piece**: Wrap each pickle (whole or sliced) with a strip of bacon. Make sure the bacon overlaps slightly to ensure that the pickle is fully covered. The bacon should be tightly wrapped around the pickle, but it doesn’t need to be overly tight. Secure the bacon with a toothpick to keep it in place during baking.
3. **Add Seasoning**: If you’d like, you can sprinkle the bacon-wrapped pickles with some **garlic powder** and **ranch seasoning** before moving to the next step. These seasonings will add a nice depth of flavor to the bacon and cheese.
#### **Step 3: Add the Cheese Filling**
1. **Stuff the Bacon-Wrapped Pickles**: In a small bowl, mix your **shredded cheese** with a bit of ranch seasoning (if desired). Using a spoon or your fingers, stuff the top of each bacon-wrapped pickle with the cheese. You can make a small pocket in the center of each pickle to hold the cheese filling. Press the cheese into place, ensuring it’s secure but doesn’t spill out.
2. **Optional Filling Ideas**: While cheese is the most common filling for these bacon pickle cups, you can also get creative with other fillings. You might want to try adding **cream cheese** or a **cheese spread**, or even **chopped jalapeños** for an added spicy kick. **Chopped onions** or **mushrooms** can also complement the bacon and pickle flavors for a more complex bite.
#### **Step 4: Bake the Golden Bacon Pickle Cups**
1. **Preheat the Oven**: Preheat your oven to **375°F (190°C)**. This is the ideal temperature to cook the bacon until it becomes crispy while allowing the cheese to melt inside the pickle.
2. **Prepare the Baking Sheet**: Lightly grease a baking sheet with **cooking spray** to prevent the bacon from sticking. You can also line the baking sheet with **parchment paper** for easier cleanup.
3. **Arrange the Bacon-Wrapped Pickles**: Place the bacon-wrapped pickles on the prepared baking sheet, making sure they are spaced out and not touching. This allows the bacon to crisp up evenly on all sides.
4. **Bake**: Place the baking sheet in the oven and bake for **20-25 minutes**, or until the bacon is golden and crispy and the cheese inside has melted. Keep an eye on the bacon during the last few minutes to avoid burning it. The bacon should be perfectly crisp, and the cheese should be bubbling and melted inside.
#### **Step 5: Serve and Enjoy**
Once the **Golden Bacon Pickle Cups** are out of the oven, let them cool for a minute or two before serving. Remove the toothpicks, and then transfer the bacon pickle cups to a serving platter. Serve them as an appetizer or snack with dipping sauces like ranch, honey mustard, or even spicy sriracha mayo for an extra burst of flavor.
—
## **Tips and Variations for Perfect Golden Bacon Pickle Cups**
### **1. Bacon Variations**
While regular bacon is the classic choice, you can experiment with different types of bacon to change up the flavor. **Turkey bacon** is a lower-fat alternative that still provides a good crunch, while **maple bacon** will add a sweet twist to the savory flavor profile of the dish. For an extra smoky flavor, try **smoked bacon** or **peppered bacon**.
### **2. Add Heat with Spicy Ingredients**
If you enjoy a little spice, you can kick things up a notch by adding **jalapeños**, **hot sauce**, or **cayenne pepper**. These ingredients work beautifully with the tangy pickles and the crispy bacon, providing an exciting burst of heat with each bite.
### **3. Use Different Cheeses**
Though shredded cheddar is the most common cheese for stuffing bacon-wrapped pickles, other cheese varieties can add unique flavors. Try **cream cheese** for a smoother, richer filling, or **mozzarella** for a melty, gooey center. For a sharper, more pungent taste, **blue cheese** can be a great addition.
### **4. Make Mini Versions for Parties**
If you’re serving a crowd, you can make **mini bacon pickle cups** by cutting your pickles into smaller pieces and using half-slices of bacon. This allows you to make more servings while still maintaining the same delicious flavors.
—
## **Conclusion**
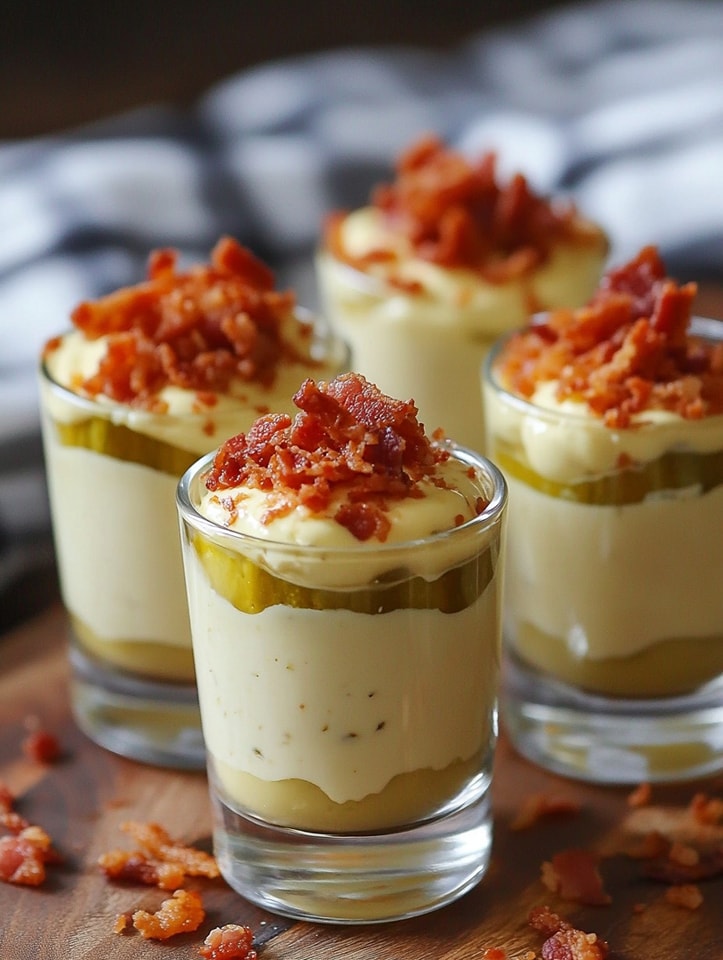
**Golden Bacon Pickle Cups** are the perfect combination of savory, tangy, and cheesy goodness, making them the ideal appetizer or snack for any gathering. Their crispy bacon exterior, combined with the gooey cheese and tangy pickle interior, creates a flavor explosion that is irresistible to everyone who tries them. Whether you’re hosting a party, tailgating, or simply looking for a delicious treat, these bite-sized snacks are sure to be a hit. With endless customization options, you can personalize these little bites to suit your tastes and satisfy all your cravings. Give them a try today, and watch them disappear before your eyes!
