ADVERTISEMENT
If there are any stubborn spots that don’t come off with wiping, use the plastic spatula to gently scrape them off. Be careful not to scratch or damage the oven’s surface.
### Step 6: Add Vinegar for Extra Cleaning Power
To further clean and neutralize any odors, fill a spray bottle with white vinegar and spray it over the areas where you applied the baking soda paste. The vinegar will react with the baking soda, causing it to foam and fizz. This reaction helps lift any remaining grease and grime from the oven’s surfaces.
Let the vinegar and baking soda sit for about 5-10 minutes to ensure maximum cleaning power. Once the fizzing subsides, grab your damp cloth and wipe down the oven again to remove any remaining vinegar and baking soda residue.
### Step 7: Clean the Oven Door
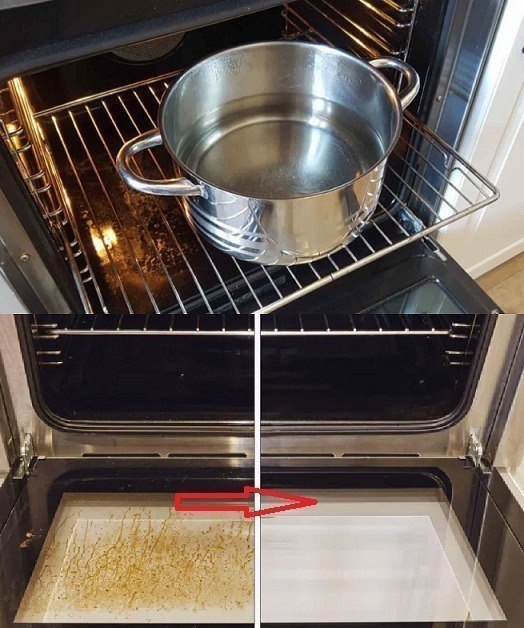
The oven door is often one of the most neglected parts of the oven when it comes to cleaning. To clean the oven door, first, spray the same vinegar solution on the glass and let it sit for a few minutes. After the solution has had time to work, use a soft cloth or sponge to scrub the glass.
If there are stubborn stains, use a paste of baking soda and water, apply it to the glass, and allow it to sit for 10-15 minutes. Scrub gently with a non-abrasive sponge or cloth to remove the stains without scratching the glass. Once the door is clean, wipe it down with a damp cloth to remove any residue.
For stainless steel oven doors, you can use a stainless steel cleaner or a mixture of vinegar and water to make them shine. Just be sure to wipe in the direction of the steel’s grain to avoid streaking.
### Step 8: Replace the Oven Racks
Once the oven racks are dry, carefully place them back into the oven. Make sure they’re fully inserted and secure before closing the oven door.
### Step 9: Final Touch-Up
After all the surfaces have been cleaned and wiped down, give your oven one final wipe with a dry cloth or paper towel to remove any excess moisture. Check for any missed spots and wipe them down as needed.
To keep your oven looking clean for longer, it’s a good idea to wipe it down after each use to prevent grease buildup. This will make future deep cleaning tasks much easier and quicker.
### Additional Tips for Cleaning Your Oven
1. **Self-Cleaning Ovens**: If your oven has a self-cleaning feature, it can be an effective way to get rid of grease and food residue. However, self-cleaning ovens can take several hours and get very hot, so it’s a good idea to use this feature only when necessary. After the cycle is complete, simply wipe away the ash that remains.
2. **Avoid Harsh Chemicals**: Many commercial oven cleaners contain harmful chemicals like ammonia and bleach. These can emit strong fumes that are hazardous to your health. Opt for natural alternatives like baking soda, vinegar, and dish soap to keep the cleaning process safe and non-toxic.
3. **Keep the Oven Door Seals Clean**: The rubber seals around your oven door are prone to food buildup. Gently wipe them with a damp cloth after every few uses to prevent grease and grime from accumulating. Make sure not to damage the seal as it plays an important role in maintaining the oven’s efficiency.
4. **Use a Regular Cleaning Schedule**: To keep your oven in top shape, clean it regularly. Ideally, give it a deep clean every three to six months, depending on how often you use it. Regular spot cleaning after each use can help prevent heavy grease buildup, making deep cleaning sessions much quicker and easier.
### Conclusion
Cleaning your oven doesn’t need to be a lengthy or difficult process. With a few simple ingredients like baking soda and vinegar, you can easily clean your oven in minutes and restore it to a like-new condition. Not only does regular oven cleaning improve the overall cooking environment, but it also ensures your oven operates efficiently and prolongs its lifespan. So next time your oven needs a clean, try this simple, effective method, and you’ll be amazed at how quickly you can get it sparkling again. Happy cleaning!
ADVERTISEMENT
ADVERTISEMENT
