ADVERTISEMENT
### Instructions:
#### 1. **Heat the Milk:**
Begin by pouring the whole milk into a heavy-bottomed pot. Heat it over medium heat, stirring occasionally to prevent it from scorching. You’ll want to bring the milk to a gentle simmer, but be careful not to let it boil over. The goal is to get the milk to around 180°F (82°C)—it should be steaming and just about to bubble at the edges.
#### 2. **Add the Yogurt:**
Once the milk is heated, stir in the plain yogurt. The yogurt acts as a natural starter culture, helping to curdle the milk and form the cheese. Continue stirring gently for a couple of minutes to evenly distribute the yogurt throughout the milk.
#### 3. **Add the Lemon Juice:**
Next, add the fresh lemon juice (or vinegar) to the milk mixture. Stir it in gently. The acid from the lemon will cause the milk to curdle, separating into curds (solid) and whey (liquid). You should see this happen almost immediately, so don’t worry if it seems like magic!
#### 4. **Let It Sit:**
Turn off the heat and cover the pot. Let it sit undisturbed for about 10 to 15 minutes. This gives the curds time to fully form and separate from the whey. You’ll see the milk transform into soft curds with clear liquid surrounding them.
#### 5. **Strain the Curds:**
After the resting period, place a fine-mesh strainer or sieve over a clean bowl. Lay a piece of cheesecloth or a clean kitchen towel inside the strainer. Carefully pour the curdled milk into the strainer to separate the curds from the whey.
You can discard the whey (or save it for use in smoothies, baking, or as a liquid for soups) and focus on the curds. If you prefer a drier cheese, you can let the curds drain for a longer period of time. For a creamier texture, stop the draining process sooner.
#### 6. **Season and Mix (Optional):**
Once the curds have drained to your desired consistency, transfer them into a bowl. If you like, you can season the cheese with a pinch of salt to enhance the flavor. Mix it well to ensure the salt is evenly distributed.
#### 7. **Enjoy Your Homemade Cheese Delight:**
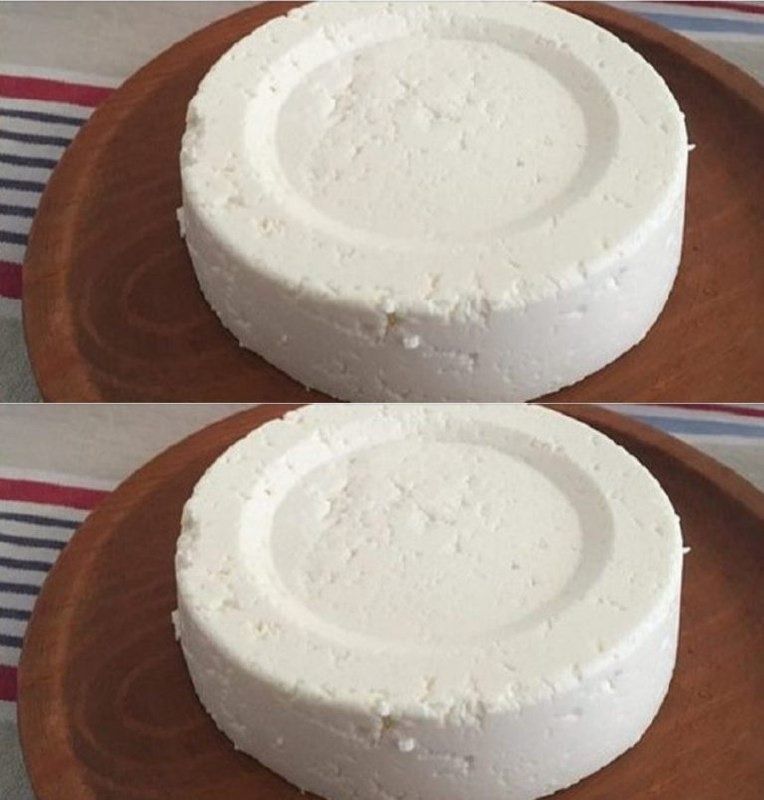
Your homemade cheese is now ready to be enjoyed! You can eat it right away, or refrigerate it for a firmer texture. Store it in an airtight container in the fridge, and it should keep for 3 to 5 days.
### How to Enjoy Your Homemade Cheese:
– **Spread on Toast or Crackers:** This fresh cheese works beautifully as a spread on crusty bread or crackers, especially when paired with a drizzle of honey or some fresh herbs.
– **Use in Salads:** Crumbled or scooped onto a salad, this homemade cheese adds a rich, tangy element that elevates the whole dish.
– **Top on Pasta or Pizza:** You can use it as a topping for pasta dishes, or scatter it over a homemade pizza for a creamy, slightly tangy twist.
– **Serve as a Side Dish:** Pair it with fresh fruits like figs, grapes, or apples for a balanced and refreshing side dish.
– **Flavor Variations:** For extra flavor, you can mix in fresh herbs like dill, thyme, or basil, or even a little garlic for a savory version of this cheese delight.
### Why You’ll Love This Homemade Cheese Delight:
1. **Super Simple and Quick:** With only three main ingredients, this cheese comes together quickly, and the process is incredibly easy—no special equipment or prior experience needed.
2. **Healthy and Fresh:** Homemade cheese made from milk and yogurt is a natural and healthier alternative to store-bought options that may contain preservatives or artificial additives. Plus, you control the level of salt and can avoid unnecessary sugars or flavorings.
3. **Versatile:** The beauty of this cheese is its versatility. You can use it in a variety of dishes, from breakfast spreads to savory meals. Whether you prefer it plain or with added seasonings, the possibilities are endless.
4. **Rich in Protein and Probiotics:** This cheese provides a great source of protein and probiotics from the yogurt, making it a healthier choice than many store-bought cheeses.
5. **Customizable:** Want to add more flavor? Try adding some garlic powder, herbs, or spices to the cheese to make it suit your taste. You can even incorporate fresh fruit or honey for a sweet version!
### Final Thoughts:
Making **Homemade Cheese Delight** is one of those simple pleasures in life that’s both satisfying and rewarding. With just a few ingredients—milk, yogurt, and lemon—you can create a delicious, fresh cheese that’s creamy, tangy, and perfect for a variety of uses. Whether you spread it on toast, add it to salads, or enjoy it with fruit, this homemade cheese is sure to become a staple in your kitchen.
It’s easy, healthy, and delicious—what’s not to love? So, give this simple homemade cheese recipe a try, and enjoy the delight of fresh, homemade cheese in your meals today!
