ADVERTISEMENT
How to Grow Orchids in Water – A Simple Guide for Beginners
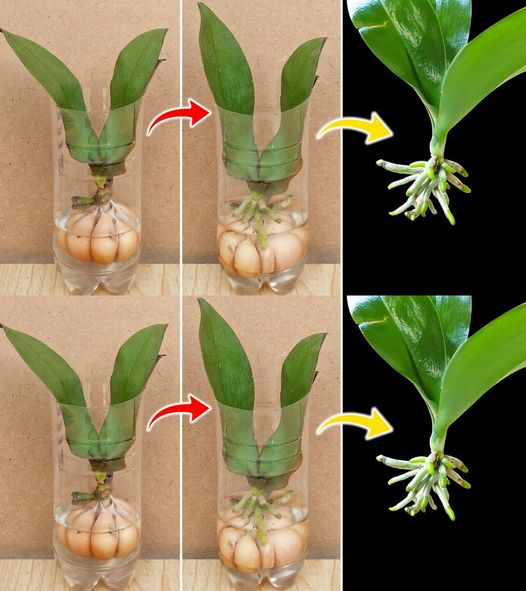
Orchids are one of the most beautiful and exotic flowers you can have in your home. With their intricate blooms and diverse colors, they bring elegance and charm to any space. While orchids are traditionally grown in soil or special potting mixes, growing orchids in water is an increasingly popular method among plant enthusiasts. Not only is it visually appealing, but it also simplifies care for those who might not have a green thumb. If you’re wondering how to grow orchids in water, this guide will walk you through the process and provide you with the essential tips for success.
Why Grow Orchids in Water?
Growing orchids in water offers several benefits:
- Simpler Maintenance: Water culture removes the need for soil or potting mix, reducing mess and making watering easier.
- Clean Aesthetic: Growing orchids in water can be visually striking, offering a clean, modern look that showcases the orchid’s roots and creates a unique centerpiece.
- Healthier Roots: When grown in water, the orchid’s roots can absorb moisture continuously without drying out, as long as the water is changed regularly.
While growing orchids in water is an unconventional method, with the right care, your orchid can thrive and bloom beautifully.
What You’ll Need:
- Orchid Plant: Phalaenopsis orchids (moth orchids) are particularly suitable for growing in water.
- A Clear Vase or Container: A glass vase or clear container helps you monitor the roots and water level.
- Water: Use distilled or filtered water to avoid the buildup of minerals that could harm your plant.
- Orchid Fertilizer: Specialized orchid fertilizer will provide the necessary nutrients, since the plant won’t be absorbing them from the soil.
- Rocks or Pebbles (Optional): Some people use pebbles to help stabilize the roots and keep the orchid upright.
Step-by-Step Guide to Growing Orchids in Water:
1. Choose the Right Orchid
Select a healthy orchid, preferably a Phalaenopsis (moth orchid), as they adapt well to water culture. Ensure that your orchid doesn’t have any pests or diseases. If it’s in soil, gently remove it from the pot, being careful not to damage the roots.
2. Prepare the Container
Choose a clear container that will allow you to see the roots and water level. A glass vase, jar, or even a large mason jar can work well. The container should be large enough to accommodate the orchid’s roots comfortably.
If you’d like extra support, you can add some rocks or pebbles to the bottom of the container. The pebbles will help stabilize the orchid roots and prevent them from floating. The rocks should not cover the roots entirely, as the plant needs to be in contact with water.
3. Clean the Roots
Once your orchid is removed from the soil, gently clean the roots by rinsing them under lukewarm water. Trim off any dead or decaying roots with sterile scissors. Be sure to remove any remaining potting mix or soil debris. Only healthy, firm roots should remain, as these will be the ones that thrive in water.
4. Place the Orchid in the Container
Carefully place the orchid’s roots into the container, making sure the roots are submerged in the water but that the crown of the orchid (where the leaves meet the roots) stays above the water line. The water should cover the roots, but it shouldn’t reach the leaves or stem, as this could lead to rot.
5. Add Water
Fill the container with distilled or filtered water until the orchid’s roots are fully submerged. Be sure to use water that is at room temperature to avoid shocking the plant. Tap water can sometimes contain minerals or chemicals that could harm the plant, so it’s best to use purified or rainwater.
6. Fertilize the Orchid
Orchids grown in water do not have access to the nutrients they would normally get from potting mix. To provide nourishment, use a diluted orchid-specific fertilizer. Fertilize your orchid once a month using a water-soluble orchid fertilizer. Make sure to follow the manufacturer’s instructions to avoid over-fertilizing.
7. Change the Water Regularly
One of the key factors in keeping your orchid healthy in water is regular water changes. Change the water every 7-10 days to prevent stagnation, algae growth, and the buildup of salts and minerals. Be sure to rinse the container and roots gently during each water change.
8. Provide Proper Light
Place your orchid in a location where it will receive bright, indirect light. Orchids love natural light but should be kept out of direct sunlight, which can scorch their leaves. A windowsill with filtered sunlight or a spot near a sheer curtain is ideal. Aim for around 10-12 hours of light per day for optimal growth.
9. Monitor Humidity and Temperature
Orchids thrive in humid environments with temperatures between 65-75°F (18-24°C). You can use a humidity tray or a humidifier if the air in your home is too dry. Avoid placing the orchid in drafty areas or near heat sources, as this can stress the plant.
For Complete Cooking STEPS Please Head On Over To Next Page Or Open button (>) and don’t forget to SHARE with your Facebook friends
