ADVERTISEMENT
**How to Remove Labels from Glass Jars: 5 Quick, Easy, and Effective Methods**
Glass jars are often used to store a variety of items such as food, candles, and homemade crafts. These sturdy, reusable containers are a fantastic option for eco-friendly storage. However, once the contents of the jar are finished, many people find themselves frustrated with the labels that remain stuck to the glass. Whether you plan on reusing the jar for a new purpose or simply want to clean it up for recycling, getting rid of those sticky labels can be a challenge.
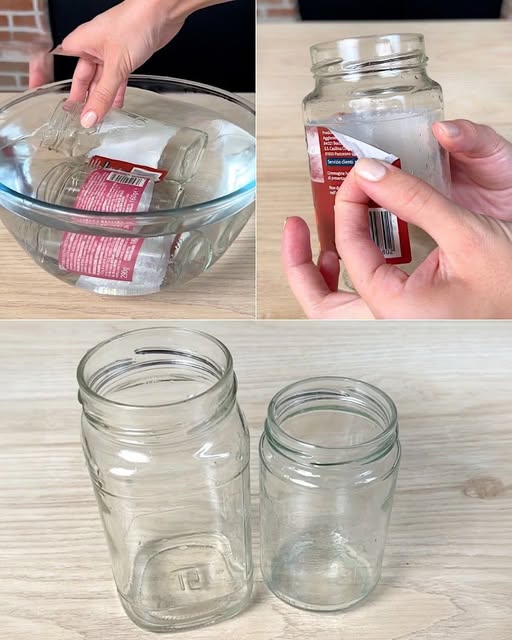
Fortunately, removing labels from glass jars doesn’t have to be a complicated task. There are several methods that you can use to remove labels quickly, easily, and effectively without damaging the glass. In this article, we will explore five tried-and-tested methods for removing labels from glass jars, along with helpful tips and tricks to ensure that your jar is left sparkling clean and label-free.
### **Why is Removing Labels Important?**
Before diving into the methods, it’s worth briefly considering why you might want to remove labels from glass jars in the first place.
1. **Reusing Jars for Crafting or Storage:** Many people save glass jars for DIY projects or to repurpose them for storage. Removing the label ensures that your new project looks clean and professional, whether you’re making homemade candles, creating decorative jars for storage, or using the jars to organize small items.
2. **Recycling and Reusing Glass Jars:** Glass is an environmentally friendly material that can be recycled. By removing the label, you’re making it easier for the recycling process and helping to reduce waste.
3. **Creating Custom Containers:** Once the label is removed, you have a clear canvas to personalize the jar with your own designs, stickers, or labels.
4. **Maintaining Cleanliness:** Labels can sometimes leave behind sticky residue that can attract dust or dirt, making the jar look untidy. Cleaning the jar properly ensures that it’s hygienic and presentable for future use.
### **Essential Materials to Have on Hand**
Before attempting any of the methods described below, it’s important to gather the right materials. Most of these items are things you likely already have in your kitchen or household. Here’s a list of common tools and supplies you’ll need:
– **Soapy Water**: Dish soap and warm water to help dissolve adhesives.
– **Baking Soda**: A gentle abrasive that can help remove sticky residue.
– **Vinegar**: A versatile cleaner that can dissolve adhesives and stains.
– **Olive Oil or Vegetable Oil**: These oils can break down sticky adhesives.
– **Scraper or Plastic Knife**: For gently peeling off labels and sticky residue.
– **Paper Towels or Cloth**: To clean and wipe the jar.
– **Aluminum Foil**: A unique trick for removing tough labels.
– **Rubbing Alcohol**: To help remove sticky residues that are hard to clean.
– **Hairdryer**: To loosen the label with heat.
Once you have the right supplies, you’re ready to explore some of the best methods for removing those pesky labels!
For Complete Cooking STEPS Please Head On Over To Next Page Or Open button (>) and don’t forget to SHARE with your Facebook friends
ADVERTISEMENT
ADVERTISEMENT
