ADVERTISEMENT
Title: How to Remove Moisture from Walls So It Never Comes Back
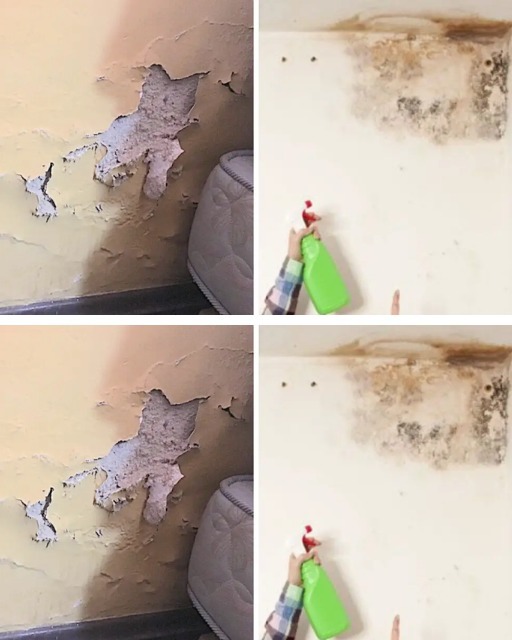
Moisture in your walls can lead to significant damage if left unchecked. Not only can it cause unsightly stains, peeling paint, or wallpaper, but it can also create the perfect environment for mold and mildew to thrive. Whether you’re dealing with a small leak or general humidity buildup, removing moisture from your walls is crucial for maintaining a healthy and safe home. In this article, we’ll guide you through the steps to remove moisture from walls and prevent it from coming back.
Step 1: Identify the Source of Moisture
Before taking action, it’s important to figure out where the moisture is coming from. Moisture can enter your walls in several ways, including:
- Leaks from plumbing – Faulty pipes or burst water lines can lead to water seeping into the walls.
- Roof or window leaks – Heavy rain or improper sealing around windows can allow water to infiltrate the interior.
- Condensation – Excess humidity in the air can condense on cool surfaces, like walls, creating dampness.
- Rising damp – This occurs when groundwater rises through porous building materials, particularly in older homes.
If you can pinpoint the exact source, you can fix the root cause and prevent future moisture problems.
Step 2: Dry the Affected Area
Once you’ve identified and addressed the source of moisture, the next step is to dry out the damp walls. This process is essential to preventing mold and mildew from forming. Here’s how to dry the walls thoroughly:
- Use a Dehumidifier: Set up a dehumidifier in the affected room to draw moisture out of the air. This will speed up the drying process and reduce humidity levels.
- Ventilate the Space: Open windows and doors (if possible) to allow fresh air to circulate. You can also use fans to increase airflow and dry the walls faster.
- Apply a Damp Rid or Moisture Absorber: Place moisture-absorbing products like Damp Rid around the room to help pull excess moisture from the air.
- Use a Heat Source (Carefully): A space heater or a heat gun can be used to gently warm the walls and help the moisture evaporate. However, take care not to overheat or damage the wall material.
Allow the area to dry for at least 24 to 48 hours, depending on the extent of the moisture.
Step 3: Clean the Walls
Once the area is dry, it’s important to clean the walls to prevent mold growth and remove any remaining residue from the moisture. Use a mixture of water and vinegar, or a store-bought mold and mildew cleaner. Here’s how to do it:
- Wear Protective Gear: Put on gloves, a mask, and goggles to protect yourself from mold spores and harsh cleaning chemicals.
- Clean the Walls: Using a sponge or cloth, gently scrub the walls with your cleaning solution. Focus on areas where you noticed mold or mildew growth. If the mold is persistent, you can use a diluted bleach solution (1 part bleach to 3 parts water), but make sure to test a small area first to ensure the surface won’t be damaged.
- Rinse and Dry: After scrubbing, rinse the walls with clean water and use a dry towel to wipe them down.
Step 4: Repair Any Damage
If moisture has caused visible damage to your walls, such as peeling paint or cracked plaster, you’ll need to make repairs. Depending on the severity of the damage, you can:
- Touch Up the Paint: If the paint has bubbled or peeled, scrape away the damaged paint and repaint the area once it’s completely dr
