ADVERTISEMENT
How to Remove Moisture from Walls So It Never Comes Back
Moisture problems in your home are not only unsightly but can also lead to structural damage and health issues like mold and mildew growth. If you’re dealing with damp walls, it’s essential to act quickly to resolve the issue. The good news is that with the right steps, you can remove moisture from walls and prevent it from returning. Here’s how to tackle this common problem once and for all.
Why Do Walls Get Moist?
Before diving into the solutions, it’s essential to understand why walls get damp in the first place. Common causes of moisture in walls include:
- Poor Ventilation: A lack of proper airflow can trap moisture in your home, especially in areas like bathrooms, kitchens, and basements.
- Leaks: Roof or plumbing leaks allow water to seep into your walls, leading to dampness.
- Rising Damp: This occurs when water from the ground moves up through the walls, particularly in older homes that lack proper damp-proofing.
- Condensation: When warm, moist air meets cold surfaces, condensation forms. This is common in homes with poor insulation or temperature regulation.
How to Remove Moisture from Walls
Once you’ve identified the source of moisture, you can take the appropriate steps to eliminate it. Here’s how to effectively remove moisture from your walls:
1. Identify and Repair the Source of Moisture
The first step in dealing with moisture on your walls is addressing the root cause. Without fixing the underlying problem, the moisture will likely return.
- Leaks: If you notice water stains on your walls, inspect your plumbing for leaks, and check your roof for missing shingles or cracks. If you’re unsure, hiring a professional to inspect for leaks might be necessary.
- Rising Damp: For rising damp, you may need to install a damp-proof course or membrane, particularly if you live in an older home.
- Condensation: If condensation is the issue, increasing ventilation in your home can help. Consider installing extractor fans in high-moisture areas, such as bathrooms and kitchens.
2. Remove Surface Moisture
Once you’ve dealt with the source of the moisture, you need to dry out the affected walls. Here are some methods to remove excess moisture from walls:
- Use a Dehumidifier: A dehumidifier is an excellent tool for removing moisture from the air, especially in damp rooms like basements or bathrooms. Place the dehumidifier near the affected wall to help dry it out faster.
- Ventilate the Area: Open windows and doors to allow fresh air to circulate. Use fans to increase airflow, particularly in rooms that are poorly ventilated. This will help speed up the drying process.
- Use Absorbent Materials: To pull moisture out of the walls, try using moisture-absorbing materials like silica gel, baking soda, or activated charcoal. Place these in containers and leave them near the damp walls for a few days.
3. Dry the Walls Thoroughly
Once you’ve addressed the moisture source and removed excess moisture, it’s time to ensure your walls are completely dry. If your walls are plaster, you can use the following methods to aid the drying process:
- Heating: Use a space heater to gently warm the room, which will help evaporate any lingering moisture. Be sure to keep the heater at a safe distance from the walls to avoid causing damage.
- Fans: Positioning fans near damp walls will circulate the air and help speed up the evaporation of moisture. A good airflow will ensure that the walls dry more evenly.
4. Treat the Walls with Anti-Mold Products
Once your walls are dry, it’s time to protect them from mold growth, which can thrive in damp environments. Consider applying a mold-resistant treatment to the affected area. There are a variety of products available that can help prevent mold and mildew from returning, including:
- Anti-Mold Paints: These paints contain fungicides that resist mold and mildew growth. They are perfect for bathrooms, kitchens, and other humid areas.
- Mold and Mildew Removers: Use mold-specific cleaners to scrub away any visible mold or mildew on the surface. Be sure to follow all safety instructions when using these products.
5. Repaint or Replaster (If Necessary)
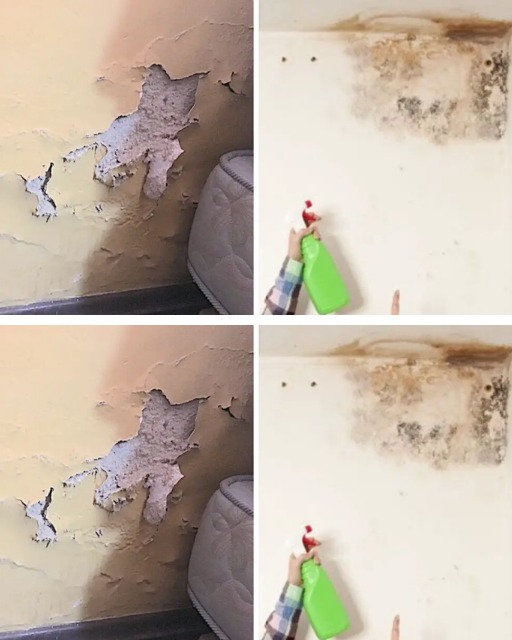
In some cases, damp walls can cause the paint or plaster to peel or bubble. Once the walls are dry and mold-free, you may need to repair or repaint the surface:
- Patch and Replaster: If the plaster has been damaged, you may need to replaster the area to restore its integrity. Be sure to allow the surface to dry completely before applying fresh plaster.
- Repaint: If the paint has been compromised, you can apply a fresh coat of paint once the walls are completely dry. Be sure to use a high-quality paint designed for humid or damp environments, such as bathroom or kitchen paint.
How to Prevent Moisture fro
ADVERTISEMENT
ADVERTISEMENT
