ADVERTISEMENT
### Step-by-Step Guide to Removing White Tendons from Chicken Breast
Now that we understand why it’s important to remove the tendons, let’s dive into how to do it. Removing white tendons from chicken breasts is a simple process that requires just a few basic tools and some patience. Here’s a step-by-step guide to help you:
#### 1. **Gather Your Tools**
To start, you’ll need a few essential tools. These include:
– **Sharp Paring Knife or Boning Knife**: A sharp knife will allow you to easily slice through the tendons without damaging the meat.
– **Cutting Board**: Make sure your cutting board is clean and sturdy to prevent slipping and ensure safety.
– **Chicken Breasts**: Fresh, boneless, skinless chicken breasts are the most common source of white tendons. You can use frozen chicken breasts as well, but it’s easier to remove the tendons if the chicken is thawed and slightly chilled.
– **Paper Towels**: You may want paper towels to blot off any excess moisture on the chicken.
#### 2. **Prepare the Chicken Breast**
Begin by placing the chicken breast on a clean cutting board. If your chicken breast is frozen, it’s a good idea to thaw it fully or leave it slightly frozen, as it will make it easier to identify the tendons and remove them. Pat the chicken breast dry with a paper towel to remove excess moisture, which will help prevent the meat from slipping while you work.
#### 3. **Locate the Tendons**
The white tendons are often visible on the side of the chicken breast, and they can be found running through the meat in a few different spots. They typically appear as white, stringy pieces, and they can vary in length and thickness depending on the chicken. Some tendons are very thin and almost invisible, while others are thick and very noticeable.
#### 4. **Use Your Knife to Cut Around the Tendons**
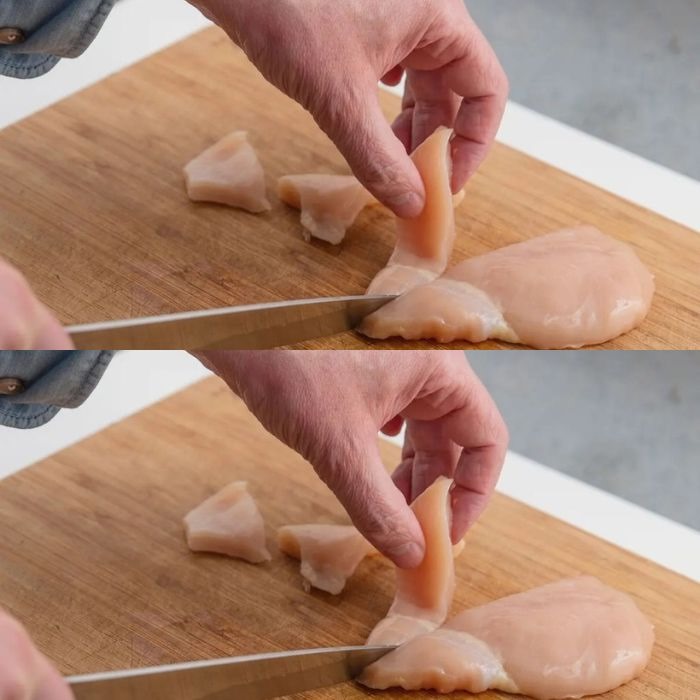
Start by holding the chicken breast steady with your non-dominant hand. Using a sharp paring knife or boning knife, gently slide the tip of the knife under the tendon. You want to cut as close to the tendon as possible without cutting into the surrounding meat.
Carefully run the knife along the tendon to separate it from the chicken breast. If the tendon is particularly thick or tough, you may need to make several small cuts to release it completely. Some tendons will come away easily with just a few cuts, while others may require a bit more work.
#### 5. **Remove the Tendon**
Once the tendon is fully detached from the meat, pull it away from the chicken breast. If you’re removing multiple tendons, repeat the process for each one. As you remove the tendons, you should be left with a smooth, tender piece of chicken breast with no white, stringy bits remaining.
If the tendon is stubborn or difficult to cut, be sure to take your time and use short, controlled cuts to avoid tearing the chicken breast or cutting into the muscle tissue unnecessarily.
#### 6. **Check for Leftover Tendons**
After you’ve removed the primary tendons, inspect the chicken breast to make sure there are no smaller tendons left behind. These smaller tendons can sometimes be hidden within the meat, so it’s a good idea to gently press down on the chicken with your knife to check for any remaining tendons.
#### 7. **Trim Off Any Extra Fat or Skin**
After you’ve removed all the tendons, use your knife to trim off any excess fat or skin that might still be attached to the chicken breast. This will give you a clean and lean piece of meat that’s ready to cook.
### Additional Tips for Removing White Tendons from Chicken Breast
While the process is relatively straightforward, here are a few additional tips to make it easier and more efficient:
1. **Work Slowly**: Don’t rush the process. Take your time when removing the tendons to ensure you don’t accidentally cut into the chicken. A sharp knife will make the process smoother, but even the sharpest knife requires careful handling.
2. **Use a Boning Knife**: A boning knife is especially useful for working around tendons because of its flexible, narrow blade. It allows for precise cutting, making it easier to get under the tendon and separate it from the meat.
For Complete Cooking STEPS Please Head On Over To Next Page Or Open button (>) and don’t forget to SHARE with your Facebook friends
