ADVERTISEMENT
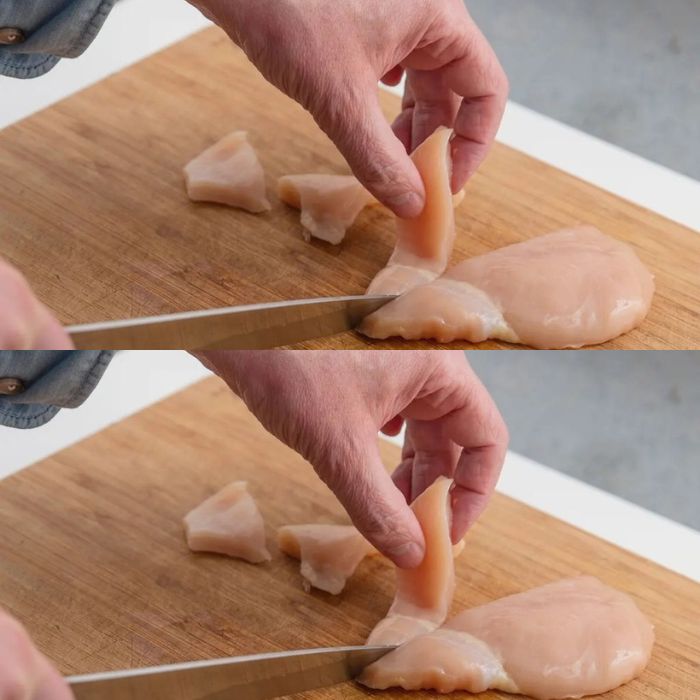
#### Step 4: Pull the Tendon Away
Once you’ve cut beneath the tendon, use your fingers or a pair of tweezers to gently pull the tendon away from the chicken breast. The tendon should come away in one piece. If the tendon is stubborn and doesn’t come off easily, continue to carefully slide your knife under it until it’s fully detached.
#### Step 5: Continue Removing Other Tendons
Work your way across the chicken breast, checking for any remaining tendons. Repeat the process of cutting underneath and lifting the tendons until the meat is free from all visible connective tissue. Take your time, as some tendons can be tough and require a bit more effort to remove.
#### Step 6: Trim Excess Fat (Optional)
While you’re working on removing the tendons, you may also notice some excess fat around the chicken breast. You can trim this away using your knife to improve the overall appearance and texture of the chicken. Some people prefer to leave a small amount of fat for flavor, while others choose to remove all excess fat for a leaner cut of meat.
#### Step 7: Clean and Rinse the Chicken
Once you’ve removed all the tendons and excess fat, rinse the chicken breast under cold water to remove any remaining bits of tendon or tissue. Pat the chicken dry with paper towels or a clean cloth.
#### Step 8: Ready for Cooking
Now that you’ve removed the white tendons from the chicken breast, it’s ready to be cooked. Whether you plan to grill, sauté, bake, or fry it, your chicken breast will have a smoother texture and be more enjoyable to eat.
### Additional Tips for Removing White Tendons from Chicken Breast
– **Work Slowly**: Patience is key when removing tendons. Don’t rush the process, as cutting too quickly can cause you to damage the chicken or miss a tendon.
– **Use a Sharp Knife**: A dull knife can make the process more difficult and less effective. Ensure that your knife is sharp to make precise cuts and avoid accidents.
– **Use the Right Knife for the Job**: A boning knife or paring knife works best for removing tendons. These knives are designed for precision and flexibility, making it easier to navigate around the tendons without cutting into the meat.
– **Freeze the Chicken Slightly**: If the chicken breast is very soft or slippery, you can place it in the freezer for 15–20 minutes before removing the tendons. This will make it easier to handle and cut through the tendons.
– **Check for Tenderness**: After removing the tendons, you can also test the chicken for tenderness. If it feels too tough, you might want to tenderize it using a meat mallet or by marinating it before cooking.
### Can You Cook Chicken Breast with White Tendons?
While you can cook chicken breast with white tendons still attached, it’s not ideal. Cooking the chicken with tendons intact can result in a tough and chewy texture. The tendons can become more difficult to chew, which might detract from the overall eating experience. That’s why it’s always a good idea to remove the tendons for a more pleasant dining experience.
If you don’t have time to remove the tendons, consider slow-cooking or braising the chicken breast to help break down the connective tissue. However, for optimal results, removing the tendons beforehand is the best choice.
### Conclusion
Removing white tendons from chicken breast may seem like an unnecessary step, but it significantly enhances the texture, flavor, and overall quality of your chicken dishes. Whether you’re preparing a simple grilled chicken breast or a more intricate recipe, taking the time to remove these tendons will result in a more enjoyable meal.
With the right tools and a bit of patience, you’ll be able to remove the white tendons from chicken breasts like a pro. So, next time you’re preparing chicken breast, remember these tips, and enjoy tender, juicy, and flavorful chicken every time.
—
Let me know if you’d like to adjust or expand any section of the article.
ADVERTISEMENT
ADVERTISEMENT

