ADVERTISEMENT
How to Use an Adjustable Wrench Properly: A Step-by-Step Guide
An adjustable wrench is one of the most versatile and essential tools in any toolbox. Whether you’re tackling DIY projects, fixing appliances, or working on your car, knowing how to properly use an adjustable wrench can save you time, effort, and frustration. But if you’re new to this tool or unsure of the right technique, don’t worry—this article will break down the steps to using an adjustable wrench effectively and safely.
What Is an Adjustable Wrench?
An adjustable wrench, often called a “Crescent wrench” (after the brand that made it popular), is a hand tool with a movable jaw that can be adjusted to fit various sizes of nuts and bolts. The key feature of this tool is its versatility, allowing you to use it on fasteners of different sizes without needing a set of fixed wrenches.
Parts of an Adjustable Wrench
Before we dive into how to use it, let’s familiarize ourselves with the main parts of an adjustable wrench:
- Fixed Jaw: This is the stationary part of the wrench that you can’t adjust.
- Adjustable Jaw: The movable jaw that slides to adjust the size of the opening to fit different fasteners.
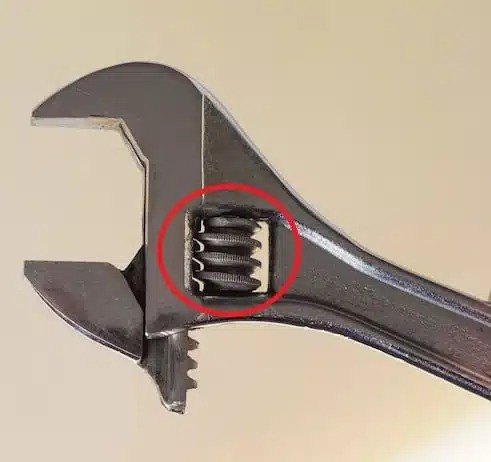
- Thumb Screw/Adjustment Knob: This is the part that you turn to adjust the size of the jaw. Turning it moves the adjustable jaw closer or farther away from the fixed jaw.
- Handle: The long part you hold to apply torque to the wrench. It’s typically made of steel, aluminum, or plastic, depending on the model.
How to Use an Adjustable Wrench Properly
Using an adjustable wrench might seem simple, but there are a few key tips that will help you get the best results and avoid damaging the tool or the fastener. Follow these steps to use your adjustable wrench like a pro:
Step 1: Choose the Right Wrench for the Job
Before you start, ensure you’re using the right size adjustable wrench for the job. If the wrench is too large or too small for the fastener, it will be harder to use effectively and could slip, leading to injury or damage to the fastener. An adjustable wrench should be able to fit snugly around the nut or bolt, with only a little extra room to adjust.
Step 2: Adjust the Jaw to Fit the Fastener
To adjust the wrench, loosen the thumb screw (or adjustment knob) by turning it counterclockwise. Slide the movable jaw so it fits snugly around the nut or bolt you need to tighten or loosen. Ensure that the jaws completely grip the fastener on opposite sides to provide maximum contact and reduce the risk of slipping.
- Tip: The jaw should be adjusted so that it’s slightly larger than the nut or bolt. When you tighten the wrench around the fastener, the movable jaw should fit tightly, with minimal play, to ensure a secure grip.
Step 3: Grip the Wrench Correctly
Hold the wrench by the handle, and make sure that your hand is secure and comfortable. For maximum leverage, grip the wrench at the far end of the handle. Your other hand can be used to hold the fastener steady if needed.
- Tip: Always apply force in the correct direction. If you are tightening the bolt, turn the wrench clockwise. If you are loosening it, turn the wrench counterclockwise.
Step 4: Apply Pressure Properly
Once the wrench is securely attached to the fastener, apply steady and consistent pressure. Turn the wrench by rotating the handle, not by twisting it sideways. The force should come from your arm and body, not from your wrist.
- Tip: Avoid using excessive force, as this can damage both the wrench and the fastener. If the fastener is too tight to turn by hand, use a longer wrench or a breaker bar for more torque.
Step 5: Maintain Proper Alignment
As you turn the wrench, make sure it stays aligned with the fastener. This will prevent the jaws from slipping and causing damage. Avoid putting the wrench at an angle to the fastener, as this can cause it to slip off.
- Tip: If the adjustable wrench starts to slip or you feel the jaws are loosening, stop and check to see if the wrench is still properly adjusted. Tighten the thumb screw again if needed.
Step 6: Finish the Task
Once the nut or bolt is either tightened or loosened to your desired level, carefully remove the adjustable wrench from the fastener. Be cautious when loosening tight fasteners, as they can suddenly come free and cause injury or damage.
Common Mistakes to Avoid When Using an Adjustable Wrench
While using an adjustable wrench may seem straig
