ADVERTISEMENT
#### **Instructions**:
**Step 1: Prep the Ribs**
1. **Remove the membrane**: Lay the rack of ribs on a cutting board, meat-side down. Use a knife to gently lift one corner of the membrane. Grab the edge with a paper towel and pull it off in one smooth motion. Discard the membrane.
2. **Trim the ribs**: If necessary, trim any excess fat or loose bits from the ribs. You can also remove the rib tips (if they’re too bony or thin), though this is optional.
**Step 2: Make the Dry Rub**
In a small bowl, combine all of the dry rub ingredients. Mix well. This dry rub will infuse the ribs with a rich, smoky flavor. Generously coat both sides of the ribs with the rub, making sure to press it into the meat. Let the ribs sit with the rub for at least 30 minutes. If you have more time, refrigerate them for up to 4 hours or overnight to let the flavors fully penetrate.
**Step 3: Preheat the Oven**
Preheat your oven to 275°F (135°C). This low temperature will ensure the ribs cook slowly and become tender.
**Step 4: Cook the Ribs**
Place the ribs on a baking sheet, bone-side down. You can line the baking sheet with aluminum foil for easy cleanup. Cover the ribs with another piece of aluminum foil, ensuring that they are tightly sealed to keep the moisture in.
Bake the ribs in the preheated oven for 2.5 to 3 hours. During this time, the fat will render, and the meat will begin to pull away from the bone. You’ll know the ribs are ready when they are tender but not falling apart.
**Step 5: Prepare the BBQ Sauce**
While the ribs are cooking, prepare the barbecue sauce. In a small saucepan, combine the barbecue sauce, honey, apple cider vinegar, and Worcestershire sauce. Heat over medium-low heat for about 5 minutes, stirring occasionally, until the sauce is smooth and slightly thickened. Taste and adjust the seasoning, adding more honey for sweetness or vinegar for tang if desired.
**Step 6: Finish the Ribs with Sauce**
Once the ribs are cooked, remove them from the oven. Preheat your grill or broiler to medium-high heat. Brush a generous amount of the prepared barbecue sauce onto both sides of the ribs. If using a grill, place the ribs directly on the grill grates, meat-side up, and cook for about 5-10 minutes, turning occasionally and basting with more sauce. If using a broiler, place the ribs under the broiler for 3-5 minutes, watching closely to prevent the sauce from burning.
**Step 7: Serve and Enjoy**
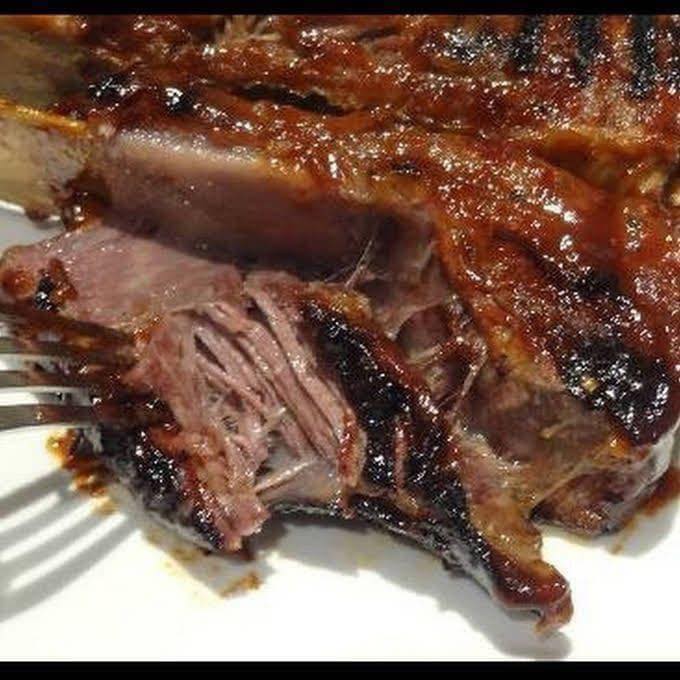
Once the ribs are caramelized and slightly crispy on the outside, remove them from the heat. Allow them to rest for a few minutes before slicing between the bones. Serve the ribs with extra barbecue sauce on the side for dipping. Pair them with your favorite sides, such as coleslaw, baked beans, or grilled vegetables, and enjoy!
—
### **Tips for Success**
– **Slow and Steady**: Don’t rush the cooking process. Low and slow is key to getting the tender, juicy ribs that everyone loves. The long cooking time allows the flavors to develop and the meat to become incredibly tender.
– **Experiment with Flavors**: This recipe offers a great base for customization. Feel free to tweak the dry rub ingredients or the barbecue sauce to match your personal taste. Adding a little brown sugar to the barbecue sauce can enhance the sweetness, or a splash of hot sauce can give the dish a spicy kick.
– **Grilling or Broiling**: If you prefer a smoky flavor, consider finishing the ribs on the grill. The char from the grill will add a depth of flavor that perfectly complements the sweet and tangy barbecue sauce.
– **Make Extra**: Ribs are even better the next day. Store any leftovers in an airtight container in the refrigerator, and reheat them gently in the oven or microwave. You can also freeze leftover ribs for a later date.
—
### **Conclusion**
This recipe for **Hubby Loved the Ribs I Made! Definitely a Keeper!** has become a go-to in our household. The combination of the perfectly seasoned dry rub, slow cooking, and the finishing touch of sweet barbecue sauce results in ribs that are tender, juicy, and packed with flavor. Whether you’re making them for a family dinner, a weekend barbecue, or a special celebration, these ribs are sure to impress.
With the tips and techniques shared in this article, you now have the tools to make these ribs your own, customizing the flavors to suit your family’s preferences. So, grab your ingredients, fire up the oven or grill, and get ready to enjoy some of the best ribs you’ve ever made. Trust me—this recipe will become a keeper in your home, just as it has in mine!
ADVERTISEMENT
ADVERTISEMENT
