ADVERTISEMENT
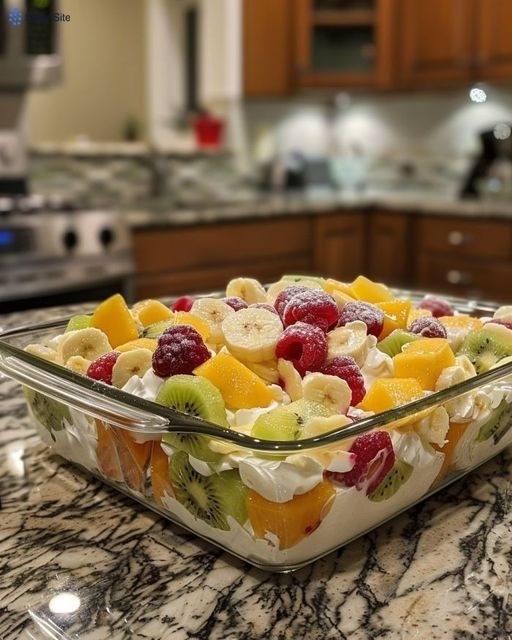
Nana’s Frozen Fruit Salad: A Timeless Family Favorite! 🍓🍍🍇
When it comes to comfort food, few dishes hold the same nostalgic charm as Nana’s Frozen Fruit Salad. This simple, sweet, and refreshingly cool dessert has been a family favorite for generations. Whether it’s a summer barbecue, a holiday gathering, or just a special treat to enjoy on a hot day, this frozen fruit salad has a way of bringing everyone to the table with smiles on their faces.
With its vibrant mix of fruits, creamy texture, and subtle sweetness, Nana’s Frozen Fruit Salad is the kind of dish that everyone remembers and looks forward to. It’s a versatile dessert that you can make ahead of time, making it perfect for busy hosts or anyone looking to impress guests with minimal effort. But the real magic lies in the memories it evokes—the love and care that go into every scoop.
Let’s dive into the recipe that’s been passed down through generations and discover why Nana’s Frozen Fruit Salad remains a classic treat that never goes out of style.
Why You’ll Love Nana’s Frozen Fruit Salad:
- Refreshing and Cool: With its combination of frozen fruit and creamy base, this salad is the perfect way to cool off on a warm day. It’s both refreshing and satisfying!
- Simple Yet Flavorful: Made with just a few basic ingredients, Nana’s Frozen Fruit Salad packs a punch of flavor. The mix of fruits and creamy texture makes every bite a sweet delight.
- Make-Ahead Friendly: One of the best things about this dessert is that it can be made in advance and stored in the freezer. It’s a great make-ahead option for busy schedules, and it’s always ready when you need it!
- Versatile: You can customize this fruit salad to fit your preferences or what fruits are in season. It’s easy to swap out fruits or add extras like marshmallows or coconut to make it your own.
Ingredients:
- 1 can (15 oz) of pineapple chunks, drained
- 1 cup of mandarin oranges, drained
- 1 cup of maraschino cherries, halved (optional, but they add a nice touch!)
- 1/2 cup of chopped strawberries (fresh or frozen)
- 1/2 cup of grapes, halved
- 1 cup of sour cream (or Greek yogurt for a tangier flavor)
- 1 cup of whipped topping (such as Cool Whip)
- 1/2 cup of mini marshmallows (optional, but they add a fun texture!)
- 1 tablespoon of fresh lime or lemon juice (optional, for a little zest)
- 1/4 cup of chopped nuts (such as walnuts or pecans, optional for extra crunch)
Instructions:
Step 1: Prepare the Fruit
- Drain and Chop: Start by draining all the canned fruits (pineapple, mandarin oranges, and maraschino cherries). For the fresh fruit, chop the strawberries and slice the grapes in half to make them bite-sized. The key to this fruit salad is to ensure the fruit is well-drained to prevent the salad from becoming too watery when frozen.
- Mix the Fruit Together: In a large bowl, gently combine the pineapple, mandarin oranges, strawberries, grapes, and cherries (if using). Make sure the fruit is evenly distributed, but try not to mash it as you mix. The goal is to keep the fruit pieces intact for texture.
Step 2: Make the Creamy Base
- Combine Sour Cream and Whipped Topping: In a separate smaller bowl, mix the sour cream (or Greek yogurt) and whipped topping together until smooth. This forms the creamy base of your frozen fruit salad. If you prefer a tangy flavor, go for the Greek yogurt—it adds a slight tartness that complements the sweetness of the fruit.
- Optional Zest: For a little added brightness, stir in a tablespoon of fresh lime or lemon juice. This adds a zing that really brings the whole dish together!
Step 3: Fold the Fruit and Cream Together
- Combine the Fruit and Creamy Mixture: Carefully fold the creamy mixture into the fruit, being gentle to maintain the integrity of the fruit pieces. Mix everything until the fruit is evenly coated in the creamy dressing.
- Add the Marshmallows and Nuts: If you’re using mini marshmallows, stir them in at this stage. You can also add chopped nuts for extra crunch if desired. This step is optional but adds a fun and delicious twist to the texture of the fruit salad.
Step 4: Freeze and Set
- Transfer to a Freezer-Safe Dish: Spoon the fruit salad mixture into a freezer-safe container or dish, spreading it evenly. You can use a glass baking dish, a loaf pan, or even individual serving cups if you prefer individual portions.
- Freeze for 4-6 Hours: Cover the dish with plastic wrap or a lid and freeze for at least 4 to 6 hours, or overnight for best results. The fruit salad will harden and become beautifully frozen while retaining its creamy texture.
Step 5: Serve and Enjoy!
- Let It Thaw Slightly: Once it’s frozen and ready to serve, remove the fruit salad from the freezer and let it sit at room temperature for a few minutes. This will make it easier to scoop and serve.
