ADVERTISEMENT
## Step-by-Step Instructions for Making No-Bake Pineapple Cream Dessert
### Step 1: Prepare the Crust
The crust forms the base of your **No-Bake Pineapple Cream Dessert**, and it’s incredibly simple to make.
1. **Crush the Graham Crackers**: Start by crushing the graham crackers into fine crumbs. You can do this by placing them in a food processor or putting them in a zip-top bag and crushing them with a rolling pin. Aim for fine crumbs, which will help the crust hold together better.
2. **Mix the Crust Ingredients**: In a medium-sized bowl, combine the graham cracker crumbs, granulated sugar, melted butter, and salt. Mix until the crumbs are fully coated with butter and the mixture has a sand-like consistency.
3. **Press into a Pan**: Transfer the crust mixture into a 9×9-inch square baking dish (or any similar-sized dish) and press it down firmly with the back of a spoon or a flat-bottomed glass. This helps to create an even, compact base.
4. **Chill the Crust**: Place the dish in the refrigerator for about 10-15 minutes to allow the crust to firm up. This step ensures that the crust stays intact when you add the creamy filling on top.
### Step 2: Make the Pineapple Cream Filling
While the crust chills, you can prepare the creamy pineapple filling.
1. **Beat the Cream Cheese**: In a large mixing bowl, beat the softened cream cheese with an electric hand mixer or stand mixer on medium speed until it becomes smooth and creamy. Make sure there are no lumps.
2. **Add the Powdered Sugar**: Gradually add the powdered sugar to the cream cheese, beating it until well combined. The powdered sugar helps to sweeten the filling without making it grainy.
3. **Incorporate the Pineapple Juice and Vanilla**: Add the pineapple juice (from the can or fresh juice) and vanilla extract to the mixture. The juice adds a nice tropical flavor to the filling, and the vanilla enhances the overall taste.
4. **Fold in the Whipped Topping**: Gently fold in the whipped topping (or whipped cream) into the cream cheese mixture. Be careful not to deflate the whipped cream. Use a spatula and fold it in slowly to maintain the light, airy texture.
5. **Add the Pineapple**: Stir in the drained crushed pineapple. Be sure to press out any excess liquid from the pineapple to avoid making the filling too runny. The pineapple will add that essential fruity flavor and a bit of texture to the dessert.
6. **Optional Thickening**: If you prefer a firmer filling, you can thicken it by mixing in cornstarch (dissolved in a small amount of water) into the pineapple mixture. This step is optional, as the filling will thicken naturally once it chills in the fridge.
### Step 3: Assemble the Dessert
Now that the crust and filling are ready, it’s time to assemble the dessert.
1. **Layer the Filling**: Take the chilled graham cracker crust from the refrigerator and carefully spread the pineapple cream filling over the crust. Use a spatula to smooth the top and ensure an even layer.
2. **Chill the Dessert**: Place the dessert back into the refrigerator and let it chill for at least 3-4 hours, or overnight for the best results. Chilling the dessert allows the filling to set, making it easier to slice and serve.
### Step 4: Garnish and Serve
Once the dessert has set, it’s time to give it a tropical finishing touch.
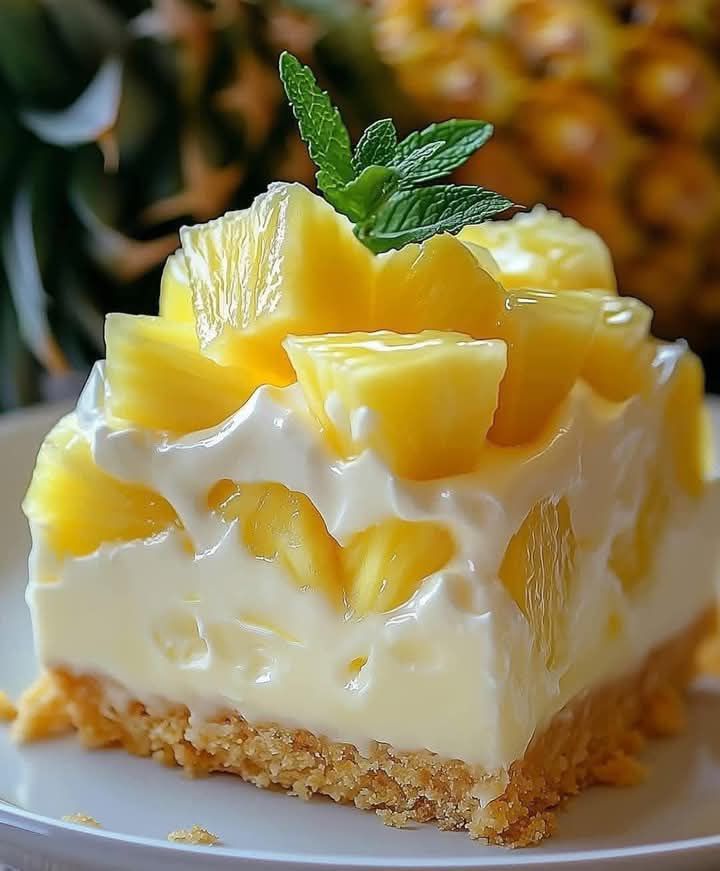
1. **Add Toppings**: Garnish the top with pineapple chunks, coconut flakes, and maraschino cherries. These toppings not only enhance the visual appeal of the dessert but also add additional layers of flavor and texture.
2. **Slice and Serve**: Slice the dessert into squares or rectangles and serve chilled. The creamy filling will have a firm texture, while the crust will provide a nice crunch, making every bite an enjoyable experience.
## Tips and Tricks for the Perfect No-Bake Pineapple Cream Dessert
– **Use Fresh Pineapple**: While canned pineapple is a convenient option, fresh pineapple will give the dessert an even more vibrant, tangy flavor. If you use fresh pineapple, just make sure to cut it into small chunks or crush it before adding it to the filling.
– **Use Room Temperature Cream Cheese**: This ensures that the cream cheese mixes smoothly with the powdered sugar and pineapple juice, preventing any lumps from forming in the filling.
– **Make It Ahead of Time**: This dessert is great for preparing ahead of time. The longer it chills, the more the flavors meld together, and the texture becomes firmer, making it easier to slice.
– **Gluten-Free Option**: For a gluten-free version, simply use gluten-free graham crackers or a different type of cookie crumb (such as gluten-free vanilla wafers) for the crust.
– **For a Vegan Version**: Substitute the cream cheese with a vegan cream cheese alternative, use dairy-free whipped topping, and opt for a plant-based butter substitute in the crust.
## Storing and Leftovers
If you have any leftovers (which is unlikely, considering how delicious this dessert is!), you can store the **No-Bake Pineapple Cream Dessert** in the refrigerator. Cover the dish with plastic wrap or store it in an airtight container for up to 3-4 days. For longer storage, you can freeze it, but note that the texture may change slightly after freezing and thawing.
## Conclusion: A Refreshing Tropical Treat
**No-Bake Pineapple Cream Dessert** is a perfect combination of creamy, tangy, and sweet, offering a refreshing tropical twist on classic dessert flavors. With its easy-to-follow recipe, minimal prep time, and no-bake preparation, it’s an ideal treat for any occasion. Whether you’re hosting a summer get-together, looking for a quick weeknight dessert, or craving something tropical, this dessert will always be a hit. The next time you’re in need of a crowd-pleasing, no-fuss dessert, reach for this simple, delicious recipe. It’s sure to bring a taste of paradise to your table!
