ADVERTISEMENT
### **Ingredients You’ll Need**
One of the best things about **Pillsbury Biscuit Garlic Butter Cheese Bombs** is that they use simple ingredients that you likely already have in your pantry and fridge. Here’s what you’ll need:
#### **For the Cheese Bombs:**
– **1 can of Pillsbury Grands! Biscuits** (or any Pillsbury biscuit dough)
– **1 cup of shredded mozzarella cheese** (or a cheese of your choice, such as cheddar or a combination of cheeses)
– **1 tablespoon of garlic powder** (or you can use fresh minced garlic for a more intense flavor)
– **½ teaspoon of dried Italian seasoning** (optional, but adds great flavor)
– **2 tablespoons of melted butter** (unsalted butter is preferred for better control over salt levels)
#### **For the Garlic Butter Coating:**
– **3 tablespoons of melted butter** (unsalted, for the coating)
– **2 cloves garlic, minced** (or 1 teaspoon of garlic powder if you don’t have fresh garlic)
– **1 teaspoon of fresh parsley** (optional, for garnish and added flavor)
– **A pinch of salt** (to taste)
The ingredients are simple, but the combination of garlic butter and cheese will give you an indulgent snack that’s perfect for any occasion.
—
### **Step-by-Step Guide to Making Pillsbury Biscuit Garlic Butter Cheese Bombs**
Making these cheese bombs is straightforward and doesn’t take much time. Follow this step-by-step guide to ensure your cheese bombs come out perfectly every time.
#### **Step 1: Preheat the Oven**
Preheat your oven to 375°F (190°C). This is the ideal temperature for baking the Pillsbury biscuits to a golden, crispy exterior while ensuring that the cheese inside melts to perfection.
#### **Step 2: Prepare the Biscuit Dough**
Open the can of Pillsbury Grands! Biscuits and separate them. On a clean, flat surface, flatten each biscuit into a circle using your fingers or a rolling pin. The dough should be flattened just enough to form a small round shape that you can stuff with cheese.
#### **Step 3: Add the Cheese Filling**
Place about a tablespoon of shredded mozzarella cheese (or your choice of cheese) in the center of each flattened biscuit. You can also add a little bit of garlic powder and Italian seasoning on top of the cheese to intensify the flavor.
#### **Step 4: Fold the Biscuit**
Carefully fold the edges of the biscuit dough around the cheese filling to form a ball. Pinch the seams together to ensure the cheese stays enclosed inside the biscuit. You’ll want the dough to be fully sealed, so none of that gooey cheese escapes during baking.
#### **Step 5: Arrange the Cheese Bombs on a Baking Sheet**
Place each filled biscuit seam-side down on a greased or parchment paper-lined baking sheet. Arrange them close together, as they will expand while baking, but make sure there’s enough space for them to bake evenly.
#### **Step 6: Prepare the Garlic Butter Coating**
In a small bowl, combine the 3 tablespoons of melted butter with the minced garlic, fresh parsley, and a pinch of salt. Stir well to combine. This garlic butter will coat the outside of your cheese bombs, giving them that irresistible garlic flavor.
#### **Step 7: Coat the Cheese Bombs with Garlic Butter**
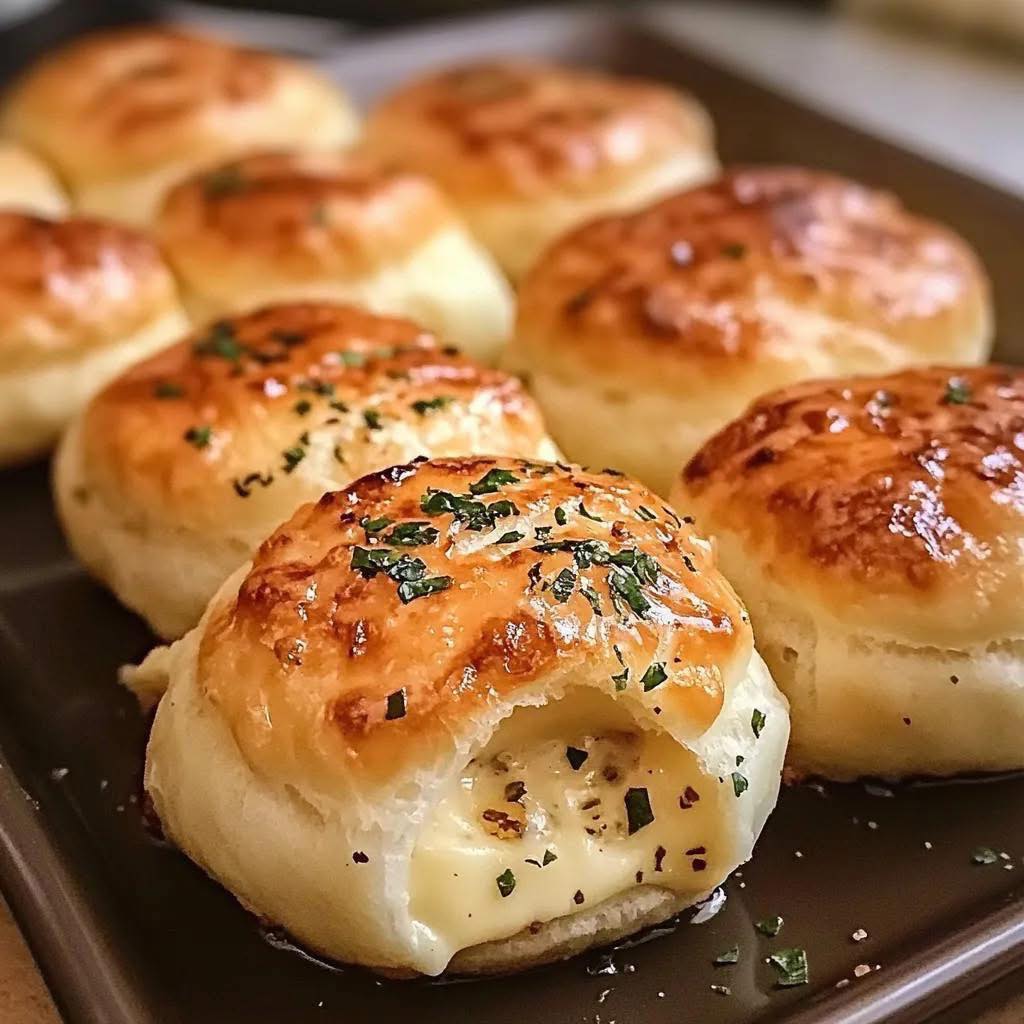
Use a spoon or a pastry brush to generously brush the garlic butter mixture over the tops of each biscuit. Make sure the garlic butter covers the entire surface to create that golden, garlicky crust.
#### **Step 8: Bake the Cheese Bombs**
Place the baking sheet in the preheated oven and bake the cheese bombs for 10-12 minutes, or until they are golden brown and puffed up. Keep an eye on them to ensure they don’t burn.
#### **Step 9: Serve and Enjoy**
Once baked, remove the cheese bombs from the oven and let them cool for a minute or two. Serve them hot, garnished with extra parsley if desired, and enjoy the gooey, cheesy, garlicky goodness!
For Complete Cooking STEPS Please Head On Over To Next Page Or Open button (>) and don’t forget to SHARE with your Facebook friends
