ADVERTISEMENT
How to Make Salted Caramel Kentucky Butter Cake: Step-by-Step Guide
While the steps involved in making **Salted Caramel Kentucky Butter Cake** are simple, it requires some attention to detail to ensure that the cake is perfectly moist, the caramel glaze is silky smooth, and the flavors come together in harmony. Here’s a detailed guide to help you make this incredible dessert.
#### Step 1: Preheat Your Oven and Prepare the Cake Pan
Before you start mixing the ingredients, preheat your oven to **325°F (163°C)**. Grease and flour a 9×13-inch baking pan, or you can line it with parchment paper to ensure that the cake doesn’t stick. Properly preparing the pan will help your cake come out easily once it’s baked.
#### Step 2: Mix the Dry Ingredients
In a medium-sized bowl, whisk together the **flour**, **baking powder**, and **salt**. This step ensures that the dry ingredients are well combined, helping to prevent clumps and ensuring an even distribution of the baking powder in the batter.
#### Step 3: Cream the Butter and Sugar
In a large mixing bowl, use an electric mixer or a stand mixer to beat the softened **butter** and **sugar** together until light and fluffy. This process typically takes about 3-5 minutes. Creaming the butter and sugar properly helps incorporate air into the batter, contributing to the cake’s soft, moist texture.
#### Step 4: Add the Eggs and Vanilla
Add the **eggs**, one at a time, to the butter and sugar mixture, mixing well after each addition. Then, add the **vanilla extract** and beat until fully incorporated. The eggs provide moisture and structure to the cake, while the vanilla enhances the flavor profile.
#### Step 5: Alternate Adding the Dry Ingredients and Buttermilk
With the mixer on low speed, alternate adding the dry ingredients and the **buttermilk** to the batter. Start by adding about a third of the dry ingredients, then a third of the buttermilk, mixing gently to incorporate each addition. Repeat until all ingredients are added. Be sure not to overmix the batter, as this can cause the cake to be dense.
#### Step 6: Bake the Cake
Pour the cake batter into the prepared pan, spreading it out evenly with a spatula. Bake in the preheated oven for **45-50 minutes**, or until a toothpick inserted into the center comes out clean. The cake should be golden brown on top and firm to the touch.
Once done, remove the cake from the oven and let it cool in the pan for about 10 minutes. Then, transfer the cake to a wire rack to cool completely.
#### Step 7: Prepare the Salted Caramel Glaze
While the cake is cooling, you can make the **salted caramel glaze**. In a medium saucepan, melt the **butter** over medium heat. Once melted, add the **brown sugar** and bring the mixture to a boil, stirring constantly. Let it boil for about 2-3 minutes, allowing the sugar to dissolve and the mixture to thicken slightly.
Carefully add the **heavy cream** to the caramel mixture. It may bubble up, so stir slowly and continuously. Cook for an additional 1-2 minutes until the glaze is smooth and glossy. Remove from heat and stir in the **vanilla extract** and **sea salt**. The salted caramel glaze should be smooth, rich, and slightly thickened.
#### Step 8: Glaze the Cake
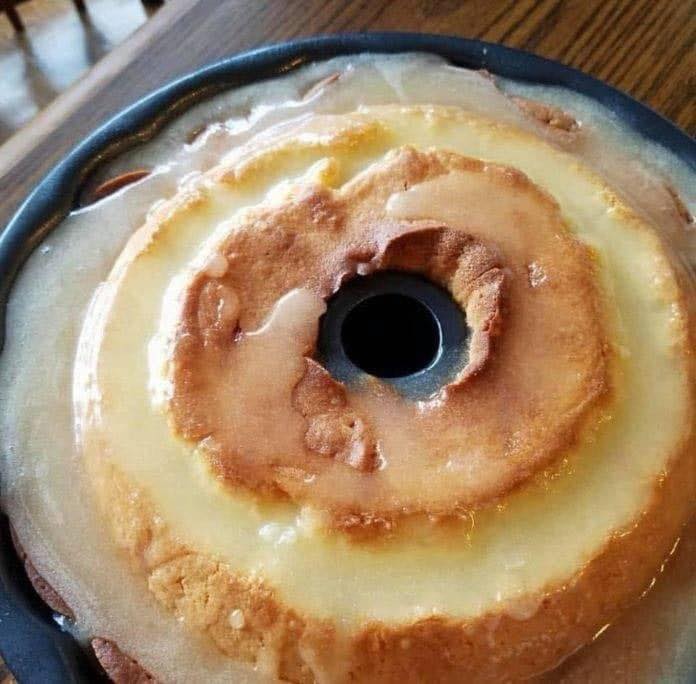
Once the cake has cooled, pour the **salted caramel glaze** evenly over the top of the cake. Let the glaze soak into the cake for a few minutes before serving. If you’d like, you can drizzle extra caramel over the cake or sprinkle a little flaky sea salt on top for extra flavor and texture.
#### Step 9: Serve and Enjoy
Slice the cake into squares and serve. This cake pairs wonderfully with a dollop of whipped cream or a scoop of vanilla
ice cream for an even more indulgent dessert experience.
### Tips for Success
1. **Use Room Temperature Ingredients**: For best results, make sure your butter, eggs, and buttermilk are all at room temperature. This will help the ingredients combine more smoothly and prevent a lumpy batter.
2. **Don’t Overmix the Batter**: Overmixing the batter can cause the cake to become dense. Mix until just combined for a light and fluffy cake.
3. **Adjust the Salt**: The salted caramel glaze relies on the perfect balance of salt to enhance the sweetness. Taste the caramel glaze and adjust the amount of salt to your preference.
4. **Let the Cake Cool Before Glazing**: Ensure that the cake is completely cool before applying the glaze. This prevents the glaze from melting into the cake too quickly and ensures it sits nicely on top.
5. **Make Ahead**: The cake can be baked a day in advance and stored at room temperature. The glaze can also be made ahead and stored in the refrigerator. Simply reheat it before drizzling it over the cake.
### Conclusion
**Salted Caramel Kentucky Butter Cake** is the perfect dessert for anyone who loves a combination of rich, buttery flavor with a touch of savory complexity. Whether you’re celebrating a special occasion or simply treating yourself, this cake is sure to impress with its incredible flavor and texture. With a moist, decadent cake base and a luscious salted caramel glaze, it’s a dessert that strikes the perfect balance between sweet and salty.
By following the step-by-step guide and tips shared in this article, you’ll be able to create a stunning, indulgent dessert that is perfect for any occasion. Whether enjoyed with a cup of coffee, a scoop of ice cream, or simply on its own, **Salted Caramel Kentucky Butter Cake** will become a new favorite in your baking repertoire. Enjoy!
