ADVERTISEMENT
vel
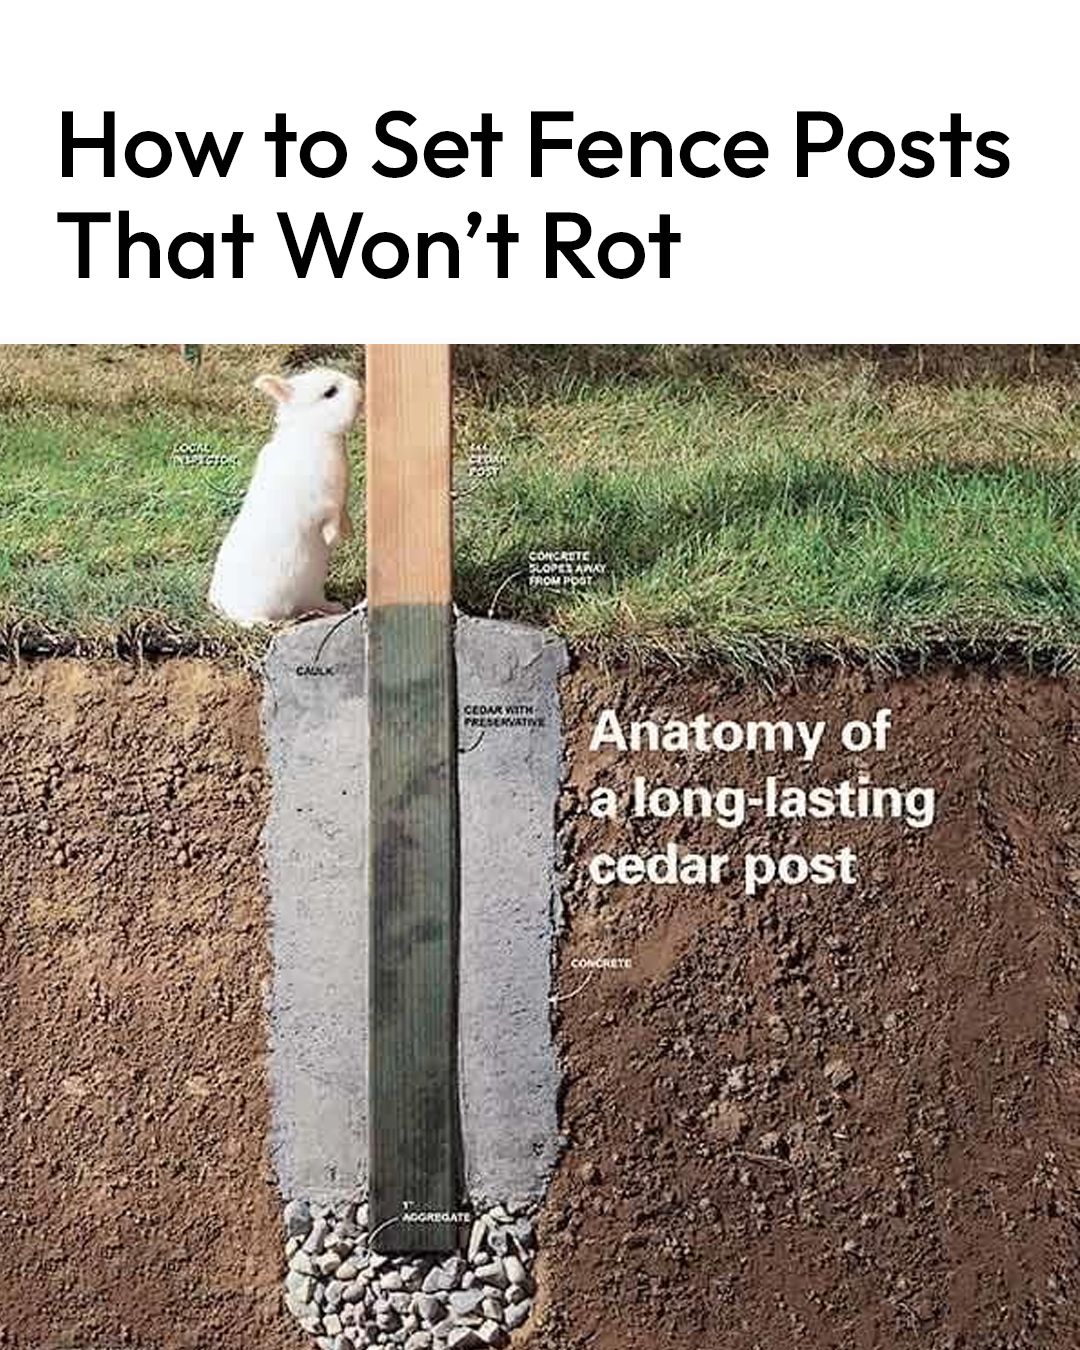
There are two common methods for securing the post in the ground: using concrete or gravel.
- Using Concrete: For added stability, pour quick-setting concrete around the post. This is particularly helpful for areas with loose or unstable soil. Make sure to follow the manufacturer’s instructions on mixing and setting times.
- Using Gravel: If you want to avoid using concrete, you can simply backfill the hole with gravel. This method provides excellent drainage and will help to prevent moisture buildup around the cedar post. Make sure to tamp down the gravel as you fill the hole to avoid air pockets.
Regardless of which method you use, ensure that the post is level and properly aligned before the material sets.
7. Seal the Post (Optional)
Although cedar is naturally resistant to rot, applying a protective sealant or wood preservative can enhance its durability and lifespan, especially in areas with high humidity or extreme weather conditions.
- Use a clear wood sealer or stain to protect the wood from moisture and UV damage.
- Make sure to apply the sealant to the entire post, including the portion that will be buried underground, to prevent moisture from seeping in.
8. Allow the Concrete to Set
If you used concrete, allow it to set according to the manufacturer’s instructions, typically for 24 to 48 hours. During this time, ensure that the post remains level and straight.
9. Finishing Touches
Once the concrete has set (if you used it), or if you’re using gravel, you can now proceed to attach the rails and finish your fence. Continue with the rest of your fence-building process, whether it’s adding cross rails or attaching the fence panels.
Additional Tips for Maintaining Cedar Fence Posts
- Regular Inspection: Check your fence posts periodically for signs of wear or damage. Look for any visible cracks or areas of rot, especially at the base of the post where it’s buried in the ground.
- Trim Vegetation: Keep plants and shrubs from growing too close to the fence posts. Overgrown vegetation can trap moisture against the wood, leading to potential rot.
- Proper Drainage: Ensure that the ground around your fence posts slopes away from the posts to direct water away. Poor drainage is one of the leading causes of wood rot.
- Reapply Sealant: Over time, the protective coating may wear off. Reapply a wood sealer or stain every couple of years to keep your cedar posts looking their best.
Conclusion
Setting cedar fence posts that won’t rot requires a combination of quality materials, proper installation techniques, and ongoing maintenance. By taking the time to carefully prepare the site, use proper drainage techniques, and secure the posts in the ground, you can ensure that your cedar fence remains sturdy and beautiful for many years to come. Remember, the key to preventing rot is to protect the base of the posts from moisture, so be sure to follow these steps and maintain your fence regularly.
