ADVERTISEMENT
#### Step-by-Step Instructions
##### Step 1: Prepare the Crust
The first step in making this creamy no-bake dessert is preparing the crust. The crust gives the dessert a nice, crunchy base that balances out the smooth cream cheese filling.
1. **Crush the Graham Crackers**: Start by crushing the graham crackers into crumbs. You can do this by placing them in a plastic bag and using a rolling pin to crush them, or by pulsing them in a food processor until you get fine crumbs.
2. **Mix the Crust Ingredients**: In a medium bowl, combine the graham cracker crumbs, melted butter, and sugar (if using). Mix everything together until the crumbs are well coated with the butter and the mixture starts to hold together when pressed.
3. **Press the Mixture into the Pan**: Press the graham cracker mixture into the bottom of a 9-inch pie dish or an 8×8-inch square baking pan. Use the back of a spoon or your fingers to evenly press the crumbs into the base, creating a firm, even layer.
4. **Chill the Crust**: Once the crust is evenly pressed, place it in the refrigerator to chill for about 15 minutes. This helps it set and firm up before adding the cream cheese filling.
##### Step 2: Make the Cream Cheese Filling
The cream cheese filling is the star of this dessert—it’s rich, creamy, and the perfect balance of sweet and tangy. Here’s how to make it:
1. **Beat the Cream Cheese**: In a large mixing bowl, beat the softened cream cheese using a hand mixer or stand mixer until smooth and creamy. This helps break up any lumps and ensures the filling has a silky texture.
2. **Add Powdered Sugar and Vanilla**: Add the powdered sugar and vanilla extract to the cream cheese. Continue mixing until everything is fully incorporated and the mixture is smooth and creamy.
3. **Whip the Cream**: In a separate bowl, whip the heavy cream using a hand mixer or stand mixer until stiff peaks form. The whipped cream should be firm and hold its shape when you lift the beaters out of the bowl.
4. **Fold the Whipped Cream into the Cream Cheese Mixture**: Gently fold the whipped cream into the cream cheese mixture. Use a spatula to carefully combine the two, being cautious not to deflate the whipped cream. This is what gives the filling its light, airy texture.
5. **Add Lemon Juice (Optional)**: If you’d like to add a touch of tang to the filling, fold in a tablespoon of lemon juice. This adds a subtle brightness and enhances the overall flavor of the dessert.
##### Step 3: Assemble the Dessert
Now that you have both the crust and the filling ready, it’s time to assemble the dessert!
1. **Spread the Cream Cheese Filling**: Take the chilled crust from the refrigerator and carefully spread the cream cheese filling over the crust, using a spatula to smooth it into an even layer.
2. **Chill the Dessert**: Place the assembled dessert back into the refrigerator and let it chill for at least 4 hours, or overnight if possible. The longer it sits, the better the flavors meld together and the firmer the filling becomes.
##### Step 4: Add the Toppings
Before serving, you can add a variety of toppings to give the dessert a festive touch. Here are a few ideas:
– **Fresh Berries**: Top the dessert with a mix of fresh berries like strawberries, raspberries, blueberries, or blackberries. The bright colors and natural sweetness of the berries make a beautiful and refreshing topping.
– **Chocolate Drizzle**: For a richer, more decadent touch, drizzle some melted chocolate or chocolate syrup over the top of the dessert. This adds a luxurious flavor that pairs perfectly with the creamy filling.
– **Crushed Nuts**: If you like a bit of crunch, sprinkle some crushed nuts—such as almonds, walnuts, or pecans—on top. They add texture and flavor that contrasts nicely with the creamy filling.
– **Whipped Cream**: For an extra indulgence, you can top the dessert with a dollop of freshly whipped cream.
##### Step 5: Serve and Enjoy!
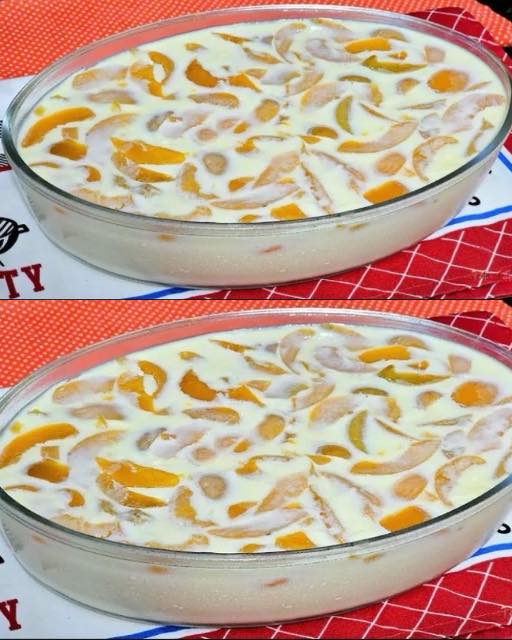
Once the dessert has chilled and the toppings are in place, slice and serve! You’ll be left with a creamy, luscious treat that will leave everyone asking for seconds. Not only is it simple and delicious, but the flavors and textures work together perfectly, making this dessert a festive highlight at any holiday gathering.
### Customizing the Recipe
While this no-bake dessert recipe is already delicious, there are plenty of ways to customize it for your specific tastes. Here are a few variations you can try:
1. **Flavor Variations**: Add flavored extracts like almond or coconut to the cream cheese filling for a unique twist.
2. **Fruit-Based Toppings**: If you’re not a fan of berries, you can top the dessert with other fruits like sliced peaches, kiwi, or even caramelized apples for a wintery feel.
3. **Coconut Crust**: For a tropical flair, you could swap out some of the graham cracker crumbs for shredded coconut to make the crust even more flavorful.
### Conclusion
This simple, creamy no-bake dessert is the perfect addition to any holiday celebration. Not only is it quick, easy, and hassle-free, but it also provides a luxurious, rich taste that everyone will love. With its creamy filling, crunchy crust, and customizable toppings, this dessert will become a holiday staple in your home. Whether you’re celebrating Christmas, Thanksgiving, or just enjoying a cozy family meal, this no-bake dessert is sure to impress your guests and make your holiday celebrations even sweeter.
