ADVERTISEMENT
f the price you’d pay for the store version.
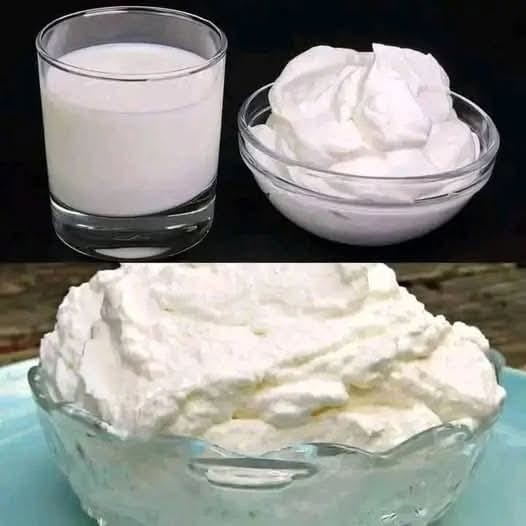
The Two Ingredients You Need
Before we jump into the recipe, let’s quickly talk about the ingredients you need. Don’t worry, they’re both basic and easy to find:
- Heavy Cream: This will form the base of your cream cheese. The high fat content will give the cream cheese that silky, rich texture we all love.
- Buttermilk: This is the secret to creating that tangy flavor that’s characteristic of cream cheese. It also helps the heavy cream to culture and thicken as it sits.
That’s it! No need for stabilizers or preservatives—just two ingredients for the creamiest spread.
How to Make Homemade Cream Cheese: A Step-by-Step Guide
Ingredients:
- 2 cups heavy cream
- 2 tablespoons buttermilk (store-bought or homemade)
Instructions:
- Combine the Ingredients:
- In a clean, medium-sized jar or glass bowl, combine the heavy cream and buttermilk. Stir gently to combine the two ingredients.
- Let it Sit and Thicken:
- Cover the jar or bowl loosely with a clean cloth or plastic wrap. Allow the mixture to sit at room temperature for 12-24 hours, depending on how thick and tangy you prefer your cream cheese. The mixture will start to thicken and form a soft, creamy texture as it cultures.
- The warmer the room, the faster the mixture will thicken, so keep an eye on it.
- Strain the Mixture:
- After the mixture has thickened, you’ll notice a slightly runny liquid (this is the whey) separating from the cream. To make your cream cheese smooth and creamy, strain the mixture using a fine mesh strainer or cheesecloth. Let it sit for a few hours to allow excess whey to drain off.
- Blend Until Smooth:
- Once strained, transfer the thickened mixture into a food processor or blender. Blend for a few minutes until the cream cheese reaches a smooth, spreadable consistency. If it’s too thick, you can add a tablespoon of cream or buttermilk to reach your desired texture.
- Season to Taste (Optional):
- At this point, you can leave your cream cheese plain, or if you like, you can season it to taste. Try adding a pinch of salt, garlic powder, or fresh herbs for an extra kick of flavor.
- Refrigerate:
- Transfer your homemade cream cheese into an airtight container and refrigerate for at least 4 hours before serving. It will firm up slightly in the fridge but remain creamy and spreadable.
Ways to Use Your Homemade Cream Cheese
Now that you’ve made your very own cream cheese, here are some fun and tasty ways to enjoy it:
- On Bagels: The classic choice! Spread it on a warm toasted bagel and top with your favorite add-ons like smoked salmon, cucumbers, or tomatoes.
- In Dips: Mix cream cheese with sour cream, herbs, and spices to make a creamy dip for vegetables, crackers, or chips.
- In Baked Goods: Use your homemade cream cheese as a filling for pastries, cakes, or brownies. It’s perfect for adding that rich, creamy texture to cheesecakes as well.
- With Crackers: Serve it as a simple spread on crackers or toast for a quick and satisfying snack.
- As a Topping: Add it to baked potatoes, scrambled eggs, or even pancakes for an indulgent finishing touch.
Tips for Success
- Quality of Ingredients: The flavor of your cream cheese depends largely on the quality of your ingredients. Opt for fresh heavy cream and buttermilk for the best results.
- Patience: The thickening process takes time, so don’t rush it. The longer it sits, the more tangy and rich the cream cheese will become.
- Flavor Variations: Get creative! You can easily customize your cream cheese by adding spices, fresh herbs, or even fruit purees (like strawberry or raspberry) for a sweet twist.
Conclusion
Making your own cream cheese at home is simple, rewarding, and downright delicious. With just two basic ingredients, you can create a smooth, creamy spread that beats store-bought versions any day. Whether you use it on bagels, as a dip, or in your favorite recipes, homemade cream cheese will elevate your dishes and impress your family and friends.
So why not give it a try? You’ll be glad you did—and who knows, your homemade cream cheese might just become a kitchen staple from now on!
