ADVERTISEMENT
Step-by-Step Guide to Repairing Cracks and Fissures in Your Home
Cracks and fissures in your walls, floors, or ceilings can be both unsightly and damaging if not addressed properly. Whether you’re dealing with small hairline cracks or larger gaps, repairing them is essential to maintain the integrity of your home and prevent further damage. Luckily, most cracks can be easily fixed with a bit of time, the right materials, and some basic know-how.
In this step-by-step guide, we’ll walk you through the process of repairing cracks and fissures in your home. Whether you’re dealing with drywall, plaster, or concrete, these tips will help you get your home back to looking pristine.
1. Assess the Type of Crack or Fissure
Before you begin repairing, it’s important to assess the type of crack or fissure you’re dealing with. Different materials (drywall, plaster, wood, etc.) and different types of cracks require different approaches.
- Hairline cracks: These are usually very thin and don’t go very deep. They’re common in drywall and plaster due to normal settling of the house.
- Structural cracks: Larger and deeper cracks that could indicate a foundation issue. These may need professional assessment.
- Expansion cracks: Often caused by seasonal changes in temperature, these cracks usually appear around windows, doors, or the foundation.
Once you identify the type of crack, gather the appropriate materials.
2. Gather Materials and Tools
Depending on the type of crack and the surface you’re working on, you will need different materials. Here’s a general list of supplies you might need for patching cracks in drywall, plaster, or concrete:
- For Drywall Cracks:
- Joint compound or spackle
- Putty knife
- Sandpaper (fine grit)
- Primer and paint
- Painter’s tape (optional)
- For Plaster Cracks:
- Plaster patching compound
- Putty knife or trowel
- Wire mesh (for large cracks)
- Sandpaper
- Primer and paint
- For Concrete Cracks:
- Concrete filler or epoxy
- Trowel or putty knife
- Wire brush or vacuum cleaner
- Sandpaper (for smoothing)
3. Prepare the Area Around the Crack
Before you start applying any filler, you’ll need to prepare the area around the crack. This is essential for ensuring a strong bond and a smooth, long-lasting repair.
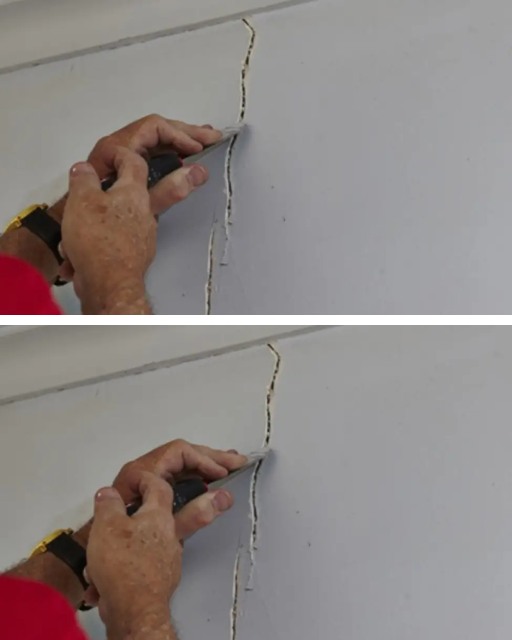
- Remove loose debris: Use a utility knife or wire brush to clean the edges of the crack. For drywall or plaster, remove any peeling paint or cracked sections to expose the damaged area.
- Widen the crack: For deep cracks, it can help to widen the crack slightly using a utility knife. This creates a better surface for the filler to adhere to.
For concrete, use a wire brush or vacuum
