ADVERTISEMENT
Gather your tools, including:
– A large mixing bowl for the Rice Krispies and marshmallow mixture.
– A medium saucepan for melting the marshmallows and butter.
– A spatula or wooden spoon to mix everything together.
#### Step 2: Melt the Butter and Marshmallows
In a medium saucepan, melt the **butter** over medium heat. Once the butter has melted, add the **mini marshmallows** to the pan. Stir continuously until the marshmallows have completely melted and combined with the butter, creating a smooth and glossy mixture.
At this point, you’ll want to add the **strawberry gelatin** (Jell-O) to the marshmallow mixture. Stir in the gelatin until it’s fully dissolved. This will infuse the marshmallow mixture with a vibrant pink color and a rich strawberry flavor.
#### Step 3: Add the Rice Krispies
Once the marshmallow mixture is smooth and the gelatin is dissolved, remove the pan from the heat. Immediately add the **Rice Krispies cereal** to the mixture. Stir gently but quickly, making sure that all the cereal is coated with the marshmallow mixture. Be careful not to crush the cereal.
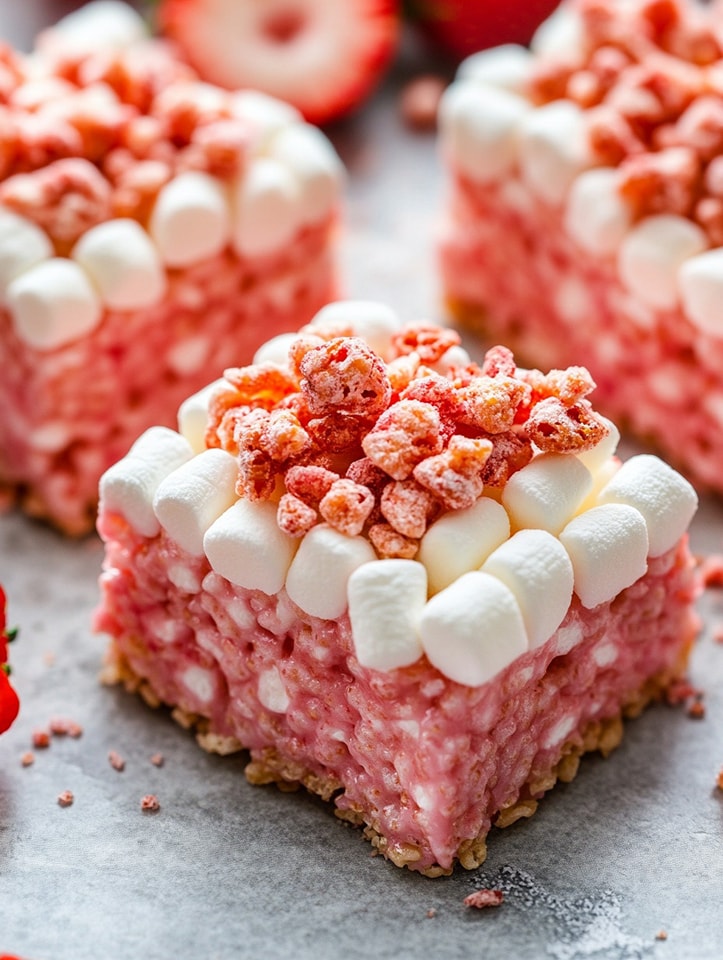
If you’re using **freeze-dried strawberries**, now is the time to add them. You can either crush them into small pieces and add them directly to the mixture for added texture or pulse them into a powder to incorporate a more uniform flavor throughout the bars.
#### Step 4: Add the Creamy Elements
To make the bars even creamier and richer, add the **heavy cream** and **sweetened condensed milk** to the mixture. Stir well to combine. The condensed milk will give the bars a silky smooth texture, while the heavy cream helps balance the sweetness and adds richness.
#### Step 5: Press the Mixture into the Pan
Once everything is fully mixed, transfer the Rice Krispies mixture to the prepared baking pan. Use a spatula or your hands to press the mixture evenly into the pan. It’s important not to press too hard, as this can make the bars too dense. Just a gentle press will do to ensure the bars hold together without becoming overly compact.
#### Step 6: Allow the Bars to Set
Allow the bars to cool and set at room temperature for about **1-2 hours**. You can speed up this process by placing the pan in the fridge for about 30 minutes. Once the bars have set and hardened, they will be ready to cut into squares or rectangles.
#### Step 7: Add the Toppings (Optional)
While the bars are cooling, you can prepare your toppings. **Fresh strawberries** can be sliced thinly and arranged neatly on top of the bars once they’re set. If you’re using **white chocolate**, you can melt the chocolate chips in a microwave-safe bowl, stirring every 30 seconds until smooth. Drizzle the melted chocolate over the bars for an extra creamy touch.
For a tropical flair, you can also sprinkle the bars with **shredded coconut** or even a few **chocolate chips** for added texture and flavor.
#### Step 8: Slice and Serve
Once the bars are fully set, use a sharp knife to slice them into squares or rectangles. Serve them immediately, or store them in an airtight container at room temperature for up to 3 days.
For Complete Cooking STEPS Please Head On Over To Next Page Or Open button (>) and don’t forget to SHARE with your Facebook friends
