ADVERTISEMENT
## **Step-by-Step Guide to Making Sugar-Free Condensed Milk**
Making sugar-free condensed milk is simple and requires minimal effort. Just follow these easy steps to create your own homemade condensed milk.
### **Step 1: Heat the Almond or Coconut Milk**
In a medium saucepan, pour in the unsweetened almond or coconut milk. Heat it over medium heat, stirring occasionally to prevent the milk from sticking to the bottom of the pan or burning. You’ll want to heat the milk until it just begins to simmer, but avoid letting it come to a full boil.
### **Step 2: Add the Sweetener**
Once the milk is heated, add the sugar substitute of your choice. If you’re using a powdered sweetener like stevia or erythritol, make sure to stir it in thoroughly until it’s fully dissolved. If you’re using a liquid sweetener like stevia or monk fruit, just add a few drops and adjust the sweetness to taste.
The amount of sweetener you add will depend on how sweet you want your condensed milk to be. Start with a smaller amount, then taste and adjust as needed. It’s important to note that different sweeteners have different levels of sweetness, so always start with less and increase if necessary.
### **Step 3: Add Butter or Coconut Oil**
Once the sweetener has dissolved, add the butter or coconut oil. This fat will help thicken the mixture and give it the creamy consistency typical of condensed milk. Stir the butter or coconut oil in until it’s fully melted and incorporated into the milk.
### **Step 4: Simmer and Reduce**
Lower the heat to a gentle simmer and allow the mixture to cook for 30 to 40 minutes, stirring occasionally. As it simmers, the milk will reduce and thicken. You’ll want to stir it every few minutes to prevent any burning or sticking. The goal is to reduce the liquid by about half, creating a thicker, creamier consistency.
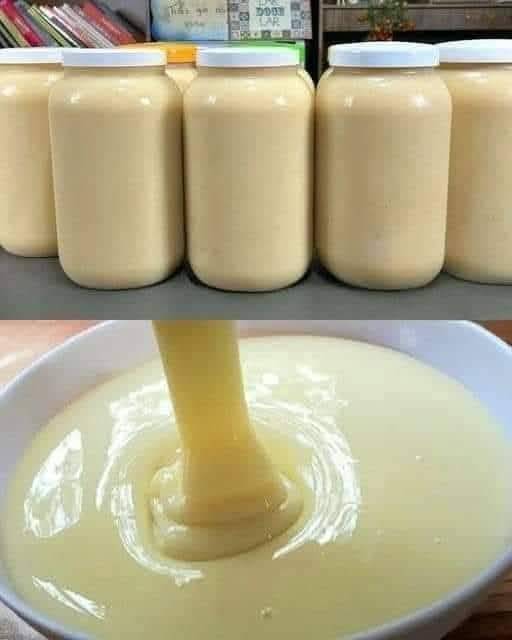
Keep in mind that the mixture will continue to thicken as it cools, so don’t worry if it’s still a bit runny after you remove it from the heat. You’ll know it’s ready when it coats the back of a spoon and has a syrupy, condensed milk-like consistency.
### **Step 5: Cool and Store**
Once the sugar-free condensed milk has thickened to your liking, remove it from the heat. Let it cool down to room temperature, and then transfer it to a glass jar or airtight container. Store it in the refrigerator for up to one to two weeks. It will continue to thicken as it cools, so don’t be surprised if it becomes even creamier after chilling.
—
## **Creative Ways to Use Sugar-Free Condensed Milk**
Now that you have a batch of delicious homemade sugar-free condensed milk, let’s explore some ways you can use it in recipes.
### **1. Sugar-Free Desserts**
Sugar-free condensed milk is an excellent base for many desserts. Use it to make sugar-free cheesecake, sugar-free fudge, or a sugar-free pie filling. It’s also great in making no-bake desserts like sugar-free ice cream or mousse.
### **2. Sugar-Free Coffee or Tea**
Add a splash of sugar-free condensed milk to your coffee or tea for a rich, creamy flavor without the added sugar. It’s perfect for making homemade sugar-free lattes or iced coffee drinks.
### **3. Sugar-Free Smoothies**
Use sugar-free condensed milk as a natural sweetener for your smoothies. Blend it with your favorite fruits, vegetables, and ice to create a creamy, refreshing drink without any added sugars.
### **4. Sugar-Free Baking**
Many baking recipes, such as cakes, muffins, and cookies, call for sweetened condensed milk. You can substitute your homemade sugar-free version in any recipe that uses condensed milk to create a lower-sugar version of your favorite treats.
### **5. Sugar-Free Sauces and Glazes**
Sugar-free condensed milk can also be used to make creamy sauces or glazes for desserts like cakes, pies, or pastries. Combine it with cocoa powder to create a chocolate glaze, or mix it with vanilla for a creamy sauce to drizzle over fruit or baked goods.
—
## **Conclusion**
Sugar-free condensed milk is a game-changer for anyone following a low-sugar, keto, or diabetic-friendly lifestyle. Not only does it allow you to enjoy the creamy texture and sweetness of traditional condensed milk, but it also gives you the freedom to control the ingredients and avoid harmful additives. This three-ingredient recipe is incredibly easy to make and can be used in a variety of recipes, making it a versatile and economical choice for your kitchen.
With just a little time and effort, you can create your own batch of sugar-free condensed milk that’s perfect for all your favorite desserts, beverages, and baking recipes. Whether you’re looking to reduce your sugar intake or simply want a healthier alternative to store-bought condensed milk, this homemade version is the way to go. So, get ready to enjoy the delicious, creamy goodness of sugar-free condensed milk and let it become a staple in your kitchen for all your sweet treats!
