ADVERTISEMENT
The Fastest Way to Get Rid of Shower Silicone Mildew 🛁✨
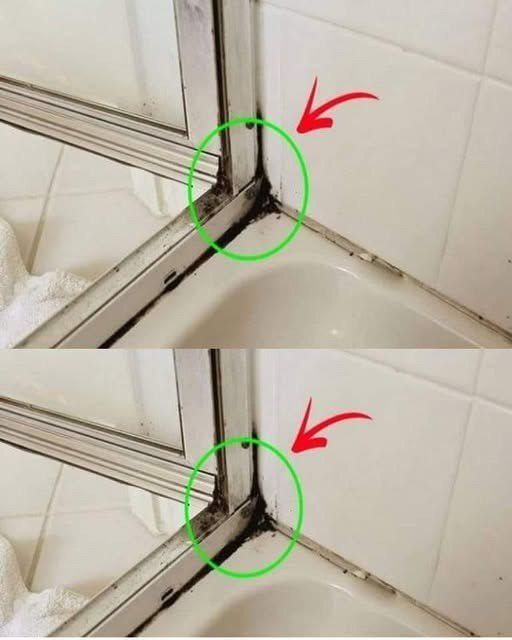
If you’ve ever noticed unsightly black or green mildew growing along the silicone seals in your shower, you know how frustrating and stubborn it can be. The humid, damp environment of a bathroom creates the perfect conditions for mildew to thrive, especially around the silicone caulk that seals gaps around your tub, shower, and tiles. But don’t worry—there’s an effective, fast way to get rid of this mildew without having to replace the silicone. Read on for simple steps and tips that will restore your shower’s freshness and cleanliness!
Why Does Mildew Form on Shower Silicone?
Mildew is a type of mold that thrives in moist, warm environments. Showers are prime breeding grounds for mildew because of the constant exposure to steam and water. Silicone caulk is often used around tiles and bathtubs because it’s waterproof, but it can trap moisture in its surface and create a breeding ground for mold and mildew over time. Once mildew takes hold, it can be tough to remove, especially if it’s allowed to grow unchecked for a long time.
What You’ll Need:
- Bleach or hydrogen peroxide (for a less harsh option)
- Baking soda (optional, for extra scrubbing power)
- Spray bottle
- Old toothbrush or soft-bristle brush
- Rubber gloves
- Towel or cloth for drying
Fast and Easy Steps to Get Rid of Shower Silicone Mildew
Step 1: Prepare Your Cleaning Solution
For a powerful yet easy-to-use solution, you can use either bleach or hydrogen peroxide—both are excellent at killing mildew.
- Bleach Solution: Mix 1 part bleach with 3 parts water in a spray bottle. This solution works quickly and is great for stubborn mildew. However, be aware that bleach can have a strong smell and may irritate your skin, so use gloves and ensure the area is well-ventilated.
- Hydrogen Peroxide Solution: If you’re looking for a gentler alternative, hydrogen peroxide is an effective mildew killer. Pour 3% hydrogen peroxide directly into a spray bottle and use it undiluted. It’s a safer option for those sensitive to bleach and has the added benefit of being less harsh on your silicone caulking.
Step 2: Apply the Cleaning Solution
Spray your chosen cleaning solution generously over the mildew-affected areas on the silicone caulk. Make sure to cover all the moldy spots completely. For best results, let the solution sit for at least 10–15 minutes to allow the cleaner to break down the mildew.
Step 3: Scrub the Silicone with a Toothbrush
After letting the cleaner sit, use an old toothbrush or soft-bristle brush to scrub the affected area. The bristles will help to lift the mildew from the surface without damaging the silicone. Scrub gently in circular motions to ensure you reach all corners and crevices where the mildew might be hiding.
If the mildew is particularly stubborn, you can sprinkle a little baking soda onto the brush or directly onto the silicone. The baking soda will act as a gentle abrasive, helping to dislodge the mildew more effectively.
Step 4: Rinse and Dry
Once you’ve scrubbed the silicone, rinse the area thoroughly with warm water to remove any cleaning solution and mildew residue. Use a towel or cloth to dry the area completely. Mildew thrives in moisture, so drying the area is crucial to prevent it from coming back.
For Complete Cooking STEPS Please Head On Over To Next Page Or Open button (>) and don’t forget to SHARE with your Facebook friends
