ADVERTISEMENT
Here’s how you can use the vacuum effectively:
– Attach the soft brush nozzle to your vacuum hose.
– Turn on the vacuum and gently run the brush attachment along the slats to remove any built-up dust.
– Move from top to bottom and ensure that you vacuum both the front and the back of the slats.
Using a vacuum before wiping down the shutters helps to prevent dust from being pushed around or scattered into the room.
#### Step 5: Clean with a Damp Cloth (For Stubborn Grime)
If you notice that your shutters have accumulated stains or sticky residue, it may be time to use a mild cleaner to clean them. Be sure to use a cleaner that’s appropriate for the material of your shutters. If you have wooden or faux wood shutters, avoid using too much moisture, as excessive water can damage the wood.
For a gentle cleaning solution, mix warm water with a few drops of dish soap, or use a wood cleaner if needed.
Here’s how to clean stubborn spots:
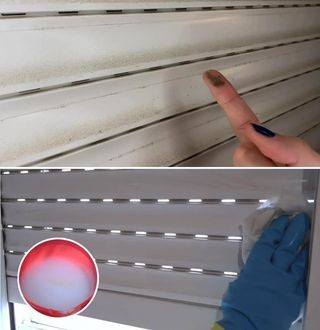
– Dampen a microfiber cloth with the cleaning solution. Be sure to wring out any excess liquid so that the cloth is just slightly damp.
– Wipe down the slats, focusing on areas with visible stains or grime. Use circular motions to break down the residue.
– If necessary, repeat the process with a clean, damp cloth to remove any soap residue.
Once you’ve finished, take a dry cloth and wipe the shutters down to remove any remaining moisture. This will prevent water spots and ensure that your shutters remain dry and streak-free.
#### Step 6: Polish for Extra Shine (Optional)
If you want your shutters to shine, especially if they are wooden or faux wood, you can finish the cleaning process with a quick polish. A furniture polish or wood conditioner will help bring out the natural shine of the shutters and protect them from moisture and dust buildup.
To polish your shutters:
– Apply a small amount of wood polish or furniture conditioner to a clean microfiber cloth.
– Buff the surface of each slat gently, moving from top to bottom.
– Use a dry cloth to remove any excess polish and ensure a streak-free finish.
This step is optional, but it can give your shutters a polished look and help maintain their luster for longer.
#### Step 7: Final Touches
Once you’ve cleaned all the slats and surfaces, take a step back and inspect your work. Make sure that there’s no remaining dust, dirt, or grime. If necessary, wipe down the surrounding area or vacuum up any dust that might have fallen during the cleaning process.
It’s also a good idea to clean any blinds or curtains that are in the vicinity of the shutters to ensure that the entire window treatment area is clean and dust-free.
### Why This Method Works So Well
This cleaning method works for several reasons:
1. **Microfiber Traps Dust**: Microfiber cloths are designed to trap and hold dust and dirt, rather than pushing it around or releasing it into the air. This makes them ideal for cleaning shutters without making a mess.
2. **Fast and Efficient**: Using a dusting mitt or microfiber cloth allows you to clean the slats quickly and without needing to focus on each individual slat for too long. The mitt is particularly helpful because it allows you to clean multiple slats at once.
3. **Minimal Effort**: With the right tools, cleaning shutters becomes a much easier task. You don’t have to worry about the hassle of scrubbing or using harsh cleaning chemicals.
4. **No Dust Clouds**: By using microfiber and a vacuum, you prevent the dust from flying all over the room. This makes the cleaning process cleaner, safer, and more efficient.
5. **Effective for All Types of Shutters**: Whether you have wood, faux wood, or vinyl shutters, this method works for all types of materials. It’s versatile and adaptable to whatever style of shutter you have in your home.
### Conclusion
Cleaning shutters doesn’t have to be a time-consuming, messy, or frustrating task. By using microfiber cloths, dusting mitts, and a vacuum, you can clean your shutters quickly and effectively, without creating a dust storm in your home. This ultra-fast method will save you time and effort, while ensuring that your shutters stay looking
clean, fresh, and beautiful. So next time you need to clean your shutters, try this method, and enjoy the ease and satisfaction of a job well done.
