ADVERTISEMENT
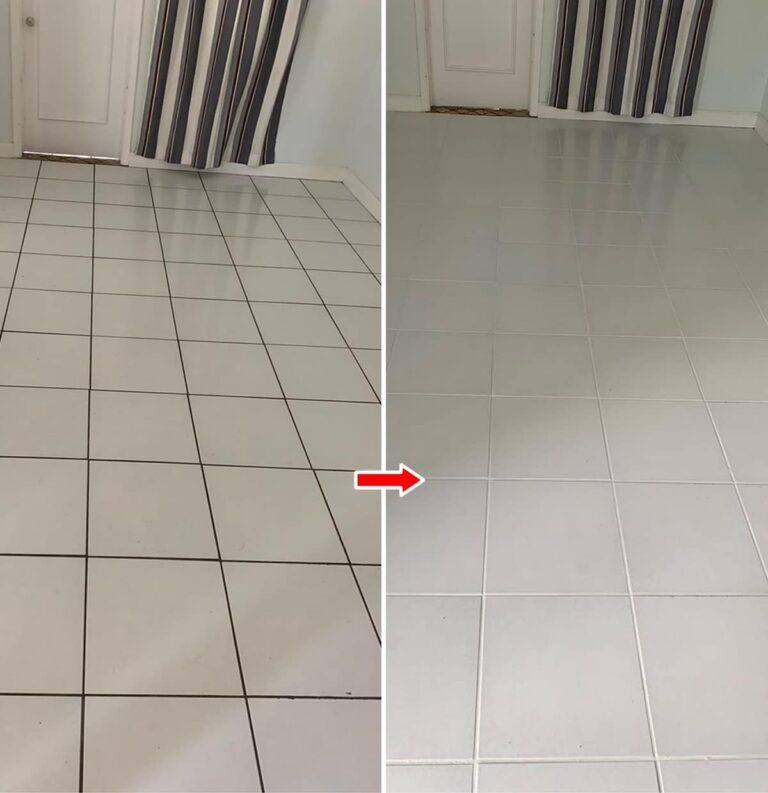
Very White Grout in One Pass: The Method That “Dissolves” Dirt and Removes It
Grout—often overlooked but essential—plays a crucial role in your tiles. It fills the spaces between tiles and helps to keep the floor or wall intact, but over time, it can accumulate dirt, grime, and stains. If you’ve ever tried to clean grout, you know how difficult it can be to restore it to its original pristine, white state. But what if we told you that there’s a method to achieve very white grout in one pass, and that it “dissolves” dirt while removing it effortlessly?
Whether you’re dealing with the grout in your kitchen, bathroom, or hallway, this effective method will make the job easier than you ever imagined. Here’s how you can achieve sparkling white grout with minimal effort.
Why Does Grout Get Dirty?
Before we dive into the cleaning method, it’s important to understand why grout gets dirty in the first place. Grout is porous, meaning it absorbs moisture and debris over time. In high-traffic areas, like kitchens and bathrooms, grout is exposed to oils, soap scum, mold, mildew, and food stains, making it difficult to keep clean. Traditional cleaning methods often fail to restore grout to its original white, leading to frustration.
The One-Pass Grout Cleaning Method
The secret to restoring very white grout in one pass lies in the combination of effective cleaning agents, tools, and the proper technique. Here’s the method that will leave your grout gleaming with minimal effort.
Ingredients and Tools You’ll Need
- Baking Soda: Known for its cleaning and deodorizing properties, baking soda is a powerhouse for grout cleaning.
- Hydrogen Peroxide (3% concentration): A gentle but effective bleach alternative, hydrogen peroxide helps break down stains and sanitize surfaces.
- Dish Soap: A degreasing agent, dish soap will help lift oils and grease from grout.
- Old Toothbrush or Grout Brush: A stiff-bristled brush will help work the cleaning solution into the grout lines.
- Spray Bottle: To apply the cleaning solution.
- A Bucket of Warm Water: To rinse and wipe off excess residue.
- Rubber Gloves: Optional, but can help protect your hands from any harsh substances.
Step-by-Step Instructions
- Prepare the Cleaning Paste
Begin by mixing a simple but powerful cleaning paste. In a small bowl, combine ½ cup of baking soda with ¼ cup of hydrogen peroxide. Add a squirt of dish soap (about a teaspoon) to the mixture. Stir everything together until you get a thick, spreadable paste. If the mixture is too runny, add a little more baking soda to thicken it up.
- Apply the Paste to the Grout
Use a small spatula, spoon, or your fingers to apply a generous amount of the paste directly onto the grout lines. Be sure to cover all areas that need cleaning. For large areas, you can work in small sections to ensure the paste doesn’t dry out before you can scrub it.
- Let the Paste Sit
Allow the paste to sit on the grout for about 5-10 minutes. During this time, the hydrogen peroxide and baking soda will begin to break down the grime, dirt, and stains. The fizzing action of the baking soda combined with the oxygenated power of hydrogen peroxide “lifts” the dirt, loosening it from the grout surface.
- For Complete Cooking STEPS Please Head On Over To Next Page Or Open button (>) and don’t forget to SHARE with your Facebook friends
- Scrub with a Toothbrush
