ADVERTISEMENT
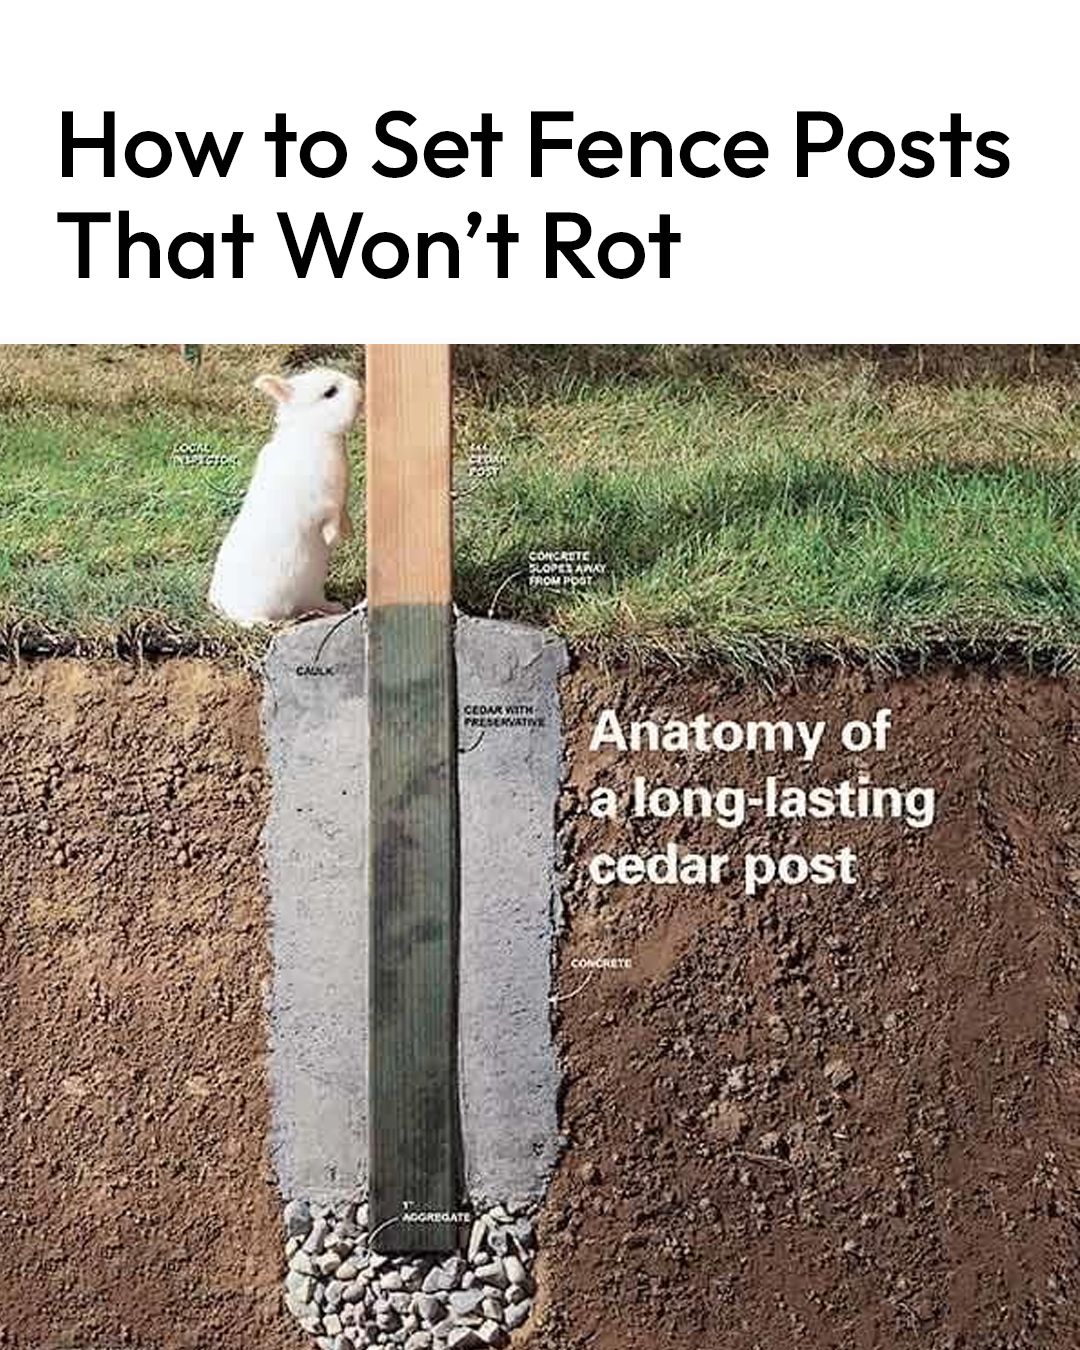
Setting Cedar Fence Posts That Won’t Rot: A Step-by-Step Guide
Cedar wood is well-known for its durability and natural resistance to rot, making it a popular choice for outdoor projects like fence posts. However, even cedar fence posts can succumb to rot if not properly set in the ground. The key to ensuring that your cedar fence posts last for many years is to install them correctly and with the right precautions to keep moisture and pests at bay.
In this article, we’ll guide you through the process of setting cedar fence posts that won’t rot, ensuring that your fence stands strong and beautiful for decades to come.
Why Choose Cedar for Fence Posts?
Cedar is a naturally rot-resistant wood, which makes it ideal for outdoor use, especially in areas where the fence posts are likely to come into contact with the ground. The wood contains oils that help protect it from moisture, insects, and decay. Cedar’s lightweight nature also makes it easier to handle and install compared to other types of wood.
However, while cedar is more resistant to rot than many other woods, it’s not entirely immune. Proper installation is essential to maximizing its longevity and ensuring it doesn’t deteriorate prematurely.
Materials You’ll Need:
- Cedar fence posts
- Gravel
- Concrete (optional, but recommended for added stability)
- Post hole digger or auger
- Shovel
- Level
- Measuring tape
- String line (optional)
- Post hole foam (optional, for added drainage)
Step-by-Step Guide to Setting Cedar Fence Posts
1. Choose the Right Cedar Posts
Before you even begin the installation, ensure you’re using quality cedar posts that are free of cracks or defects. Look for posts that have been properly treated or kiln-dried to reduce moisture content, as this will prevent them from warping or splitting in the long run.
2. Prepare the Site
Start by determining the exact location of your fence. Measure and mark where each post will go, keeping in mind the length of your fence and spacing requirements (typically 6 to 8 feet apart).
- Use a measuring tape to mark the locations of each fence post.
- For accuracy, you can run a string line between two posts to keep your alignment straight.
- Be sure the ground is level, and clear any debris or vegetation that could obstruct the installation process.
3. Dig the Holes
Now it’s time to dig the holes for the posts. The size of the hole will depend on the height and width of your cedar posts, but generally, a hole should be about 1/3 the length of the post. For example, if you’re installing an 8-foot cedar post, you’ll want the hole to be at least 2.5 to 3 feet deep.
- Use a post hole digger or an auger to dig the holes.
- Make sure the bottom of the hole is level to give your post a stable base.
- If you’re digging in a particularly soft or sandy area, it may be beneficial to make the hole slightly wider to provide extra stability.
4. Create a Gravel Base
To prevent water from collecting at the bottom of the hole, which could lead to rot, create a drainage base using gravel. A few inches of gravel at the bottom of each hole will allow water to flow away from the post and prevent it from staying trapped against the wood.
- Pour a few inches of gravel into the bottom of the hole.
- Use a tamper to pack the gravel down to ensure a solid base.
5. Position the Cedar Post
With the hole ready, it’s time to position your cedar post. Place the post in the center of the hole and make sure it’s standing straight.
- Use a level to check the post’s vertical alignment.
- You may want to use a brace or another person to help hold the post in place while you make adjustments.
- For Complete Cooking STEPS Please Head On Over To Next Page Or Open button (>) and don’t forget to SHARE with your Facebook friends
